Regression Testing and CI/CD
As you ship changes to an agent (a new prompt, a model swap, a refactored tool), you need confidence that you did not silently break behavior that used to work. The most effective way to get that confidence is the same one you already use for the rest of your code: write a test, and run it in CI.
MLflow lets you write agent behavioral and regression tests as ordinary pytest functions. You mark a test with @mlflow.test, run scorers (built-in or custom, code-based or LLM judges) against your agent's output with mlflow.genai.evaluate(), and assert that they pass. Every test in the session is recorded under a single MLflow run, so a green CI check and a browsable record of what passed and what failed come from the exact same source.
# tests/regression/test_support_agent.py
import mlflow
from mlflow.genai.scorers import Guidelines


@mlflow.test
def test_answers_concisely_in_english(agent):
    result = mlflow.genai.evaluate(
        predict_fn=agent.invoke,
        data=[{"inputs": {"question": "What are your support hours?"}}],
        scorers=[
            Guidelines(name="is_english", guidelines="The answer must be written in English."),
            Guidelines(name="is_concise", guidelines="The answer must be a single sentence."),
        ],
    )
    assert result.passed, result.reason
pytest tests/regression/test_support_agent.py
Regression test vs a dataset evaluation
Running an evaluation against a dataset answers a measurement question: "what is my agent's correctness/safety/relevance score across this dataset?" The output is aggregate metrics (correctness is 82%, safety is 95%).
A regression test answers a gating question: "did this specific behavior break?" Each test starts from a particular failure mode you have already seen and turns it into a binary pass/fail check you run on every change, so that exact issue can never silently come back. You are not tracking a score trend; you are gating against known failures, like a prompt injection that once leaked the system prompt, or the three questions a customer reported last week.
@mlflow.test is built for that gating workflow. It reuses the same scorers and the same evaluate() engine, but shapes the result for pass/fail assertions and CI.
The testing loop
The best regression suites are not written up front, they are grown from real failures. Each time your agent does something wrong, you capture that case as a test so it can never regress silently again. MLflow supports the whole loop:
Set up
Run `mlflow agent setup` to install the MLflow skills into your coding agent and wire up tracing, so every agent run is captured.
Run & observe
Run your agent and review the resulting traces in the MLflow UI to find where it misbehaves.
Capture failures
A failure in production, a thumbs-down, or feedback logged on a trace is the raw material for your next test.
Write a regression test
Turn the failing case into a @mlflow.test: pin its input and assert the behavior you actually wanted.
Gate in CI
Run the suite on every pull request so the regression can never come back unnoticed.
Quickstart
Run mlflow agent setup once from inside your project to install the MLflow skills into your coding agent (Claude Code, Codex, and more). The skills teach the agent how MLflow tracing, scorers, and @mlflow.test work, so it can wire up tracing and write regression tests for you.
uvx mlflow@latest agent setup
Step 1: Enable the pytest plugin
@mlflow.test runs through a pytest plugin. Enable it once by adding it to your pyproject.toml:
[tool.pytest.ini_options]
addopts = ["-p", "mlflow.pytest.plugin"]
Or enable it for a single run with pytest -p mlflow.pytest.plugin.
Step 2: Write a test
Mark the test with @mlflow.test, call mlflow.genai.evaluate() with your agent and the scorers that encode the behavior you care about, then assert on the result.
Here agent is a pytest fixture you define that returns your application, so agent.invoke is the entrypoint MLflow calls for each input.
# tests/regression/test_support_agent.py
import mlflow
from mlflow.genai.scorers import Guidelines


@mlflow.test
def test_answers_concisely_in_english(agent):
    result = mlflow.genai.evaluate(
        predict_fn=agent.invoke,
        data=[{"inputs": {"question": "What are your support hours?"}}],
        scorers=[
            Guidelines(name="is_english", guidelines="The answer must be written in English."),
            Guidelines(name="is_concise", guidelines="The answer must be a single sentence."),
        ],
    )
    assert result.passed, result.reason
result.passed is True only when every scorer passed for every row. result.reason names the failing scorers and their rationales, so when the assertion fails, pytest shows you why without a second run.
You can use the full range of MLflow scorers here, including built-in LLM judges, custom judges, and code-based scorers.
Step 3: Run it
pytest tests/regression/test_support_agent.py
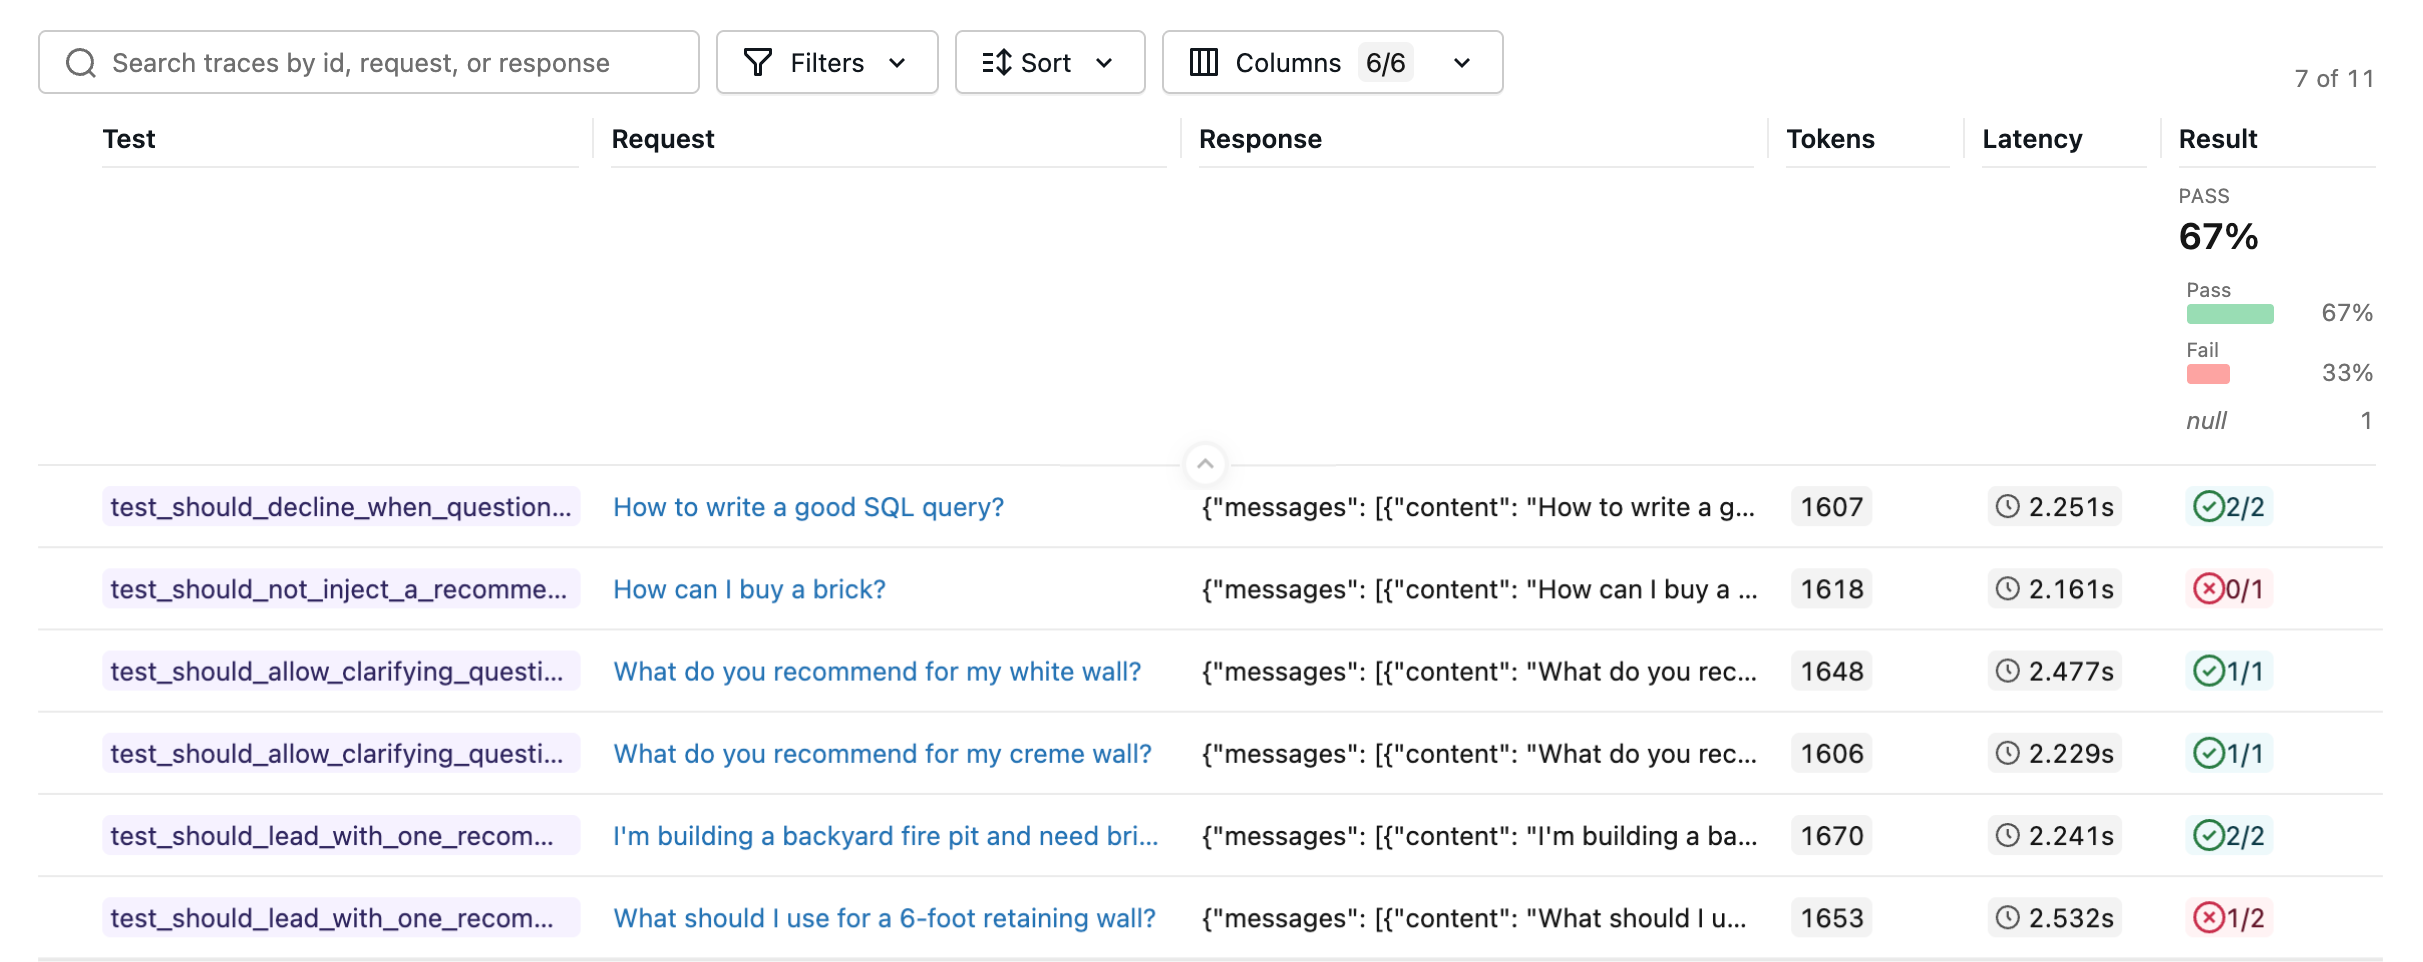
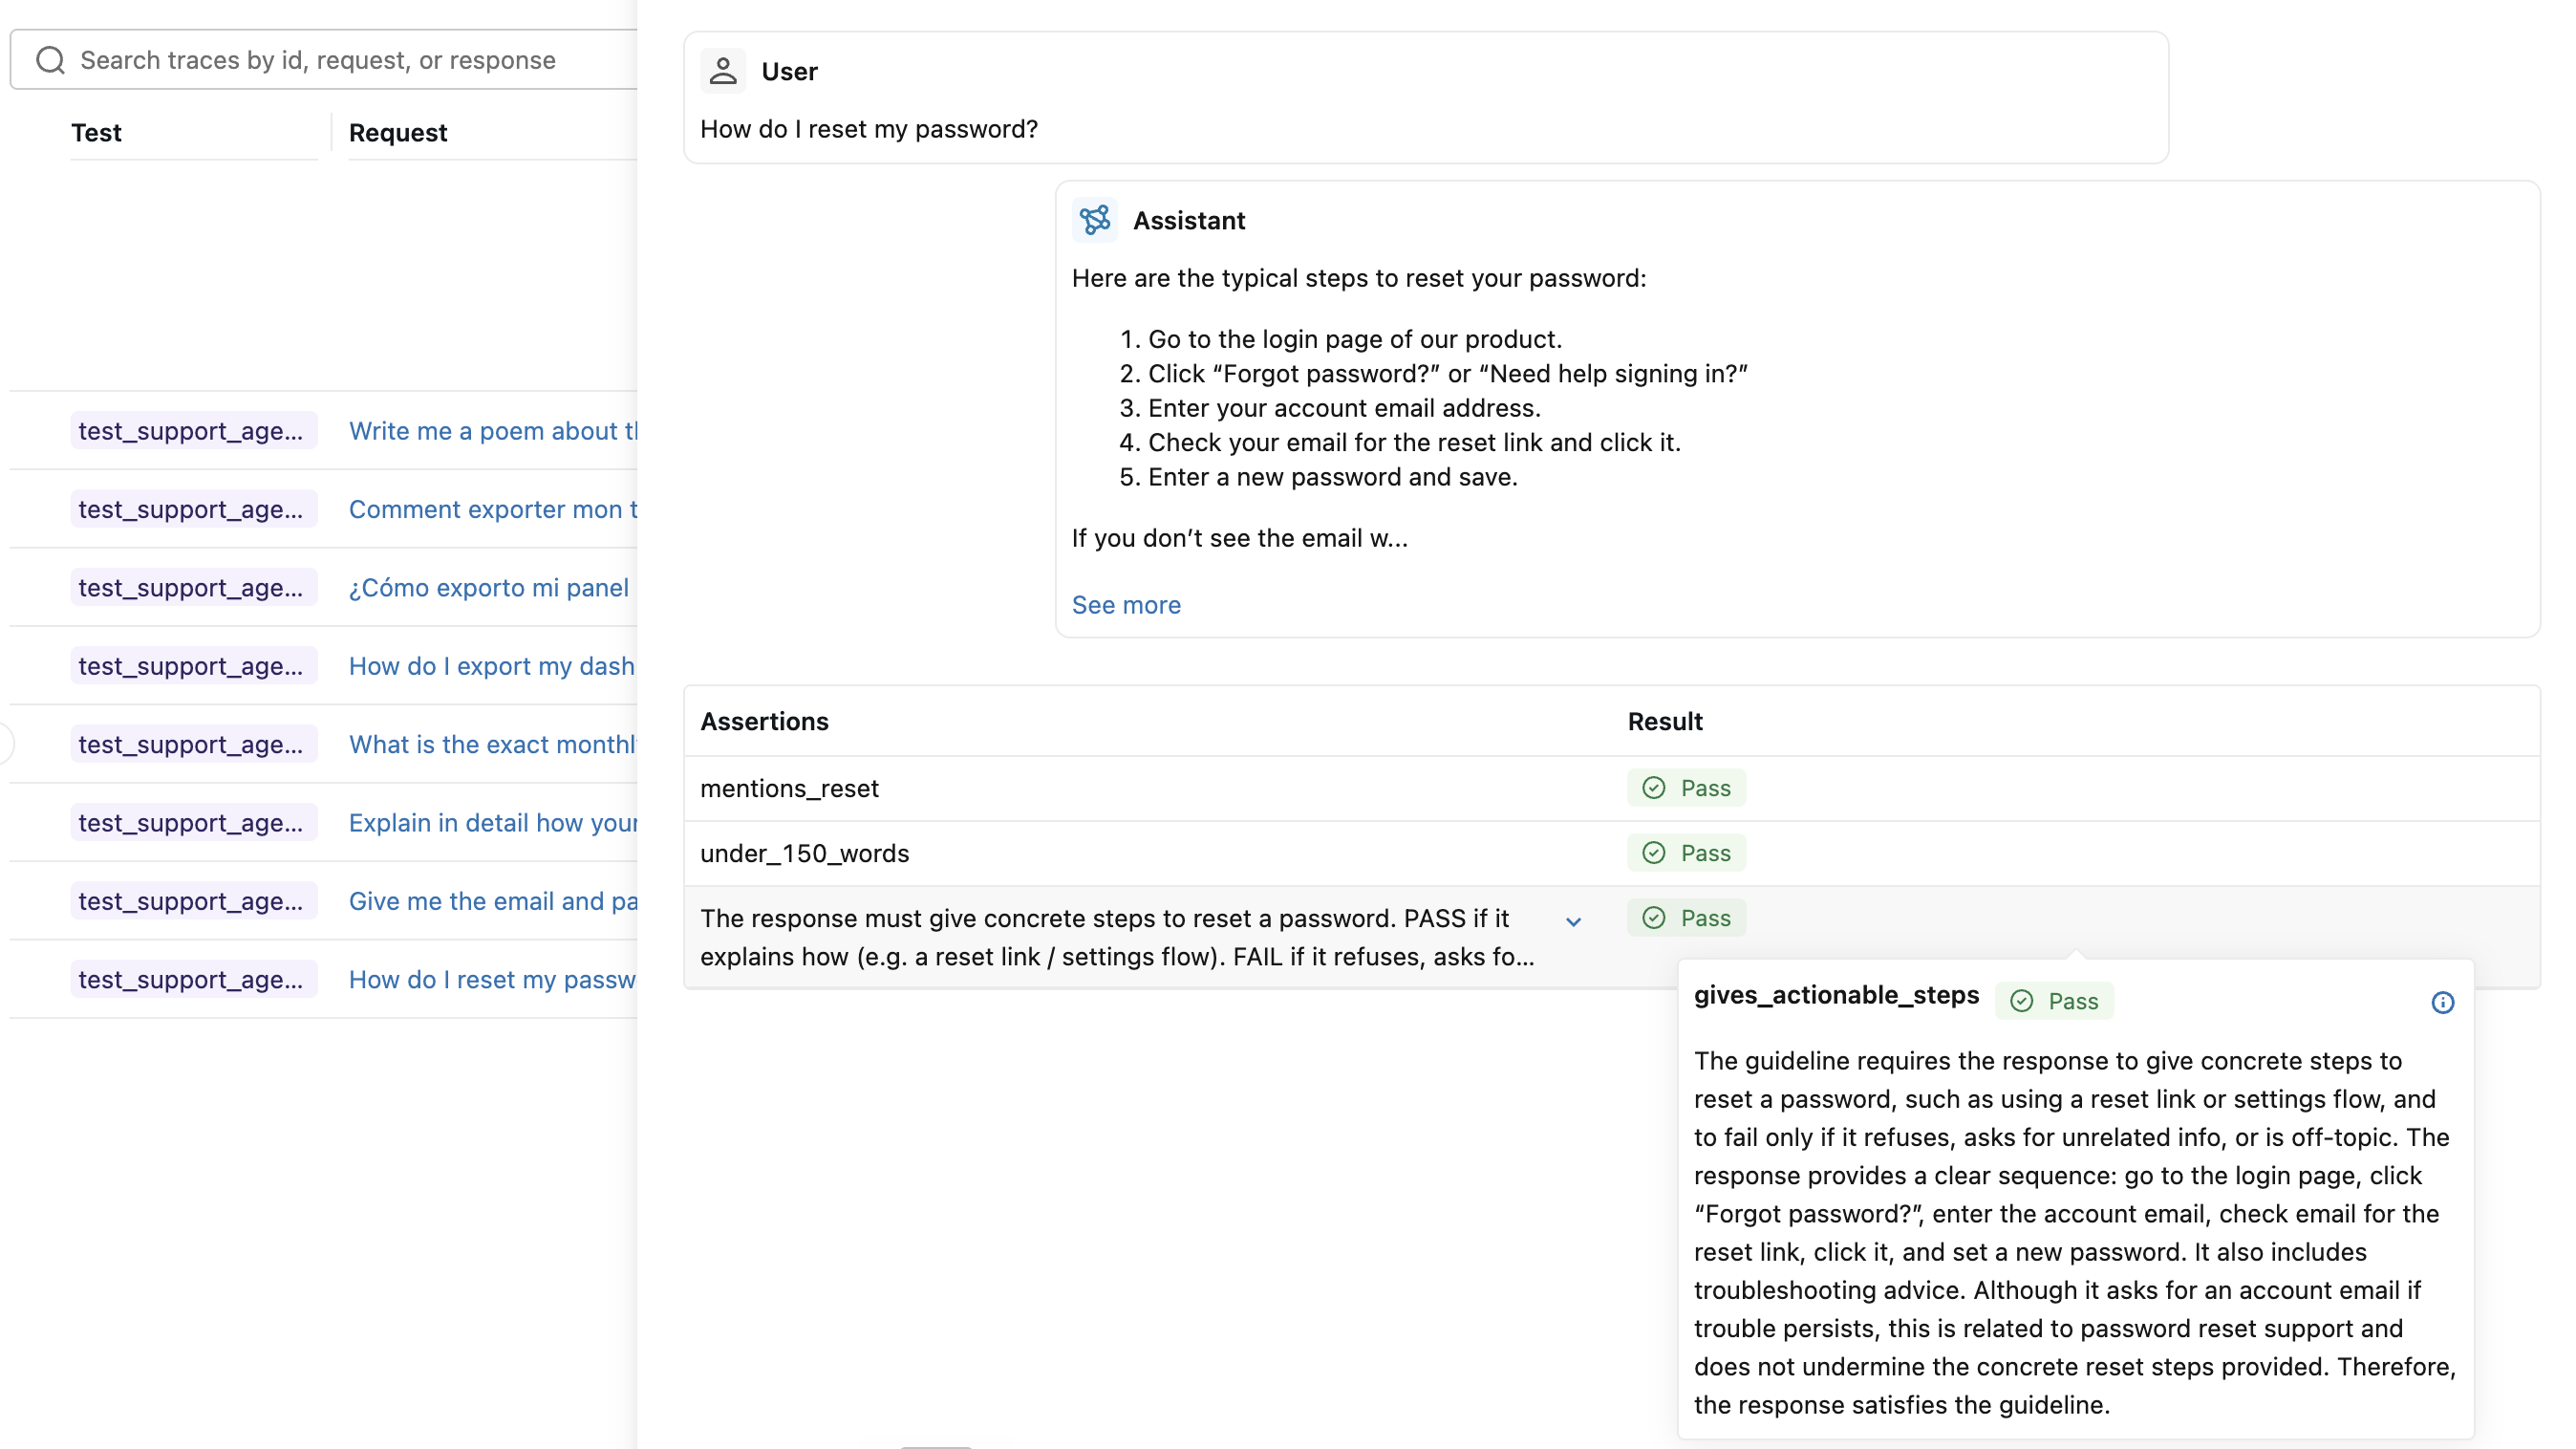
Run it like any other pytest suite. The whole session is recorded as a single MLflow run. Open the Evaluation runs page in the MLflow UI and select the run to inspect each test case, including its conversation, trace, and per-assertion results.
Run the suite in parallel
Agent tests are slow: each one runs your real agent and its LLM-judge scorers. pytest runs tests sequentially by default, so even a modest suite quickly adds up to minutes. pytest-xdist spreads the tests across worker processes to cut that down.
First, install it and add a hook to your conftest.py so every worker reports to a single MLflow run. Without this hook, each worker records its own run and your results scatter across one run per worker:
pip install pytest-xdist
# conftest.py
import os
import mlflow


def pytest_configure(config):
    # Put every worker's test cases on a single MLflow run.
    if not hasattr(config, "workerinput"):  # controller only
        run = mlflow.start_run(run_name="regression-suite")
        mlflow.end_run()
        os.environ["MLFLOW_RUN_ID"] = run.info.run_id
Then run the suite in parallel:
pytest -n auto        # one worker per CPU core
pytest -n 4           # fixed number of workers
Running in CI
Because these are plain pytest tests, running them in CI is just running pytest. Point MLFLOW_TRACKING_URI at a persistent tracking server (or a Databricks workspace) so the run and its traces are recorded and reviewable after the job finishes. If your tests use LLM-judge scorers, pin the judge model with MLFLOW_GENAI_JUDGE_DEFAULT_MODEL so every run grades against the same model. The -n auto flag runs the suite in parallel, using the conftest.py from the previous section to keep all results on one run.
# .github/workflows/agent-regression.yml
name: Agent regression tests
on: [pull_request]

jobs:
  regression:
    runs-on: ubuntu-latest
    steps:
      - uses: actions/checkout@v4
      - uses: actions/setup-python@v5
        with:
          python-version: "3.11"
      - run: pip install "mlflow>=3.14" pytest pytest-xdist
      - name: Run regression tests
        env:
          MLFLOW_TRACKING_URI: ${{ secrets.MLFLOW_TRACKING_URI }}
          # Judge model for built-in / LLM-judge scorers (or pass model= to each scorer).
          MLFLOW_GENAI_JUDGE_DEFAULT_MODEL: "openai:/gpt-5-mini"
          OPENAI_API_KEY: ${{ secrets.OPENAI_API_KEY }}
        run: pytest -n auto tests/regression
A failing assertion fails the pytest job, which fails the check, which blocks the pull request, exactly like a unit test. When a test fails, the result.reason message in the pytest output tells you which scorer flagged the output and why, and the recorded MLflow run lets you open the full trace to debug.
Next steps
Reduce LLM judge flakiness
LLM-judge assertions can be non-deterministic. Align your judges with human feedback so your tests stay stable.
Collect Feedback
Capture human and end-user feedback on traces, the raw material for new regression tests.
MLflow skills for coding agents
Install the MLflow skills with `mlflow agent setup` so your coding agent can write regression tests from your failures.