Tracing Spring AI
MLflow Tracing provides automatic tracing capability for Spring AI, the Spring framework for building AI applications. MLflow supports tracing for Spring AI through the OpenTelemetry integration.
Step 1: Create a Spring AI Project
Create a new Spring AI project using Spring Initializr or add Spring AI to an existing project:
spring init --dependencies=web --build=maven --java-version=17 spring-ai-demo
cd spring-ai-demo
Add the OpenTelemetry dependencies to your pom.xml:
<properties>
    <java.version>17</java.version>
    <spring-ai.version>1.0.0-M3</spring-ai.version>
    <opentelemetry.version>1.45.0</opentelemetry.version>
</properties>

<dependencyManagement>
    <dependencies>
        <dependency>
            <groupId>org.springframework.ai</groupId>
            <artifactId>spring-ai-bom</artifactId>
            <version>${spring-ai.version}</version>
            <type>pom</type>
            <scope>import</scope>
        </dependency>
    </dependencies>
</dependencyManagement>

<dependencies>
    <!-- Spring Boot Actuator (required for observability) -->
    <dependency>
        <groupId>org.springframework.boot</groupId>
        <artifactId>spring-boot-starter-actuator</artifactId>
    </dependency>

    <!-- Spring AI OpenAI -->
    <dependency>
        <groupId>org.springframework.ai</groupId>
        <artifactId>spring-ai-openai-spring-boot-starter</artifactId>
    </dependency>

    <!-- Micrometer to OpenTelemetry Bridge -->
    <dependency>
        <groupId>io.micrometer</groupId>
        <artifactId>micrometer-tracing-bridge-otel</artifactId>
    </dependency>

    <!-- OpenTelemetry OTLP Exporter -->
    <dependency>
        <groupId>io.opentelemetry</groupId>
        <artifactId>opentelemetry-exporter-otlp</artifactId>
        <version>${opentelemetry.version}</version>
    </dependency>
</dependencies>

<repositories>
    <repository>
        <id>spring-milestones</id>
        <name>Spring Milestones</name>
        <url>https://repo.spring.io/milestone</url>
        <snapshots>
            <enabled>false</enabled>
        </snapshots>
    </repository>
</repositories>
Add the following to src/main/resources/application.properties:
spring.application.name=spring-ai-demo

# OpenAI Configuration
spring.ai.openai.api-key=${OPENAI_API_KEY}
spring.ai.openai.chat.options.model=gpt-4o-mini

# Enable Spring AI Observations
spring.ai.chat.observations.include-prompt=true
spring.ai.chat.observations.include-completion=true

# Tracing Configuration
management.tracing.sampling.probability=1.0
Step 2: Start the MLflow Tracking Server
Start the MLflow Tracking Server:
mlflow server --port 5000
By default, MLflow uses SQLite as the backend store. To use other types of SQL databases such as PostgreSQL, MySQL, and MSSQL, change the store URI as described in the backend store documentation. OpenTelemetry ingestion is not supported with file-based backend stores.
Step 3: Configure OpenTelemetry
Create src/main/java/com/example/spring_ai_demo/config/MlflowTracingConfig.java:
package com.example.spring_ai_demo.config;

import io.opentelemetry.api.OpenTelemetry;
import io.opentelemetry.api.common.AttributeKey;
import io.opentelemetry.api.common.Attributes;
import io.opentelemetry.exporter.otlp.http.trace.OtlpHttpSpanExporter;
import io.opentelemetry.sdk.OpenTelemetrySdk;
import io.opentelemetry.sdk.resources.Resource;
import io.opentelemetry.sdk.trace.SdkTracerProvider;
import io.opentelemetry.sdk.trace.export.SimpleSpanProcessor;
import org.slf4j.Logger;
import org.slf4j.LoggerFactory;
import org.springframework.beans.factory.annotation.Value;
import org.springframework.context.annotation.Bean;
import org.springframework.context.annotation.Configuration;

/**
 * OpenTelemetry configuration for MLflow tracing.
 *
 * Configure via environment variables:
 *   OTEL_EXPORTER_OTLP_ENDPOINT=http://localhost:5000/v1/traces
 *   OTEL_EXPORTER_OTLP_HEADERS=x-mlflow-experiment-id=0
 */
@Configuration
public class MlflowTracingConfig {

    private static final Logger log = LoggerFactory.getLogger(MlflowTracingConfig.class);

    @Value("${OTEL_EXPORTER_OTLP_ENDPOINT:http://localhost:5000/v1/traces}")
    private String otlpEndpoint;

    @Value("${OTEL_EXPORTER_OTLP_HEADERS:x-mlflow-experiment-id=0}")
    private String otlpHeaders;

    @Value("${spring.application.name:spring-ai-demo}")
    private String serviceName;

    @Bean
    public OpenTelemetry openTelemetry() {
        log.info("Configuring MLflow tracing: endpoint={}", otlpEndpoint);

        var exporterBuilder = OtlpHttpSpanExporter.builder()
                .setEndpoint(otlpEndpoint);

        // Parse headers from OTEL_EXPORTER_OTLP_HEADERS format (key=value,key2=value2)
        if (otlpHeaders != null && !otlpHeaders.isEmpty()) {
            for (String header : otlpHeaders.split(",")) {
                String[] parts = header.split("=", 2);
                if (parts.length == 2) {
                    exporterBuilder.addHeader(parts[0].trim(), parts[1].trim());
                }
            }
        }

        OtlpHttpSpanExporter exporter = exporterBuilder.build();

        SdkTracerProvider tracerProvider = SdkTracerProvider.builder()
                .addSpanProcessor(SimpleSpanProcessor.create(exporter))
                .setResource(Resource.create(Attributes.of(
                        AttributeKey.stringKey("service.name"), serviceName)))
                .build();

        Runtime.getRuntime().addShutdownHook(new Thread(tracerProvider::close));

        return OpenTelemetrySdk.builder()
                .setTracerProvider(tracerProvider)
                .build();
    }
}
Step 4: Create the Chat Service
Create src/main/java/com/example/spring_ai_demo/service/ChatService.java:
package com.example.spring_ai_demo.service;

import org.springframework.ai.chat.client.ChatClient;
import org.springframework.ai.chat.model.ChatModel;
import org.springframework.stereotype.Service;

@Service
public class ChatService {

    private final ChatModel chatModel;

    public ChatService(ChatModel chatModel) {
        this.chatModel = chatModel;
    }

    public String chat(String userMessage) {
        return ChatClient.create(chatModel)
                .prompt()
                .user(userMessage)
                .call()
                .content();
    }
}
Step 5: Create a Chat Controller
Create src/main/java/com/example/spring_ai_demo/controller/ChatController.java:
package com.example.spring_ai_demo.controller;

import com.example.spring_ai_demo.service.ChatService;
import org.springframework.http.ResponseEntity;
import org.springframework.web.bind.annotation.*;

import java.util.Map;

@RestController
@RequestMapping("/api/chat")
public class ChatController {

    private final ChatService chatService;

    public ChatController(ChatService chatService) {
        this.chatService = chatService;
    }

    @PostMapping("/simple")
    public ResponseEntity<Map<String, String>> simpleChat(@RequestBody Map<String, String> request) {
        String prompt = request.get("prompt");
        if (prompt == null || prompt.isBlank()) {
            return ResponseEntity.badRequest()
                .body(Map.of("error", "Prompt is required"));
        }

        String response = chatService.chat(prompt);
        return ResponseEntity.ok(Map.of(
            "prompt", prompt,
            "response", response
        ));
    }
}
Step 6: Run the Application
Set environment variables and run your Spring Boot application:
export OPENAI_API_KEY=your-openai-api-key
export OTEL_EXPORTER_OTLP_ENDPOINT=http://localhost:5000/v1/traces
export OTEL_EXPORTER_OTLP_HEADERS=x-mlflow-experiment-id=0

mvn spring-boot:run
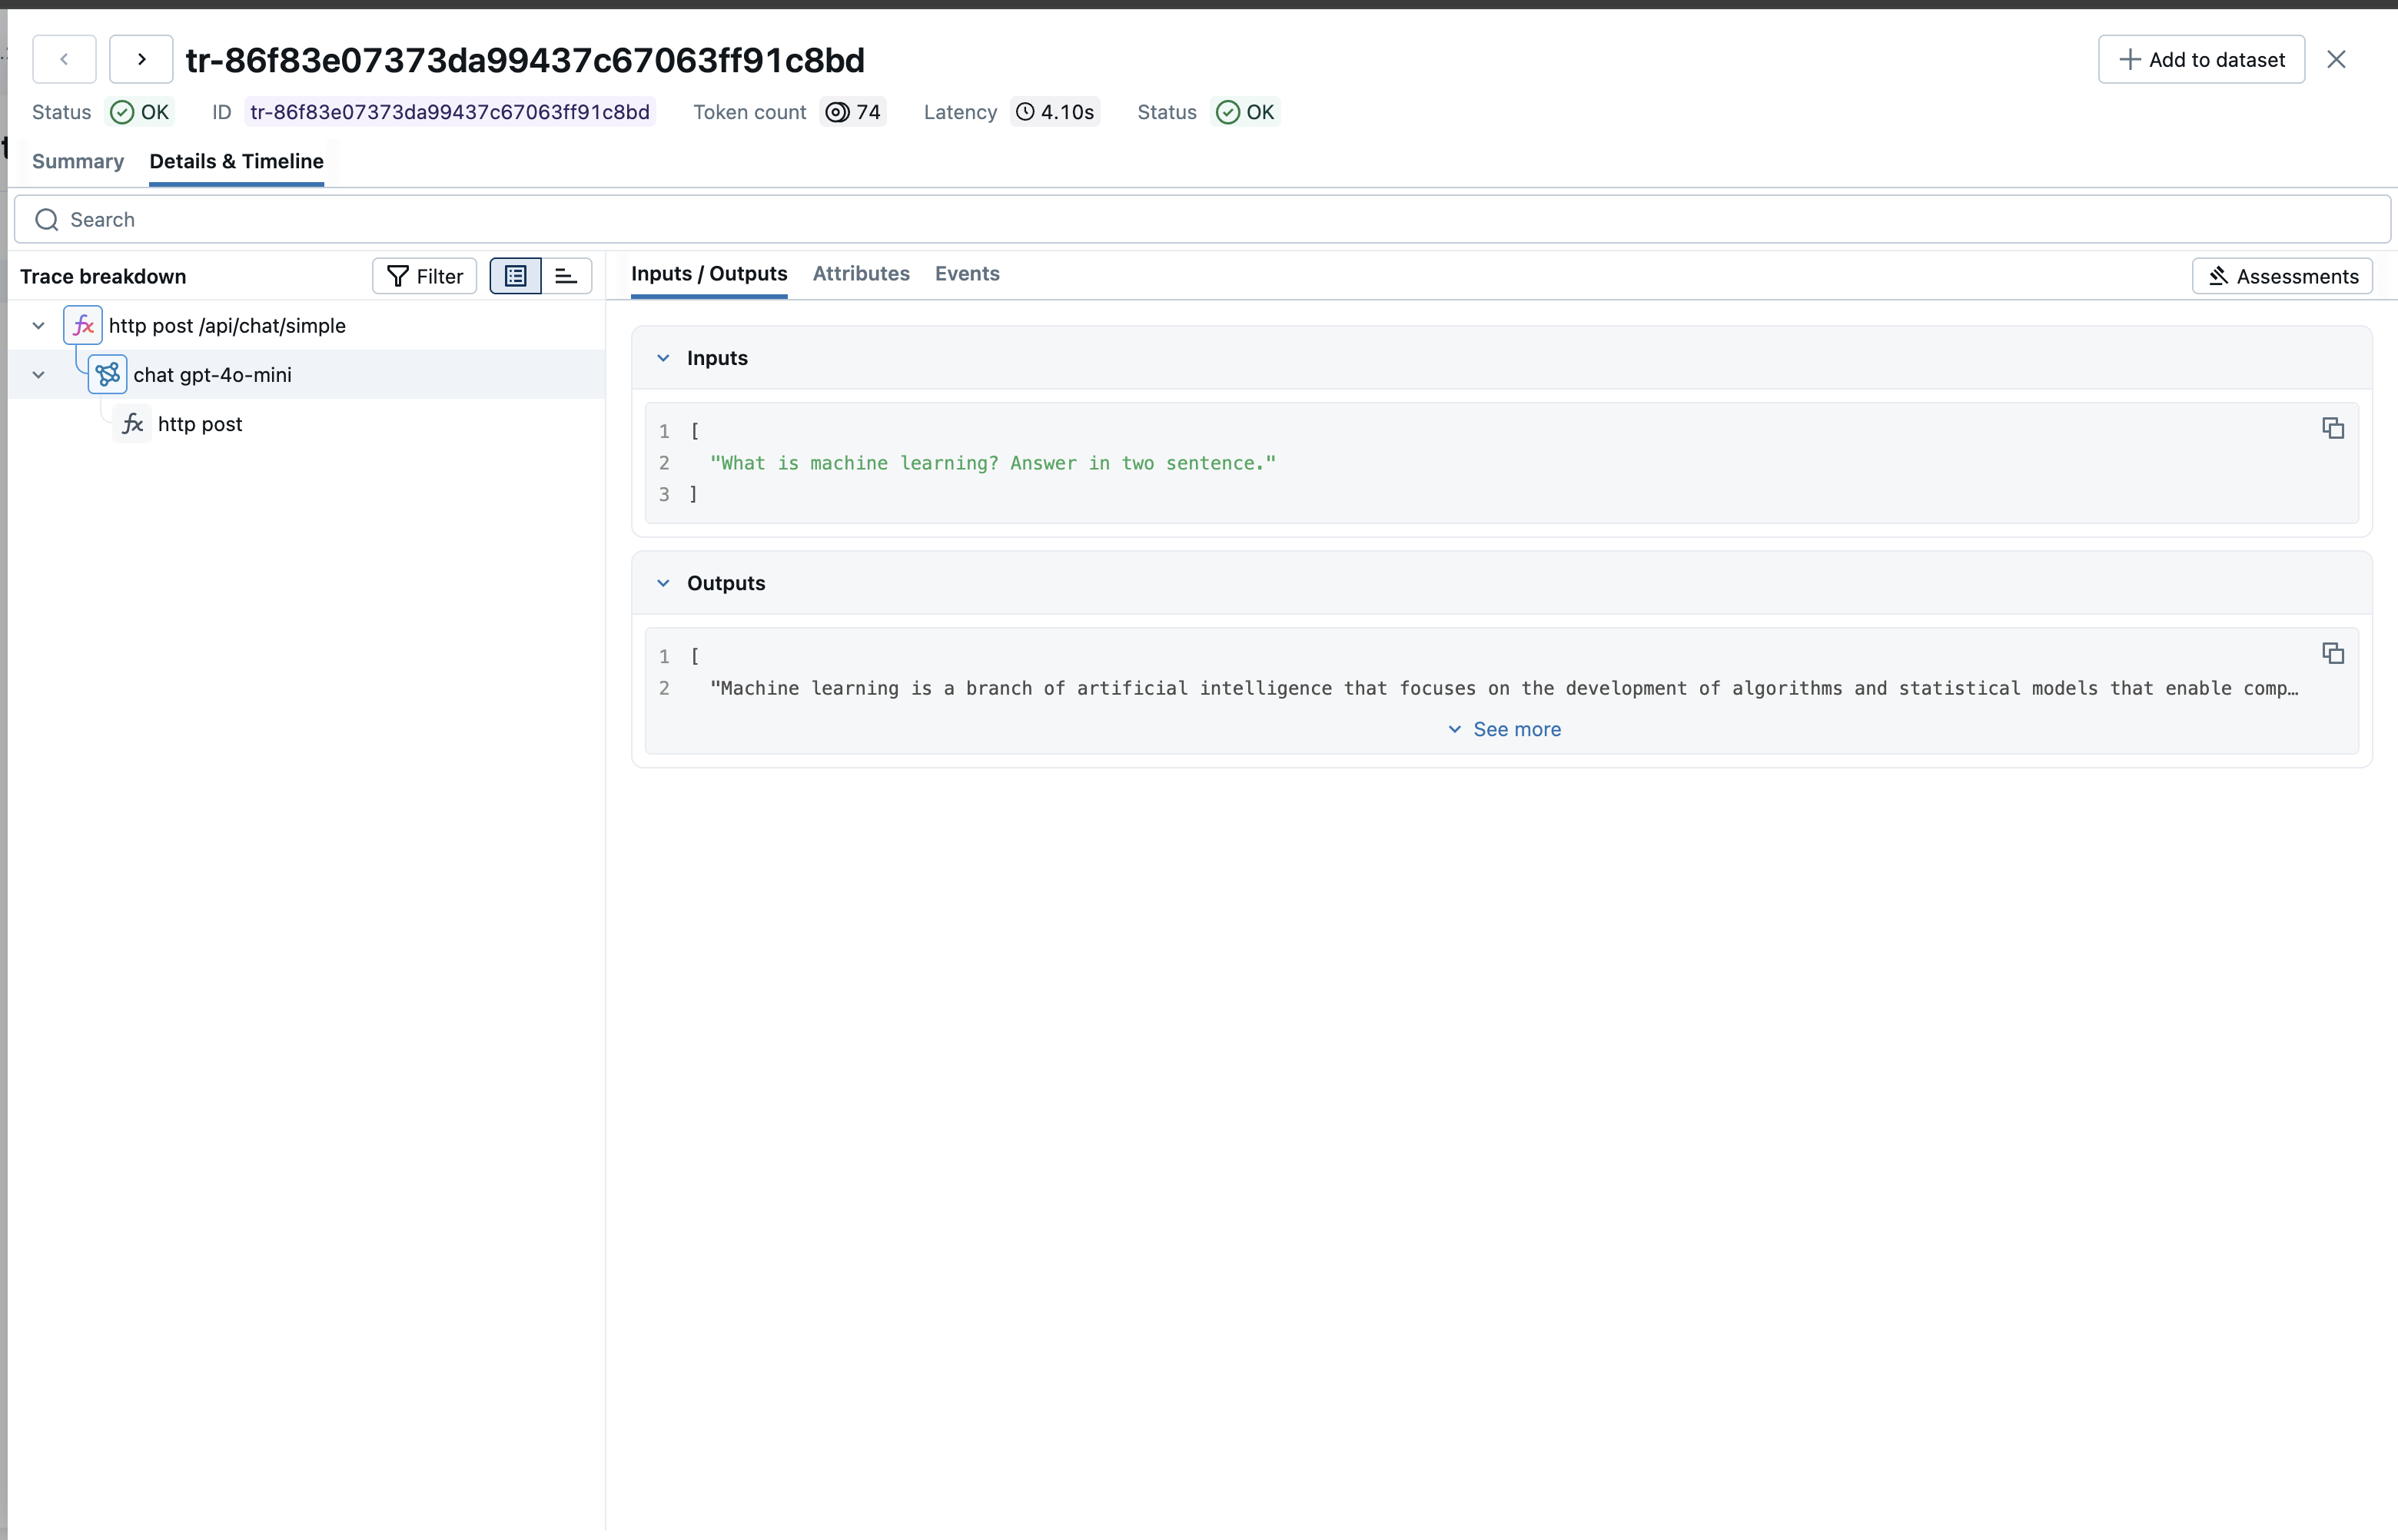
After making chat requests, open the MLflow UI at http://localhost:5000 and navigate to the experiment to see the traces.
Next Steps
- Evaluate the Agent: Learn how to evaluate the agent's performance.
- Manage Prompts: Learn how to manage prompts for the agent.
- Automatic Agent Optimization: Learn how to automatically optimize the agent end-to-end with state-of-the-art optimization algorithms.