Tracing xAI / Grok
MLflow Tracing provides automatic tracing capability for xAI / Grok models through the OpenAI SDK integration. Since xAI / Grok offers an OpenAI-compatible API format, you can use mlflow.openai.autolog() to trace interactions with Grok models.
MLflow trace automatically captures the following information about Grok calls:
- Prompts and completion responses
- Latencies
- Token usage
- Model name
- Additional metadata such as
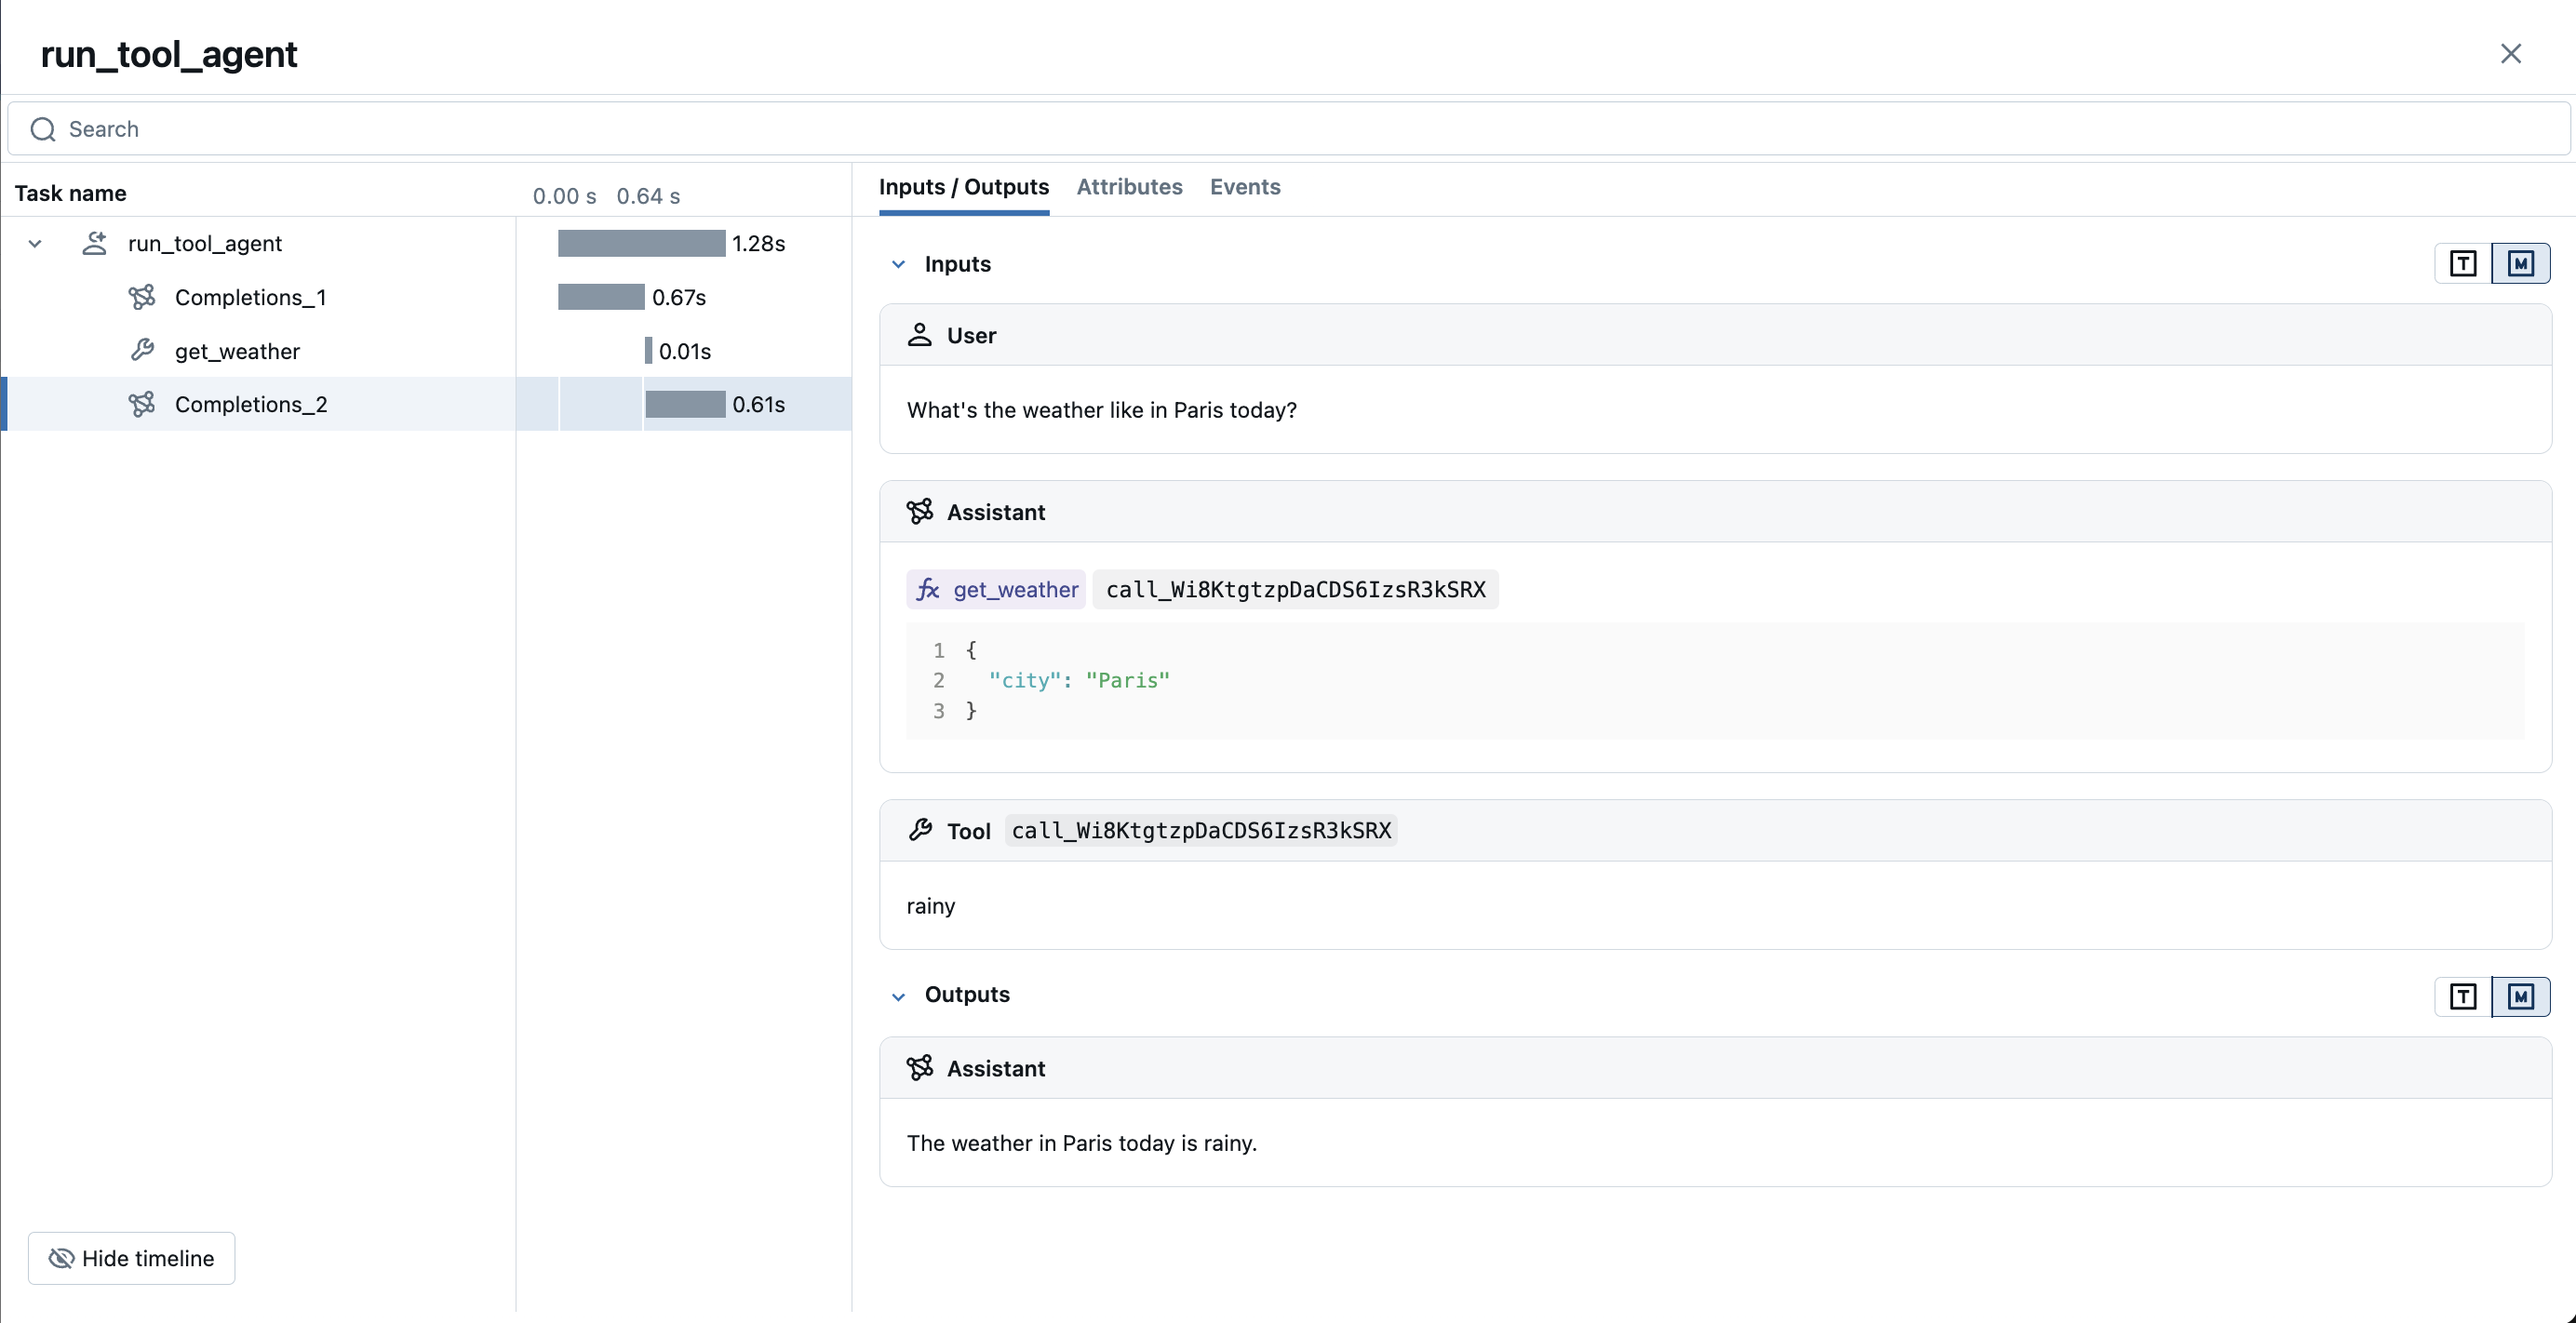
temperature,max_completion_tokens, if specified. - Function calling if returned in the response
- Built-in tools such as web search, file search, computer use, etc.
- Any exception if raised
Getting Started
Install dependencies
- Python
- JS / TS
pip install mlflow openai
npm install @mlflow/openai openai
Start MLflow server
- Local (pip)
- Local (docker)
If you have a local Python environment >= 3.10, you can start the MLflow server locally using the mlflow CLI command.
mlflow server
MLflow also provides a Docker Compose file to start a local MLflow server with a postgres database and a minio server.
git clone --depth 1 --filter=blob:none --sparse https://github.com/mlflow/mlflow.git
cd mlflow
git sparse-checkout set docker-compose
cd docker-compose
cp .env.dev.example .env
docker compose up -d
Refer to the instruction for more details, e.g., overriding the default environment variables.
Enable tracing and call Grok
- Python
- JS / TS
import openai
import mlflow

# Enable auto-tracing for OpenAI (works with Grok)
mlflow.openai.autolog()

# Optional: Set a tracking URI and an experiment
mlflow.set_tracking_uri("http://localhost:5000")
mlflow.set_experiment("Grok")

# Initialize the OpenAI client with Grok API endpoint
client = openai.OpenAI(
    base_url="https://api.x.ai/v1",
    api_key="<your_grok_api_key>",
)

response = client.chat.completions.create(
    model="grok-4",
    messages=[
        {"role": "system", "content": "You are a helpful assistant."},
        {"role": "user", "content": "What is the capital of France?"},
    ],
)
import { OpenAI } from "openai";
import { tracedOpenAI } from "@mlflow/openai";

// Wrap the OpenAI client and point to Grok endpoint
const client = tracedOpenAI(
  new OpenAI({
    baseURL: "https://api.x.ai/v1",
    apiKey: "<your_grok_api_key>",
  })
);

const response = await client.chat.completions.create({
  model: "grok-4",
  messages: [
    { role: "system", content: "You are a helpful assistant." },
    { role: "user", content: "What is the capital of France?" },
  ],
  temperature: 0.1,
  max_tokens: 100,
});
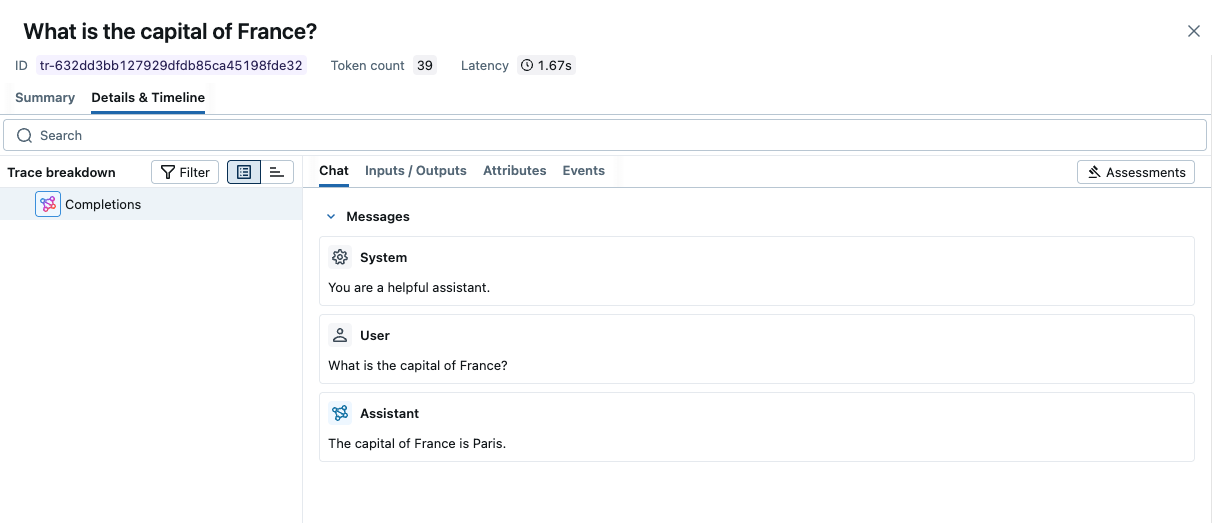
View traces in MLflow UI
Browse to your MLflow UI (for example, http://localhost:5000) and open the Grok experiment to see traces for the calls above.
-> View Next Steps for learning about more MLflow features like user feedback tracking, prompt management, and evaluation.
Streaming and Async Support
MLflow supports tracing for streaming and async Grok APIs. Visit the OpenAI Tracing documentation for example code snippets for tracing streaming and async calls through OpenAI SDK.
Combine with frameworks or manual tracing
The automatic tracing capability in MLflow is designed to work seamlessly with the Manual Tracing SDK or multi-framework integrations. The examples below show Python (manual span) and JS/TS (manual span) at the same level of complexity.
- Python
- JS / TS
import json
from openai import OpenAI
import mlflow
from mlflow.entities import SpanType

# Initialize the OpenAI client with Grok API endpoint
client = OpenAI(
    base_url="https://api.x.ai/v1",
    api_key="<your_grok_api_key>",
)


# Create a parent span for the Grok call
@mlflow.trace(span_type=SpanType.CHAIN)
def answer_question(question: str):
    messages = [{"role": "user", "content": question}]
    response = client.chat.completions.create(
        model="grok-4",
        messages=messages,
    )

    # Attach session/user metadata to the trace
    mlflow.update_current_trace(
        metadata={
            "mlflow.trace.session": "session-12345",
            "mlflow.trace.user": "user-a",
        }
    )
    return response.choices[0].message.content


answer = answer_question("What is the capital of France?")
import * as mlflow from "@mlflow/core";
import { OpenAI } from "openai";
import { tracedOpenAI } from "@mlflow/openai";

mlflow.init({
  trackingUri: "http://localhost:5000",
  experimentId: "<your_experiment_id>",
});

// Wrap the OpenAI client and point to Grok endpoint
const client = tracedOpenAI(
  new OpenAI({
    baseURL: "https://api.x.ai/v1",
    apiKey: "<your_grok_api_key>",
  })
);

// Create a traced function that wraps the Grok call
const answerQuestion = mlflow.trace(
  async (question: string) => {
    const resp = await client.chat.completions.create({
      model: "grok-4",
      messages: [{ role: "user", content: question }],
    });
    return resp.choices[0].message?.content;
  },
  { name: "answer-question" }
);

await answerQuestion("What is the capital of France?");
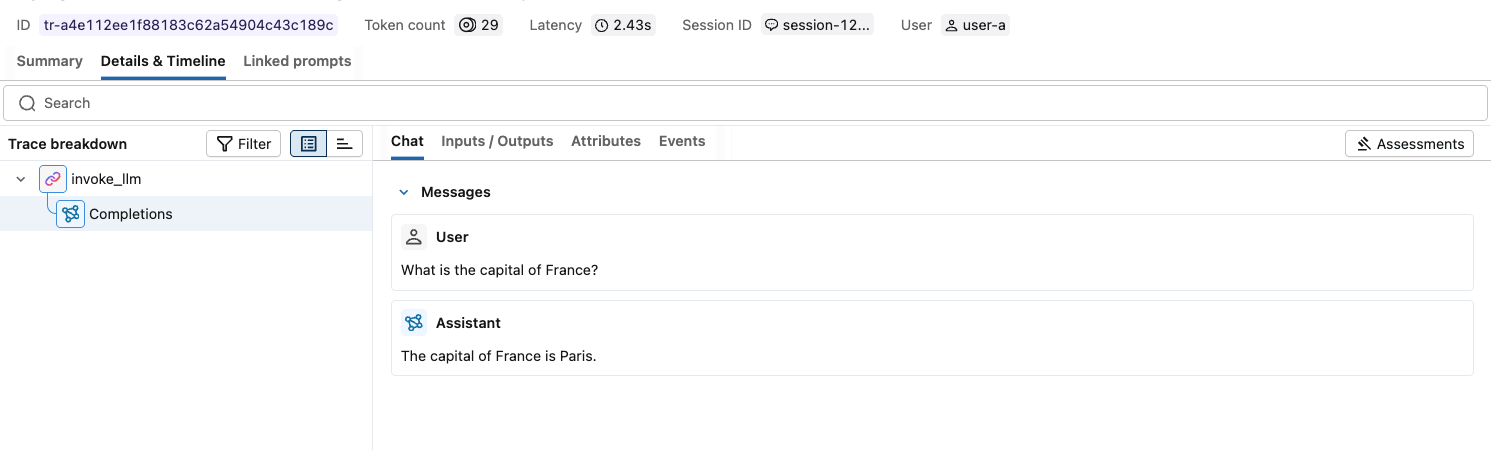
Running either example will produce a trace that includes the Grok LLM span; the traced function creates the parent span automatically.
Next steps
Track User Feedback
Record user feedback on traces for tracking user satisfaction.
Manage Prompts
Learn how to manage prompts with MLflow's prompt registry.
Evaluate Traces
Evaluate traces with LLM judges to understand and improve your AI application's behavior.