Version Tracking Quickstart
Build and track a LangChain-based chatbot with MLflow's version management capabilities. This quickstart demonstrates prompt versioning, application tracking, trace generation, and performance evaluation using MLflow's GenAI features.
Prerequisites
Install Required Packages
This quickstart requires MLflow version 3.0 or higher for full GenAI functionality.
pip install --upgrade 'mlflow[genai]'
pip install langchain-openai
Set OpenAI API Key
Configure your OpenAI API key to authenticate with OpenAI services:
export OPENAI_API_KEY=your_api_key_here
What You'll Learn
This quickstart covers the essential concepts for building trackable GenAI applications with MLflow's version management system.
Version Control Prompts
Register and track prompt templates with full version history for reproducible experiments
Build LangChain Agents
Create conversational agents with automatic MLflow integration and observability
Trace Everything
Enable comprehensive trace logging to monitor and debug your model's behavior
Evaluate Performance
Assess model quality with built-in metrics and custom evaluation frameworks
Let's build a simple IT support chatbot and track its development lifecycle with MLflow.
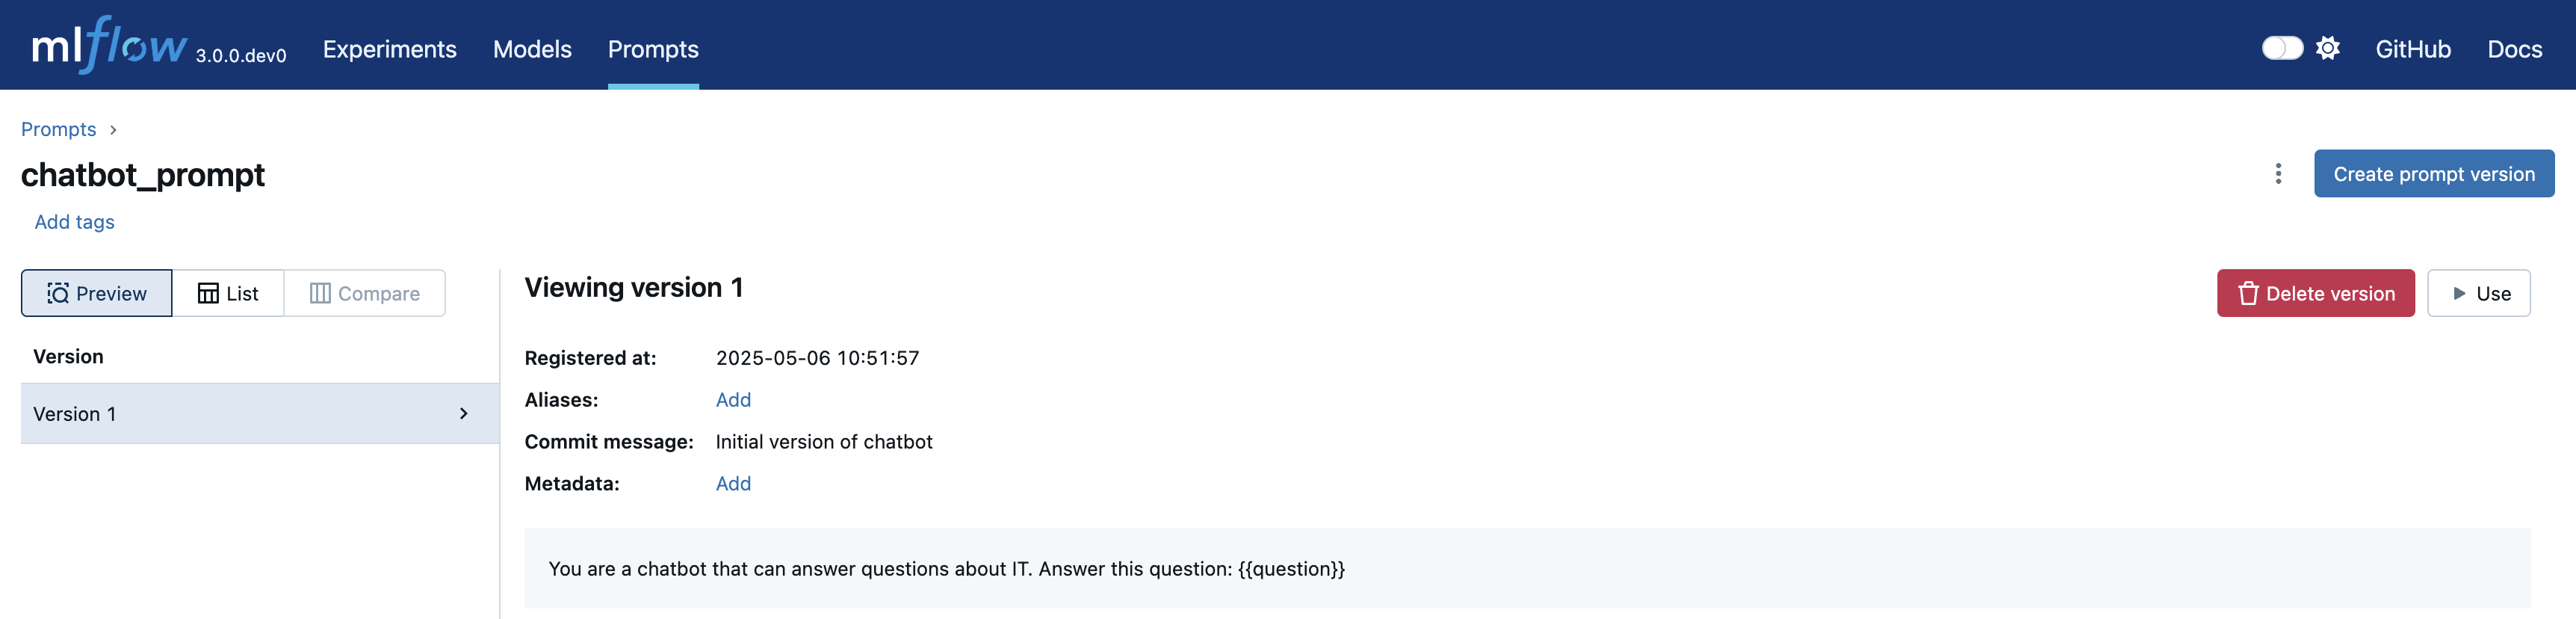
Step 1: Register a Prompt Template
Start by creating a versioned prompt template. This enables you to track prompt evolution and ensure reproducibility across experiments.
import mlflow

system_prompt = mlflow.genai.register_prompt(
    name="chatbot_prompt",
    template="You are a chatbot that can answer questions about IT. Answer this question: {{question}}",
    commit_message="Initial version of chatbot",
)
View Your Prompt in MLflow UI
Navigate to the Prompts tab to see your registered prompt:
Step 2: Build a LangChain Conversational Chain
Create a simple chain that combines your prompt template with OpenAI's chat model:
from langchain.schema.output_parser import StrOutputParser
from langchain_core.prompts import ChatPromptTemplate
from langchain_openai import ChatOpenAI

# Convert MLflow prompt to LangChain format
prompt = ChatPromptTemplate.from_template(system_prompt.to_single_brace_format())

# Build the chain: prompt → LLM → output parser
chain = prompt | ChatOpenAI(temperature=0.7) | StrOutputParser()

# Test the chain
question = "What is MLflow?"
print(chain.invoke({"question": question}))
# MLflow is an open-source platform for managing the end-to-end machine learning lifecycle...
Step 3: Enable Trace Observability
Set up automatic trace logging to monitor your model's behavior during development. This creates a linked history of all model interactions.
Configure Active Model and Autologging
# Set the active model for linking traces
mlflow.set_active_model(name="langchain_model")

# Enable autologging - all traces will be automatically linked to the active model
mlflow.langchain.autolog()
Generate Test Traces
Run multiple queries to generate traces for analysis:
questions = [
    {"question": "What is MLflow Tracking and how does it work?"},
    {"question": "What is Unity Catalog?"},
    {"question": "What are user-defined functions (UDFs)?"},
]
outputs = []

for question in questions:
    outputs.append(chain.invoke(question))

# Verify traces are linked to the active model
active_model_id = mlflow.get_active_model_id()
mlflow.search_traces(model_id=active_model_id)
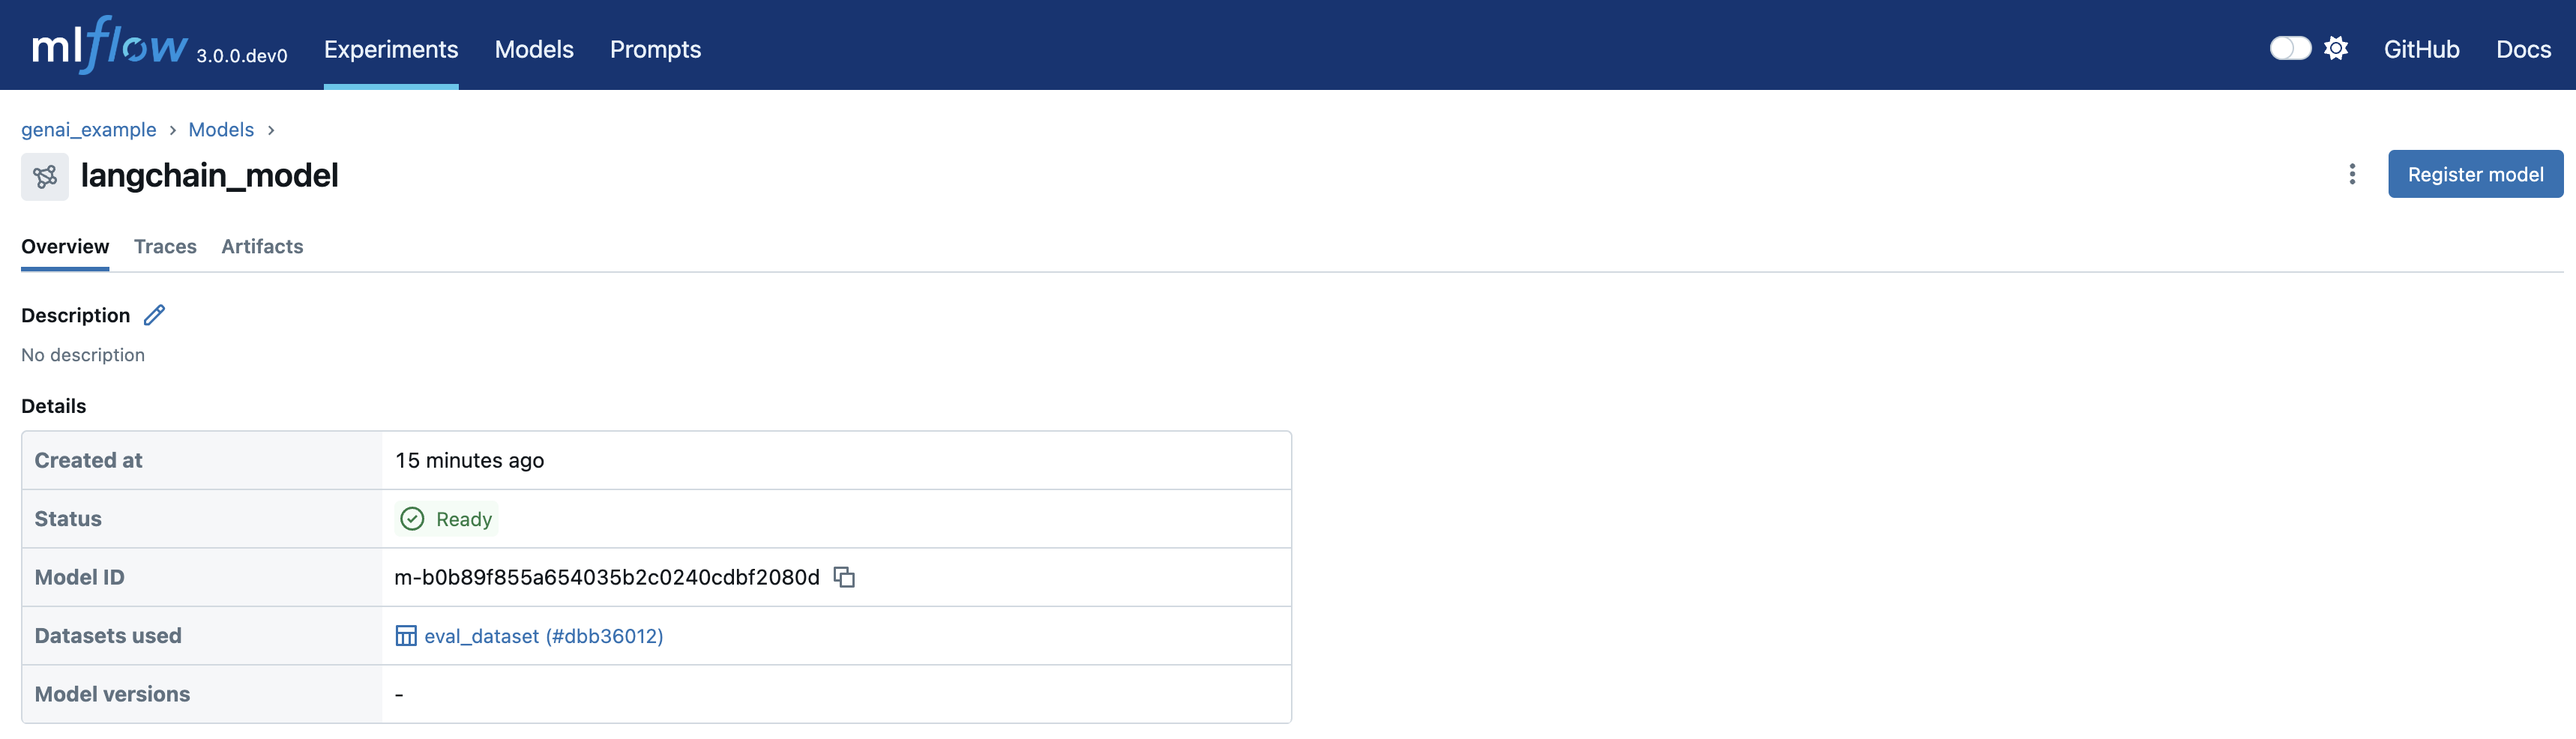
Explore Traces in the UI
- View the Logged Model: Check the Models tab in your experiment:

- Access Model Details: Click on your model to view its unique
model_id:
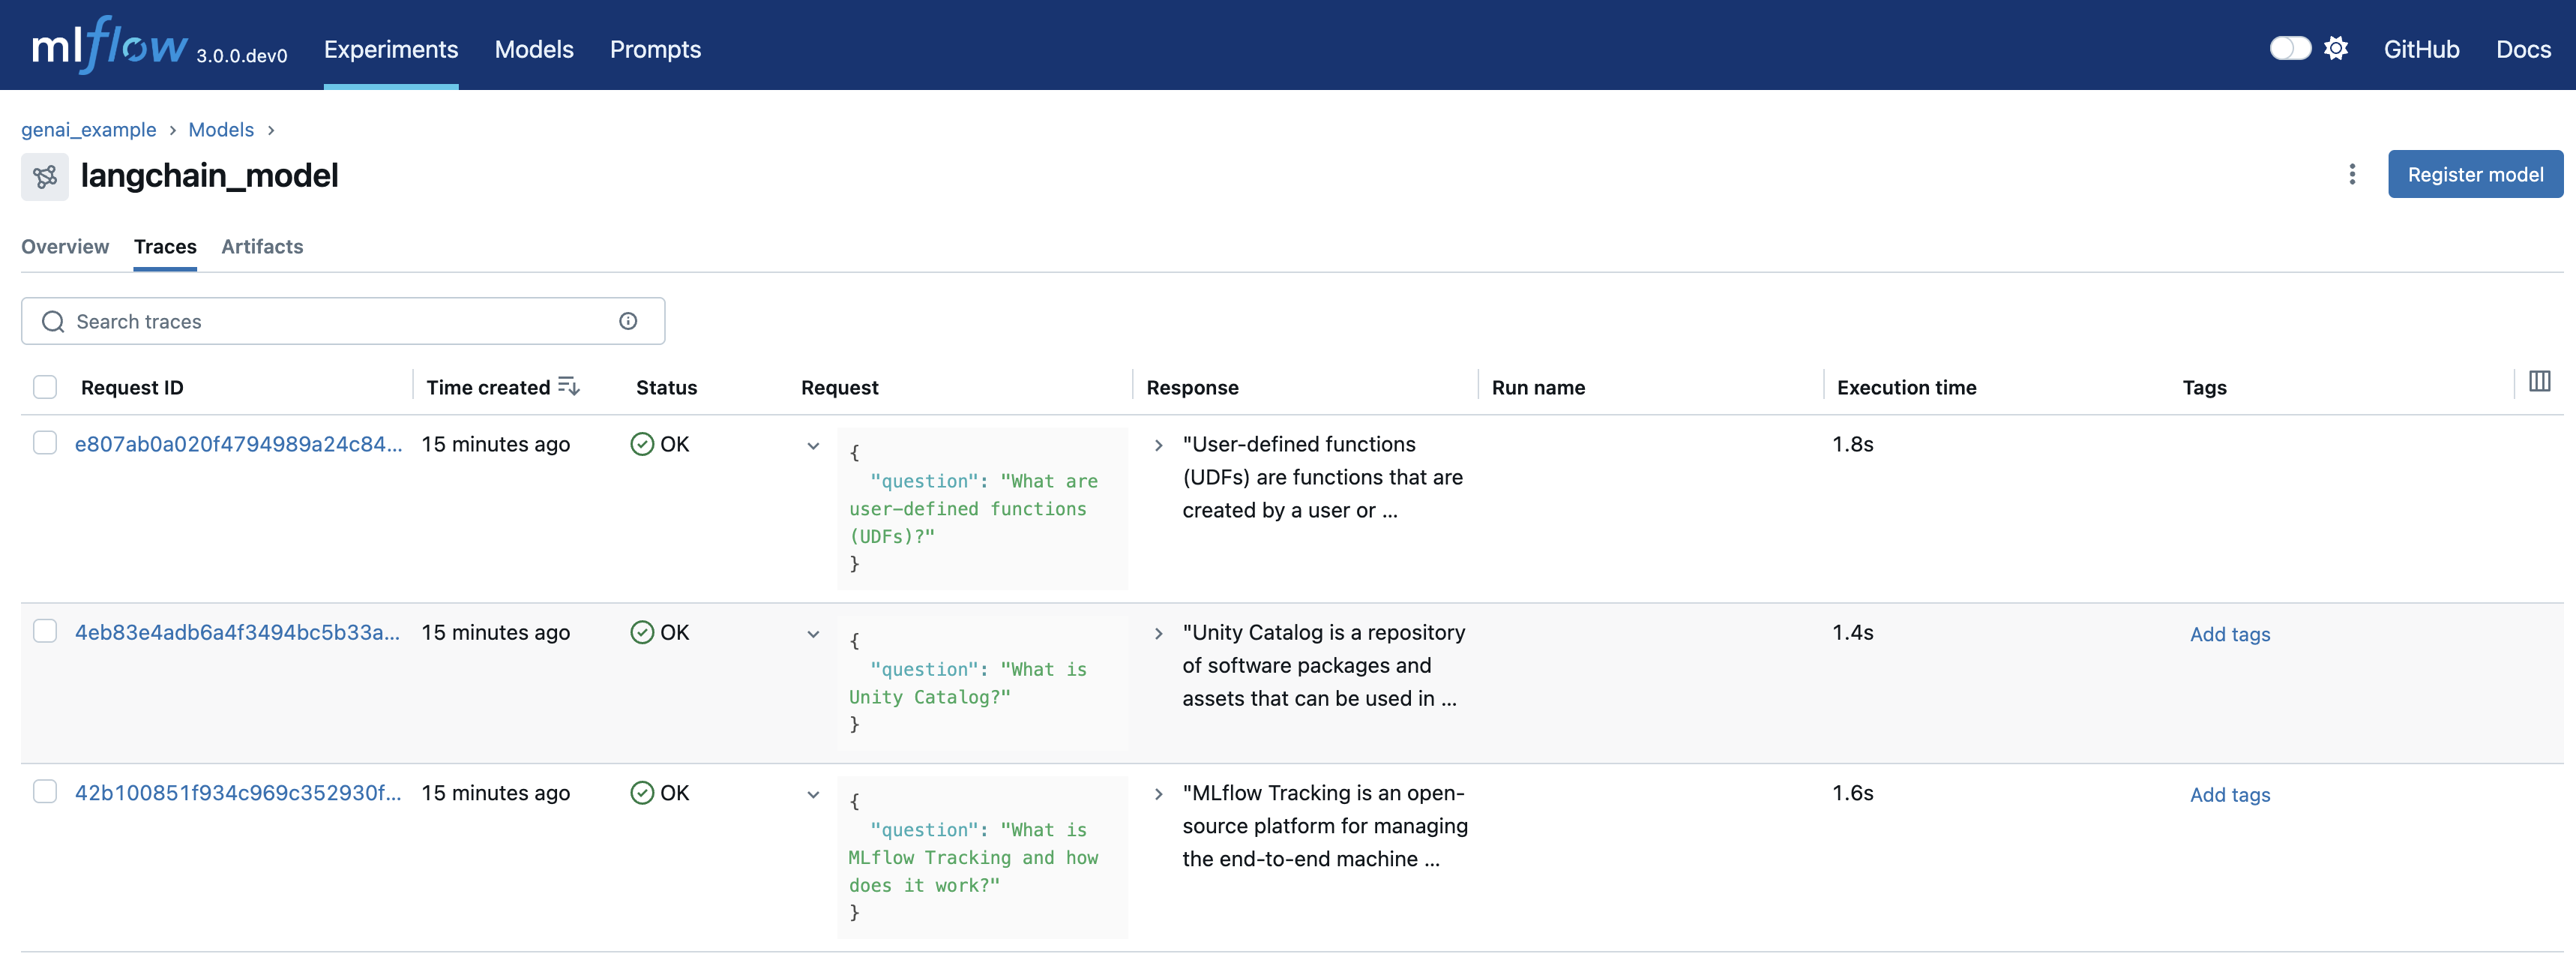
- Analyze Generated Traces: Navigate to the Traces tab to examine individual interactions:
Step 4: Evaluate Model Performance
Evaluation is crucial for understanding how well your chatbot performs and ensuring quality improvements over time. MLflow provides the foundation for systematic evaluation tracking.
Key evaluation capabilities:
- Quality Assessment: Systematically evaluate response quality using keyword coverage and content analysis to ensure your chatbot meets expectations
- Performance Metrics: Track quantitative measures like response length and keyword matching to monitor improvement over time
- Continuous Monitoring: Log evaluation results to MLflow for ongoing performance tracking and comparison across model iterations
Use MLflow's tracking capabilities to assess your chatbot's accuracy and relevance against expected responses.
Analyze Outputs Manually
Evaluate your model outputs by comparing them to expected responses:
import pandas as pd

# Create evaluation dataset
eval_data = [
    {
        "question": "What is MLflow Tracking and how does it work?",
        "expected_keywords": [
            "experiment tracking",
            "parameters",
            "metrics",
            "artifacts",
            "UI",
        ],
    },
    {
        "question": "What is Unity Catalog?",
        "expected_keywords": [
            "data assets",
            "centralized",
            "collaboration",
            "governance",
        ],
    },
    {
        "question": "What are user-defined functions (UDFs)?",
        "expected_keywords": [
            "custom functions",
            "data transformations",
            "Spark",
            "SQL",
        ],
    },
]


# Simple evaluation metrics
def evaluate_response(response, expected_keywords):
    """Simple keyword-based evaluation."""
    response_lower = response.lower()
    keyword_matches = sum(
        1 for keyword in expected_keywords if keyword.lower() in response_lower
    )
    coverage_score = keyword_matches / len(expected_keywords)
    response_length = len(response.split())

    return {
        "keyword_coverage": coverage_score,
        "response_length": response_length,
        "keyword_matches": keyword_matches,
    }


# Evaluate each response
evaluation_results = []
for i, (output, eval_item) in enumerate(zip(outputs, eval_data)):
    metrics = evaluate_response(output, eval_item["expected_keywords"])
    evaluation_results.append(
        {
            "question": eval_item["question"],
            "response": output,
            "keyword_coverage": metrics["keyword_coverage"],
            "response_length": metrics["response_length"],
            "keyword_matches": metrics["keyword_matches"],
        }
    )

    print(
        f"Question {i+1}: {metrics['keyword_matches']}/{len(eval_item['expected_keywords'])} keywords found"
    )
    print(f"Coverage: {metrics['keyword_coverage']:.1%}")
    print(f"Response length: {metrics['response_length']} words\n")

# Log evaluation metrics
with mlflow.start_run():
    avg_coverage = sum(r["keyword_coverage"] for r in evaluation_results) / len(
        evaluation_results
    )
    avg_length = sum(r["response_length"] for r in evaluation_results) / len(
        evaluation_results
    )

    mlflow.log_metric("avg_keyword_coverage", avg_coverage)
    mlflow.log_metric("avg_response_length", avg_length)

    print(f"📊 Average keyword coverage: {avg_coverage:.1%}")
    print(f"📊 Average response length: {avg_length:.0f} words")
View Results in MLflow UI
The evaluation metrics are logged to MLflow for tracking and comparison. Navigate to the Experiments tab to view your evaluation run and compare results across different iterations.
What You've Built
You now have a complete version-tracked GenAI application with comprehensive observability and evaluation capabilities.
What you've accomplished:
- Versioned Prompt Templates: Your prompts are now registered in MLflow with full version history, enabling reproducible experiments and systematic improvements
- Integrated LangChain Agent: Built a conversational agent with automatic MLflow integration that captures every interaction for analysis and debugging
- Complete Trace Observability: Enabled comprehensive trace logging that links all model interactions to your versioned application for full visibility
- Systematic Evaluation: Implemented performance tracking with keyword-based metrics that log results to MLflow for ongoing quality monitoring
Next Steps
Track Application Versions
Learn advanced version tracking patterns for production GenAI applications
Compare App Versions
Analyze performance differences between versions using trace-based comparison
Prompt Registry
Manage prompts at scale with MLflow's centralized prompt registry
Evaluation & Monitoring
Build comprehensive evaluation pipelines for production GenAI applications