SSO (Single Sign-On)
You can use SSO (Single Sign-On) to authenticate users to your MLflow instance, by installing a custom plugin or using a reverse proxy.
Using OIDC Plugin
MLflow supports SSO (Single Sign-On) with custom plugins for authentication. The mlflow-oidc-auth plugin provides OIDC support for MLflow.
Features:
- OIDC-based authentication for MLflow UI and API
- User management through OIDC provider
- User-level access control
- Group-based access control
- Permissions management based on regular expressions (allows or denies access to specific MLflow resources based on regular expressions and assigns permissions to users or groups)
- Support for session, JWT, and basic authentication methods
- Compatible with mlflow-client authentication through MLflow basic auth protocol
This plugin is maintained by the community.
To use MLflow with the OIDC plugin, we need to (1) configure OIDC provider (2) deploy MLflow server with OIDC plugin (3) configure mlflow client. Below are the configuration details.
Configure the OIDC provider
The OIDC plugin requires an Identity Provider (IDP) service that supports the OIDC protocol. Popular cloud OIDC providers include Okta Auth0, Google Identity Platform, Aws Cognito and Azure Entra ID. Below are configuration examples for these popular cloud OIDC providers:
Okta Auth0 configuration
-
Register a free Okta Auth0 account and log in.
-
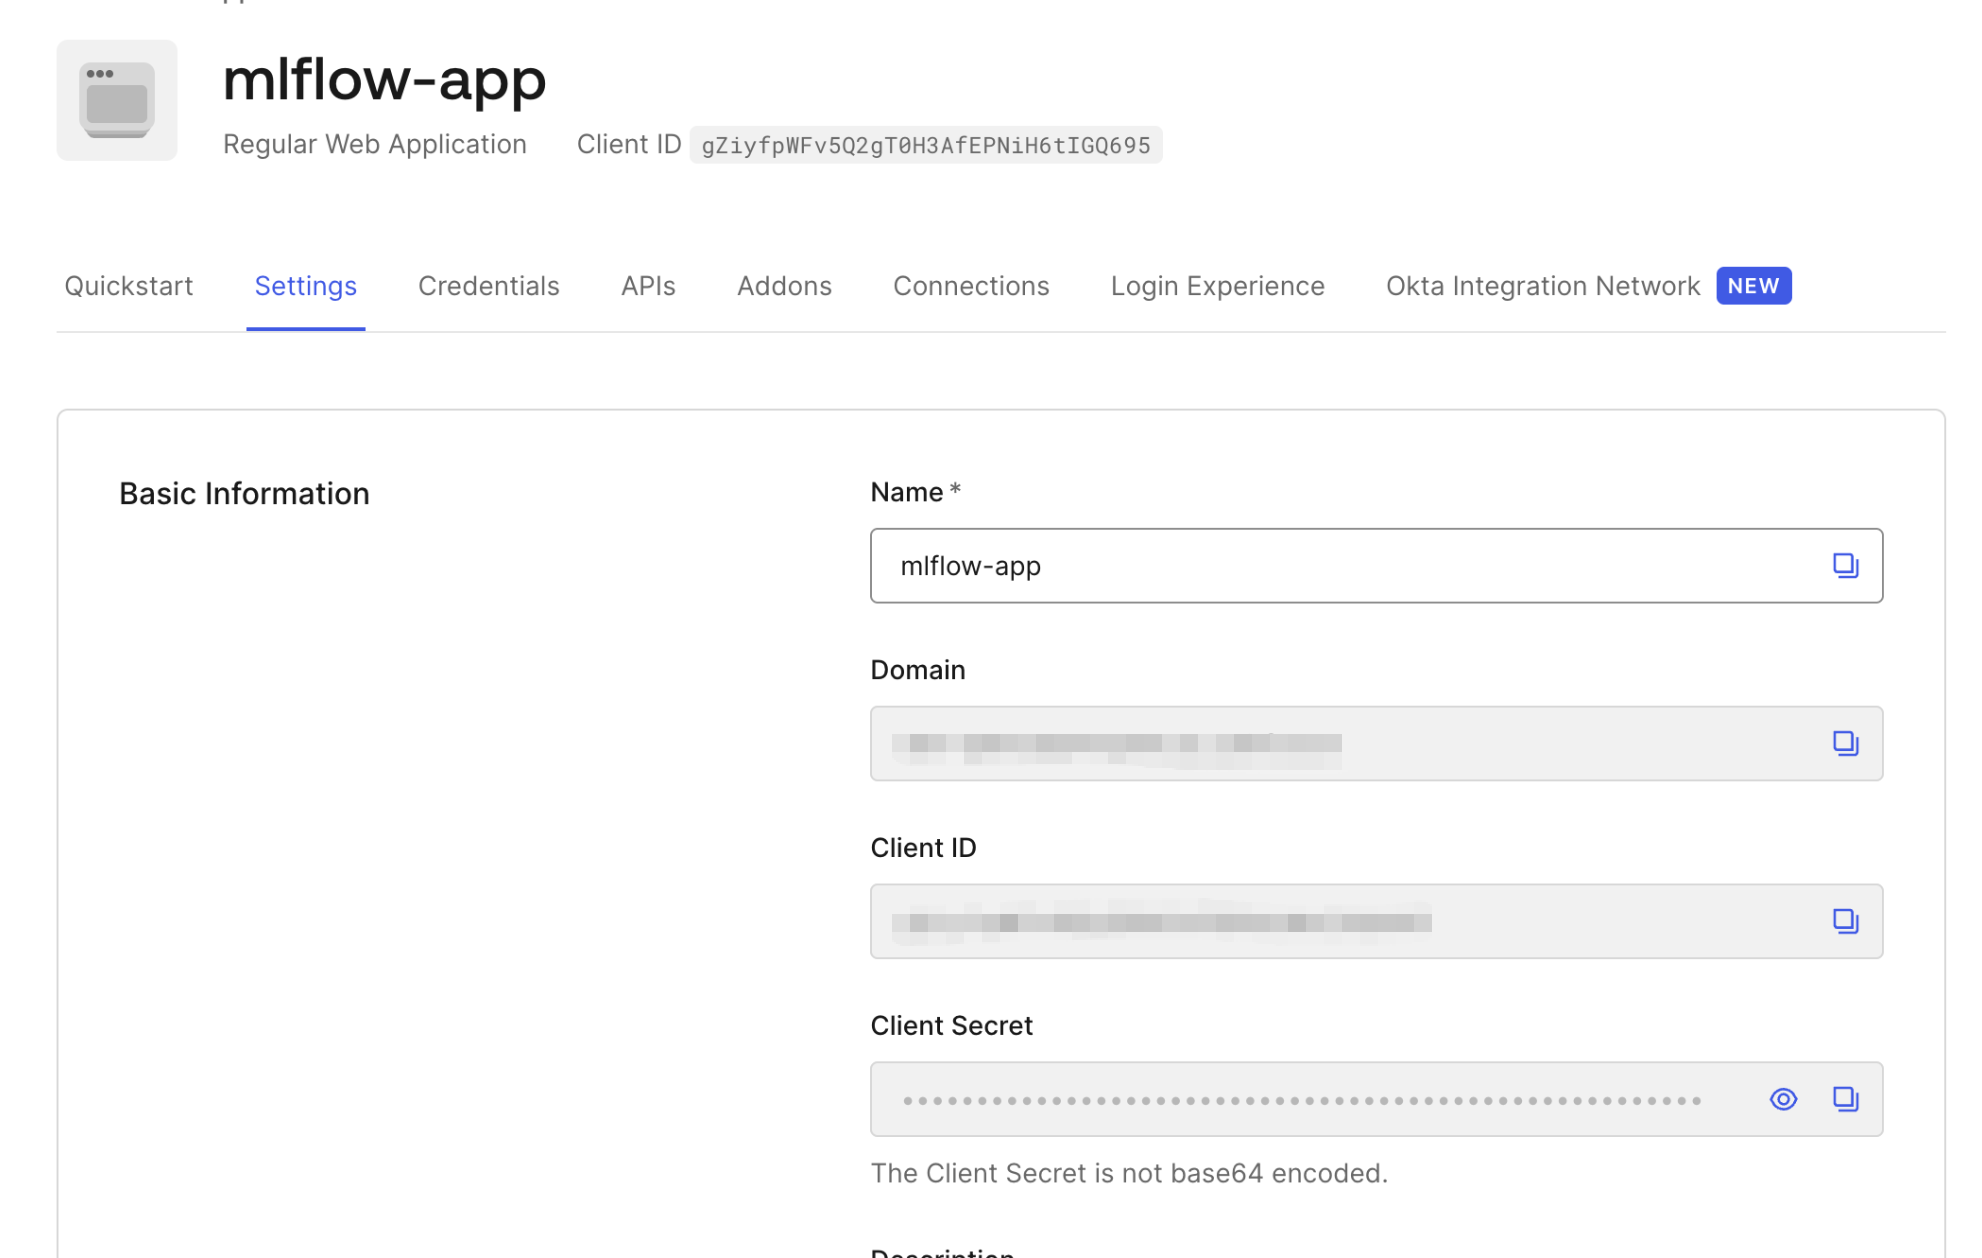
Create an application for MLflow, select application type as "Regular Web Application". View the "Domain", "Client ID", "Client Secret" values of the application on the application basic information page, these values will be used when deploying the MLflow server with the OIDC plugin.
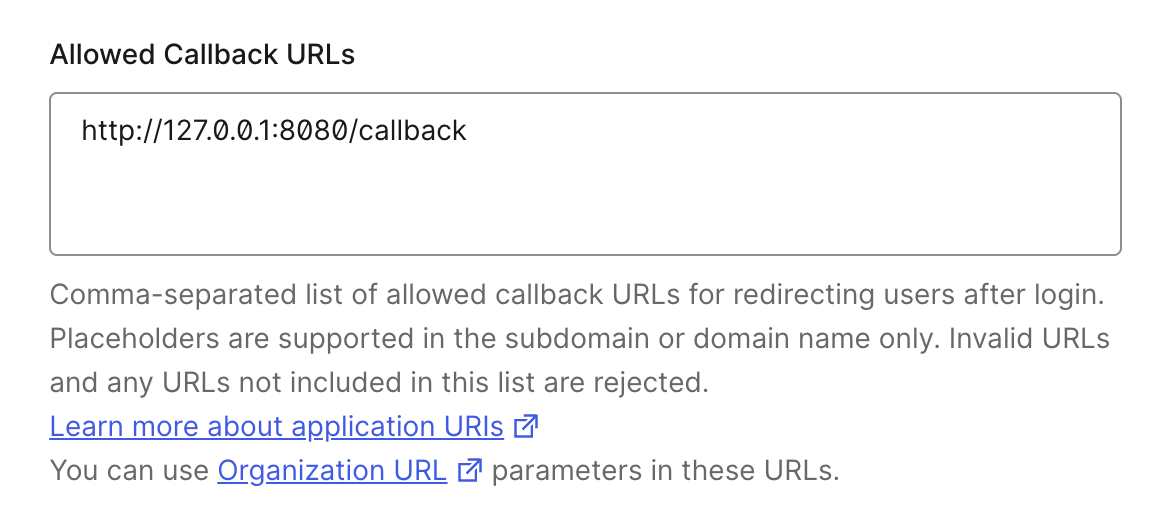
- Configure allowed callback URL for the Okta application, assuming the MLflow server is deployed at "http://localhost:8080", then the callback URL is "http://localhost:8080/callback"
- Configure and deploy a "post-login" trigger for assigning the user's group membership
The username of any Okta auth0 account can be used as the user to log in the MLflow server deployed with the OIDC plugin. You need to assign a group to each user. MLflow OIDC plugin supports 2 kinds of groups: (1) administrator group (default group name is "mlflow-admin"), (2) plain group (default group name is "mlflow"). For the user that is assigned to the administrator group, the user automatically gets all entity access permissions, and can grant permissions to any other users. For the user that is assigned to the plain group, the user does not have permissions to MLflow entities until the user in the administrator group grants permission for the user.
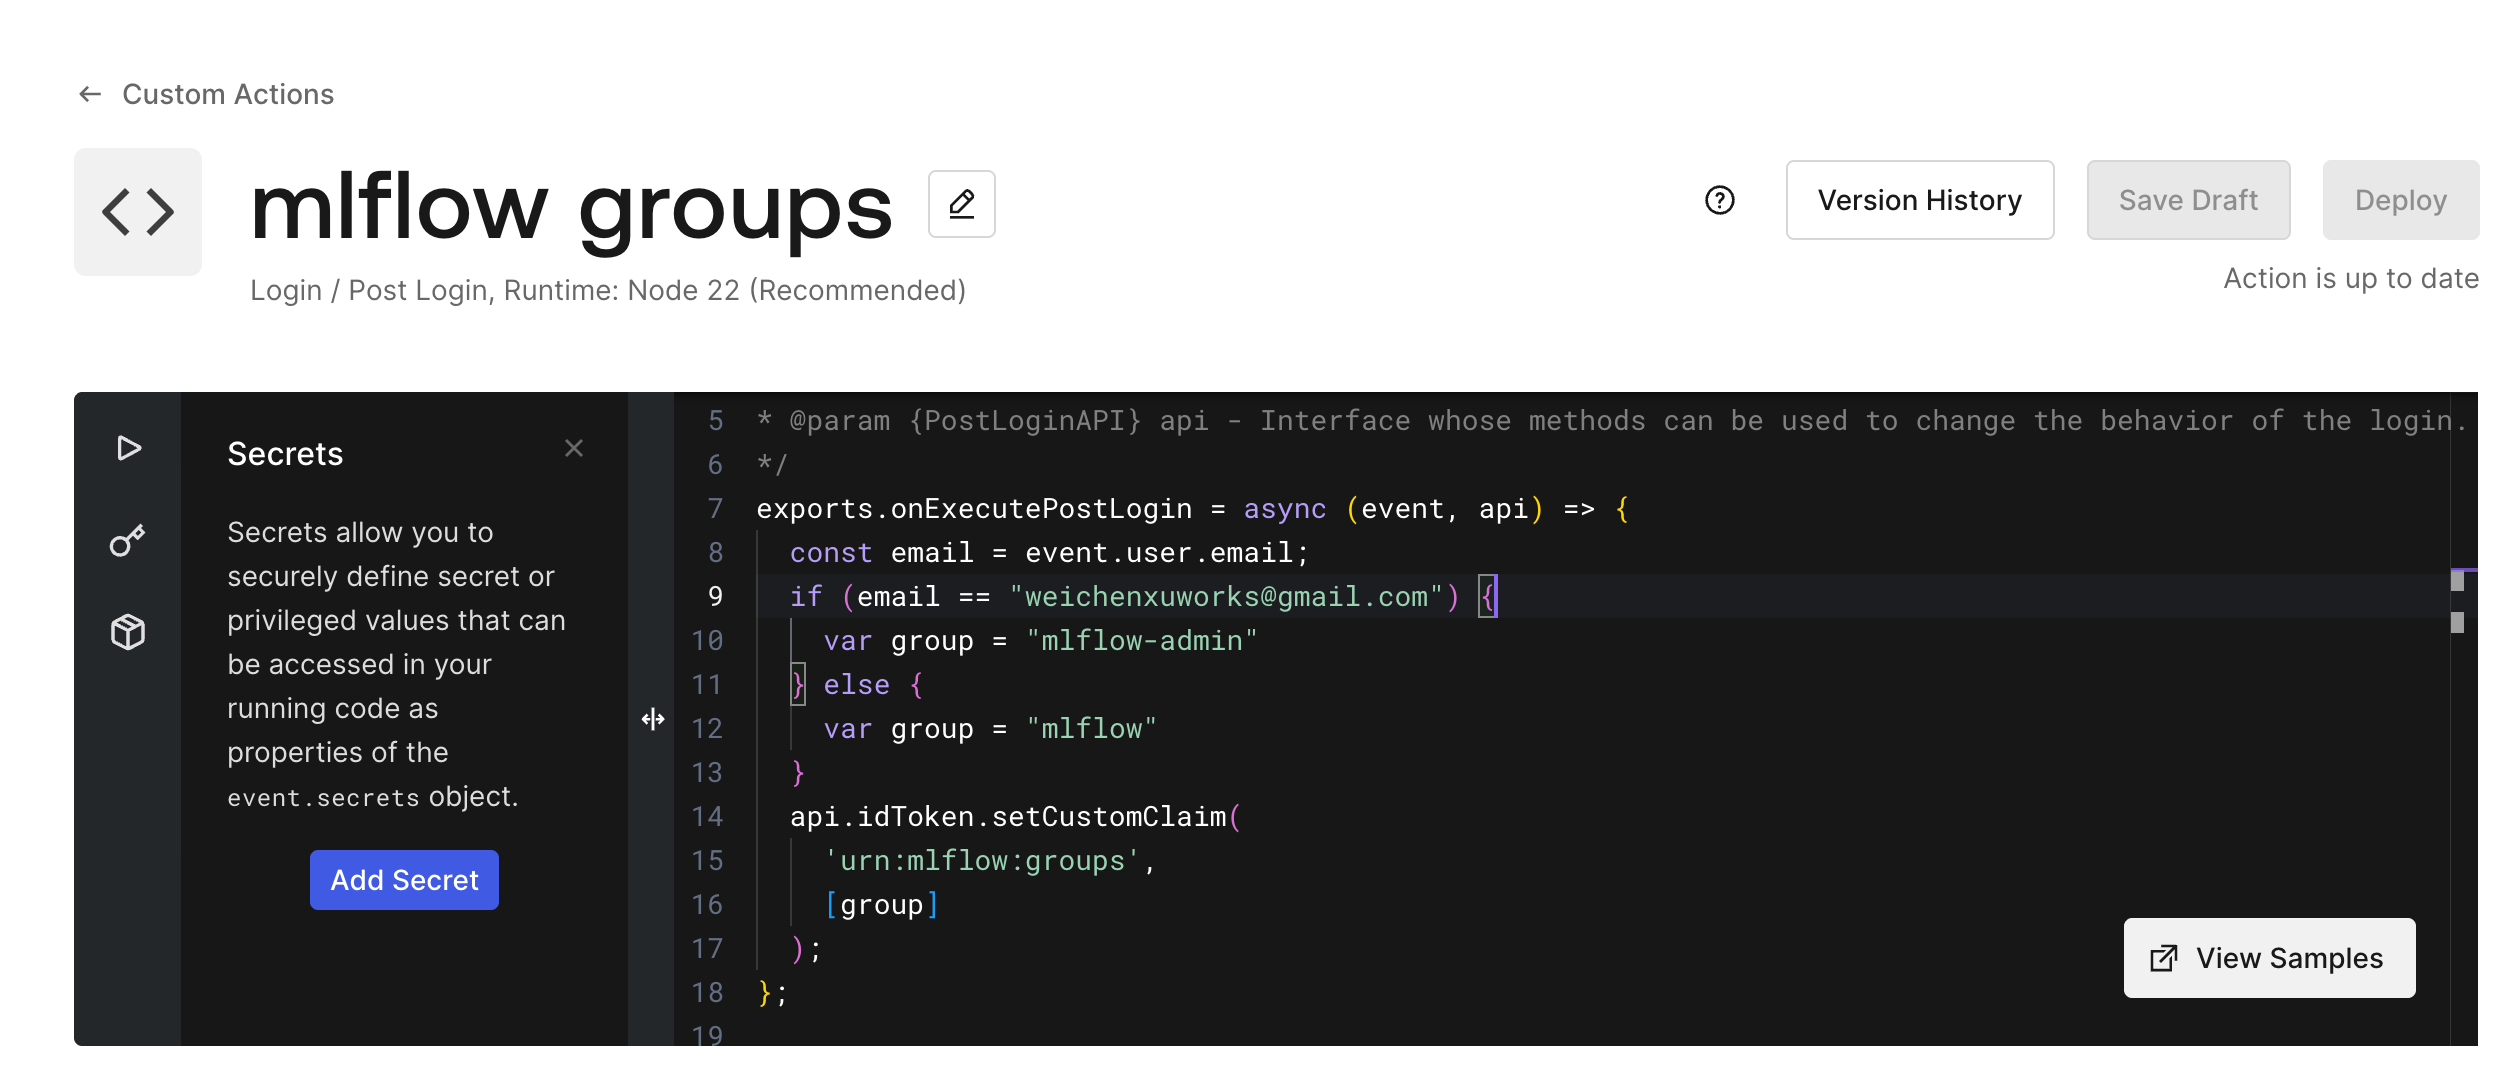
Below is an example to assign the administrator group to a certain user, and assigns the plain group to other users:
In Okta account sidebar menu: Actions -> Library -> Create Actions -> Create Custom Action, and fill in the code as follows:
exports.onExecutePostLogin = async (event, api) => {
  const email = event.user.email;
  if (email == "somebody@gmail.com") {
    var group = "mlflow-admin"
  } else {
    var group = "mlflow"
  }
  api.idToken.setCustomClaim(
    'urn:mlflow:groups',
    [group]
  );
};
then click the "Deploy" button.
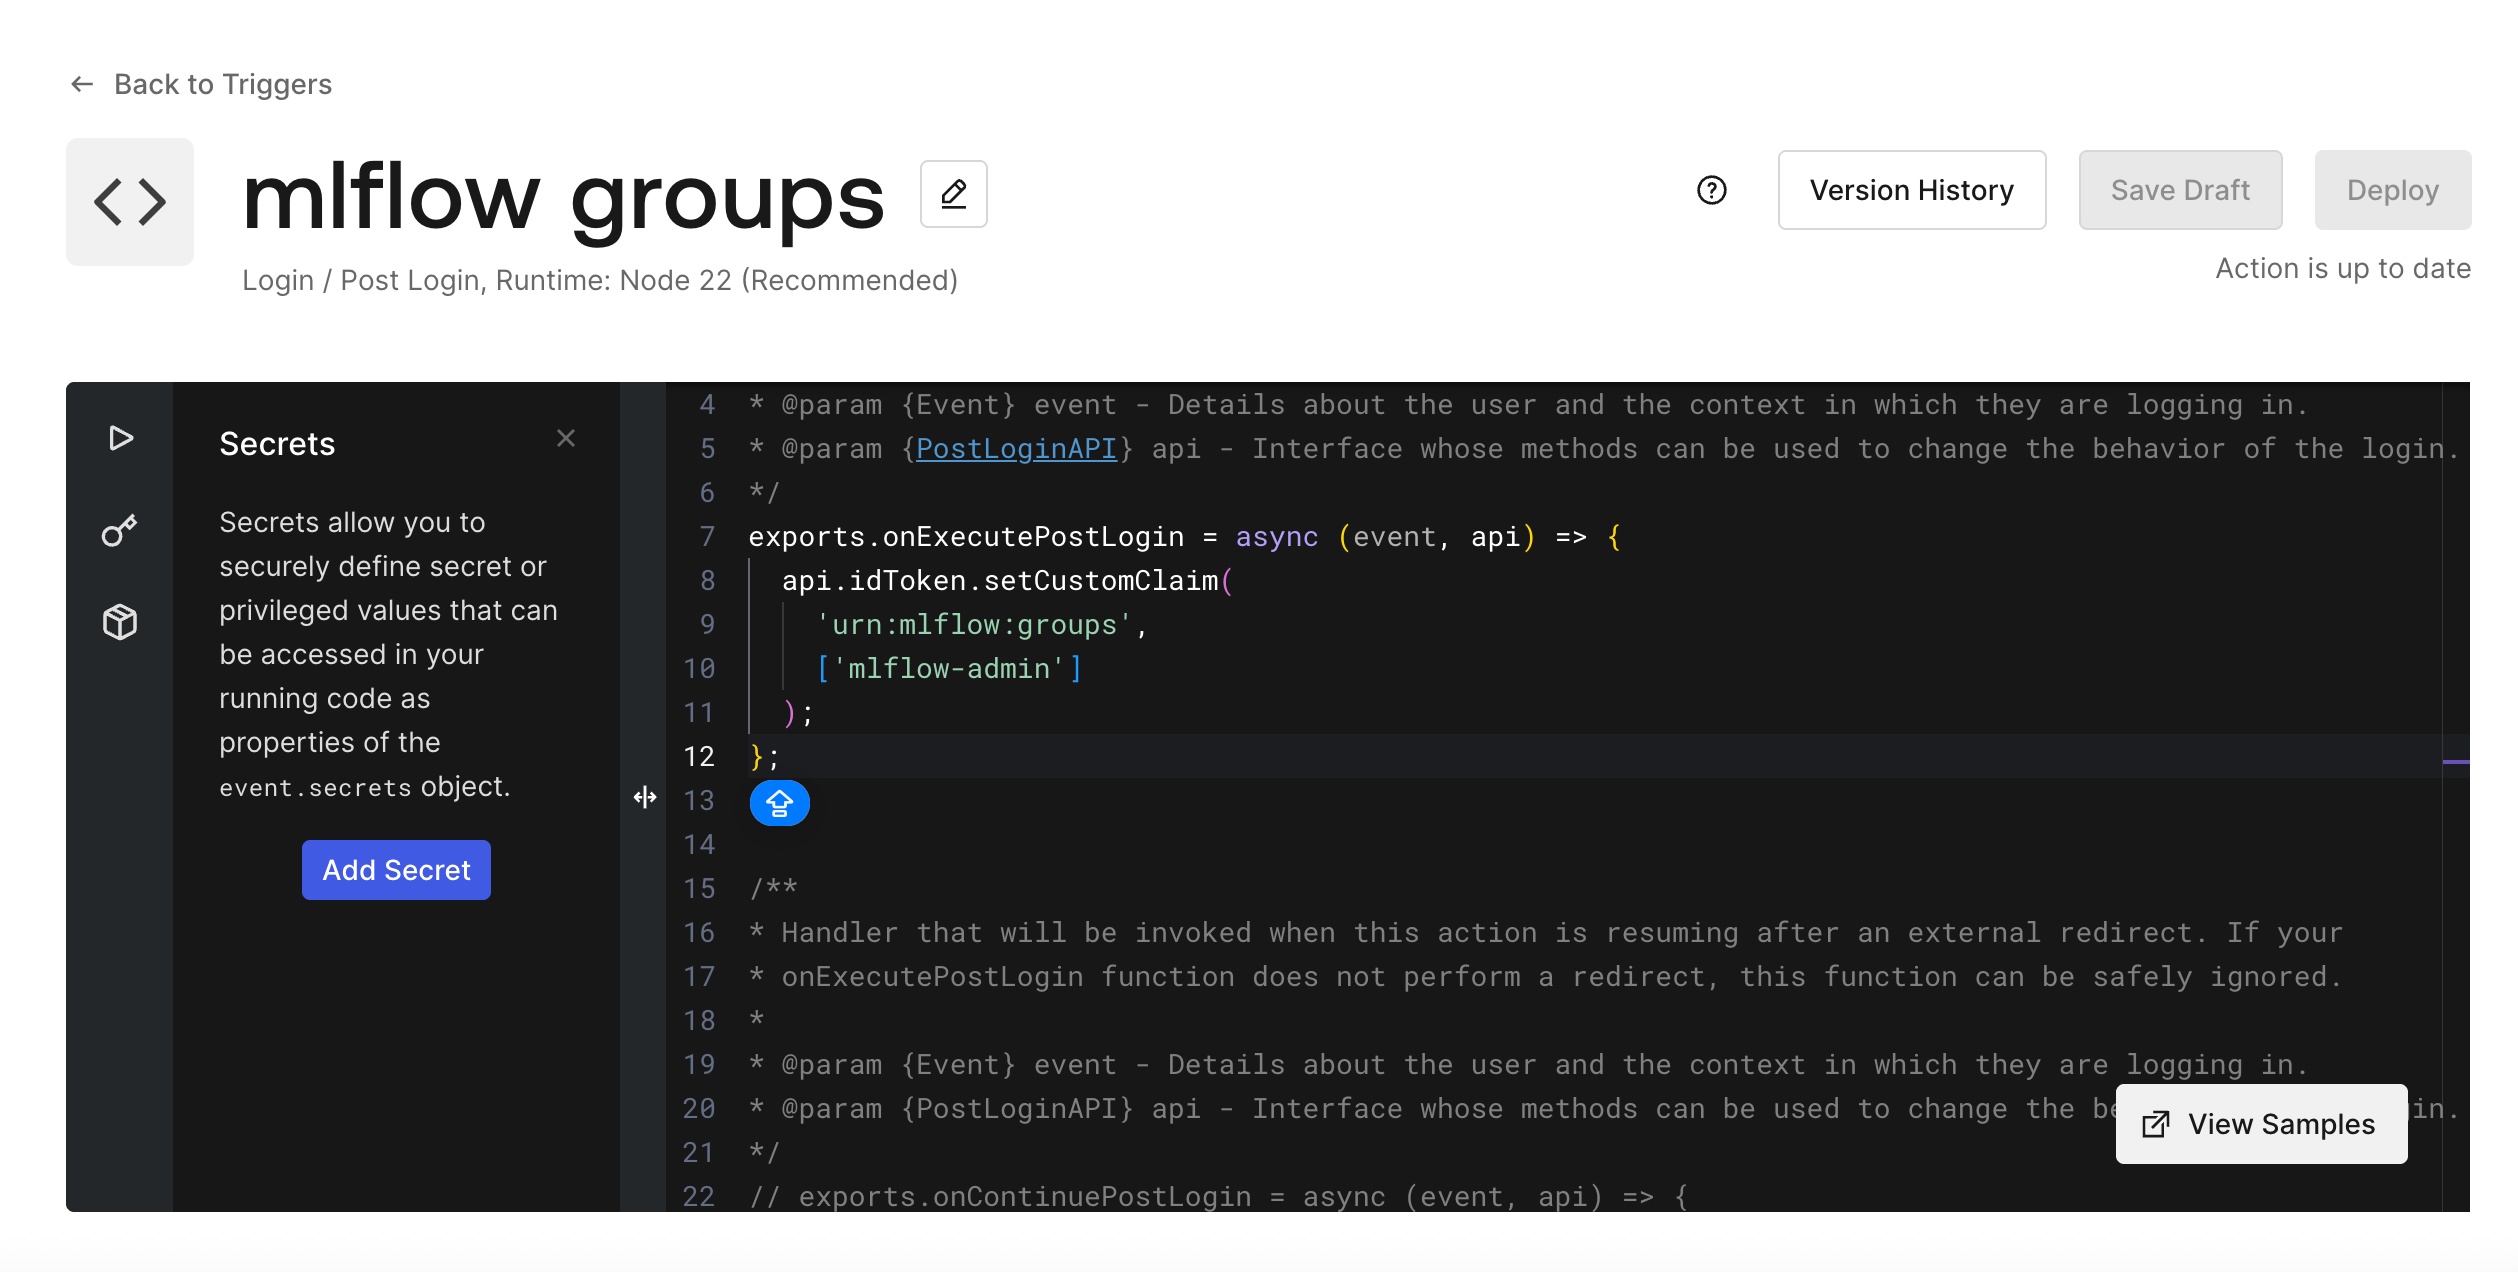
Then in Okta account sidebar menu: Actions -> Triggers -> Sign up & Login: post-login, install the trigger as follows:
Google Identity Platform configuration
- Register a Google Cloud account and open the console page.
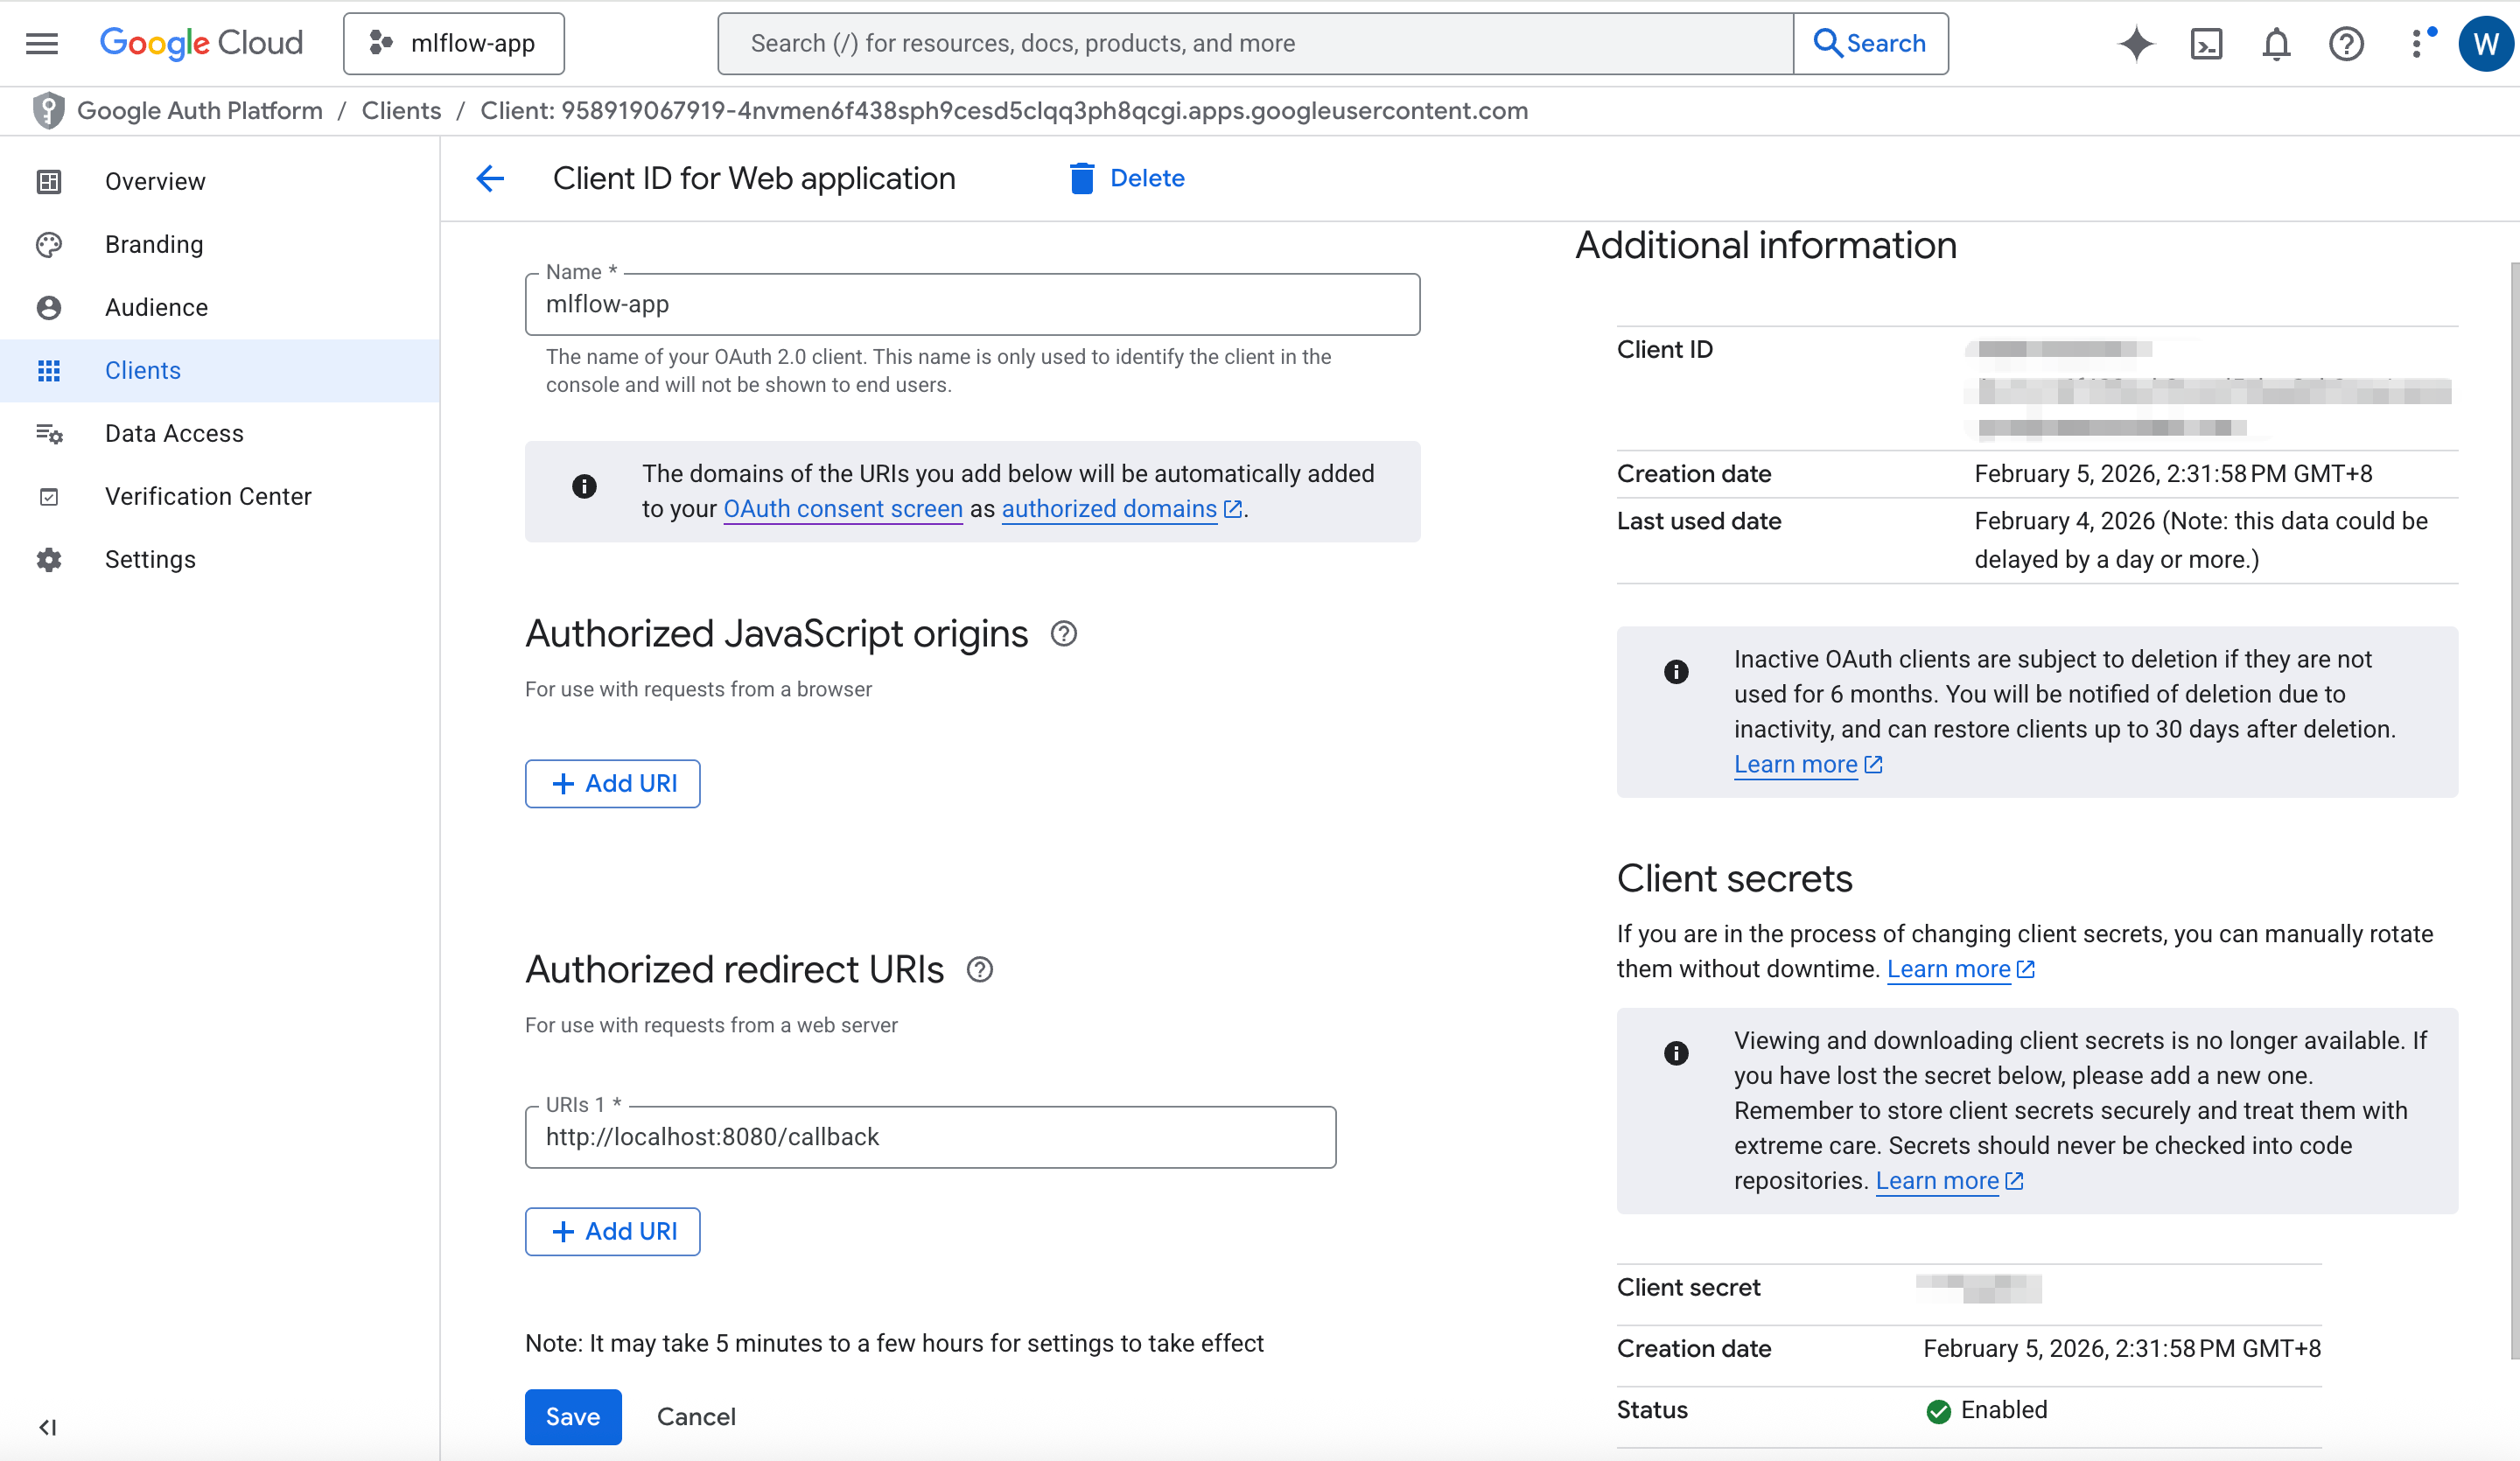
In the console, select APIs & Services → Credentials → Create credentials → OAuth client ID. Choose Application type: Web application, enter the client name, and add the callback URL (for example,
http://localhost:8080/callback) to Authorized redirect URIs.
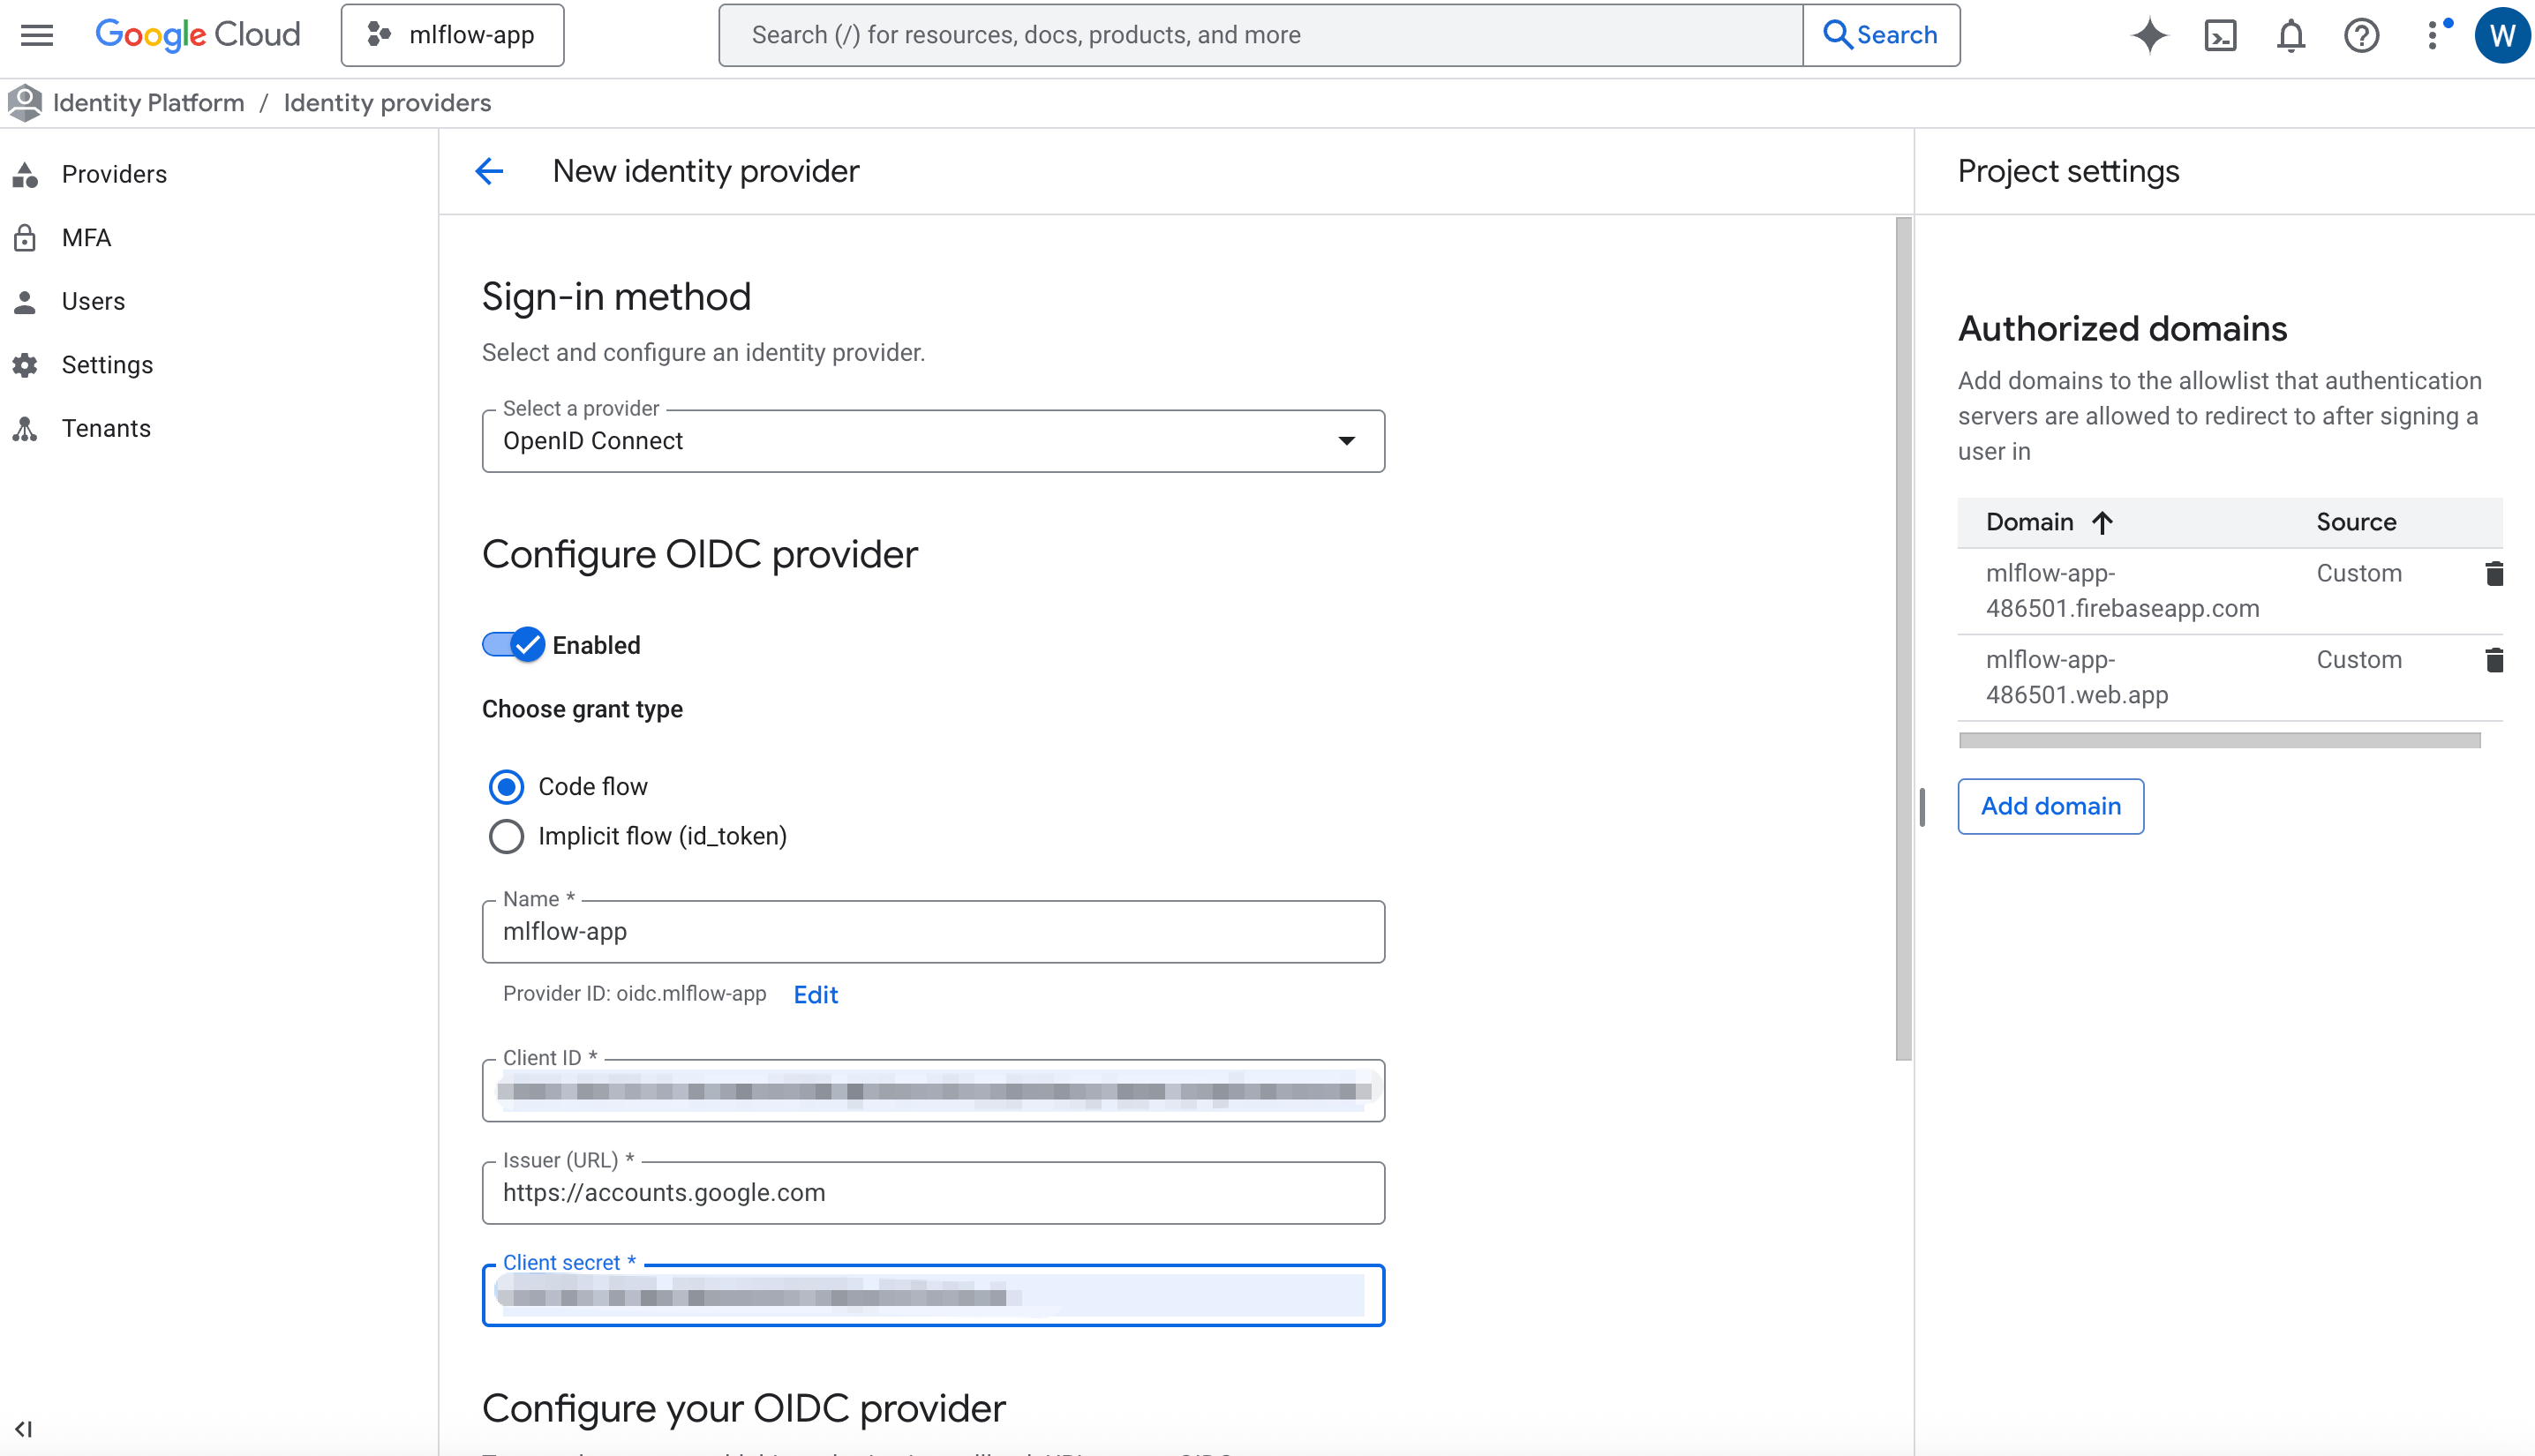
- Open Google Identity Platform console, add a provider with type "OpenID Connect" as follows:
- Unlike Okta Auth0, Google Identity Platform does not support the post-login trigger, so that we can't configure the user group setting there. Instead, we need to write a simple plugin as follows. The example group configuration plugin assigns the administrator group to a certain user, and assign the plain group to other users.
In the working directory that you launch the mlflow server, create a Python file named as "google_oidc_auth_plugin.py":
import requests


def get_user_groups(access_token):
    resp = requests.get(
        "https://www.googleapis.com/oauth2/v3/userinfo",
        headers={"Authorization": f"Bearer {access_token}"},
        timeout=10,
    )
    resp.raise_for_status()
    userinfo = resp.json()

    # userinfo contains: email, name, picture, sub, etc.
    email = userinfo.get("email")

    if email == "somebody@gmail.com":
        return ["mlflow-admin"]
    return ["mlflow"]
The plugin Python file will be used by the mlflow server's OIDC auth plugin, see the environment variable 'OIDC_GROUP_DETECTION_PLUGIN' setting in the following "Deploy MLflow server with the OIDC plugin" section.
Aws Cognito configuration
-
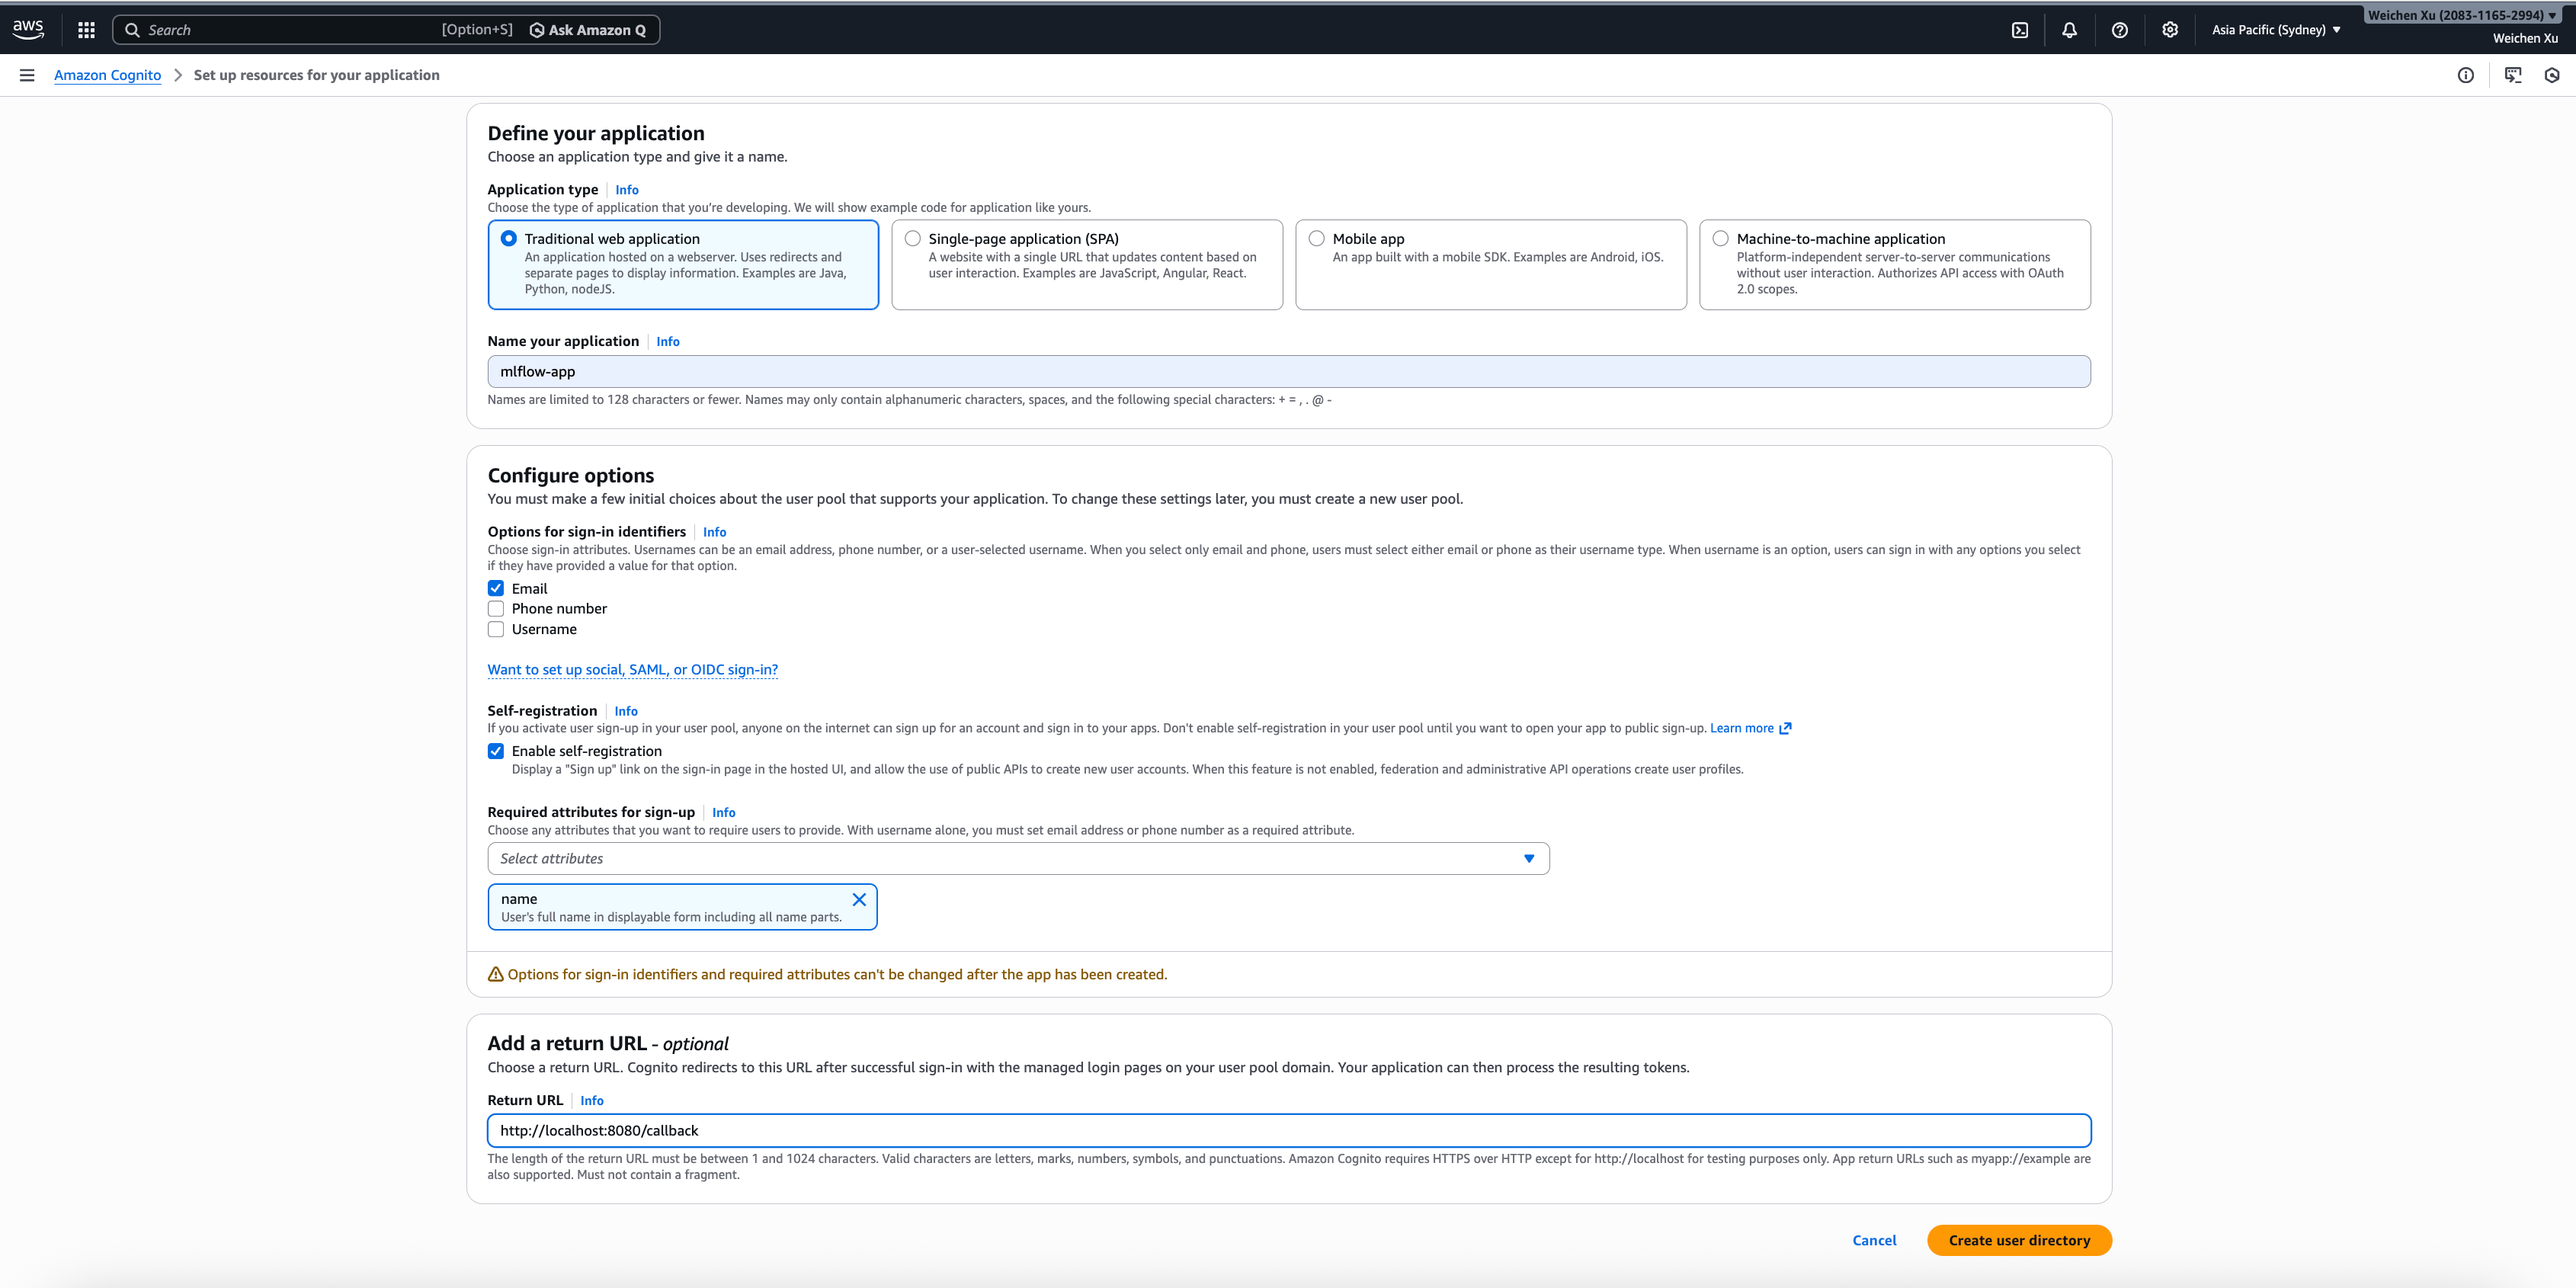
In AWS console, select menu: Amazon Cognito -> User pools -> Create user pool, and create a user pool as follows, note that the field "Required attributes for sign-up" should contain "name", and set the a return URL to the OIDC redirect URL like "http://localhost:8080/callback".
-
In the created user pool, select menu: Applications -> App Clients -> Create app client, and create a app client of Traditional web application, and set the return URL to the OIDC redirect URL like "http://localhost:8080/callback". Then, edit the "Managed login pages configuration" for the app client as follows:

-
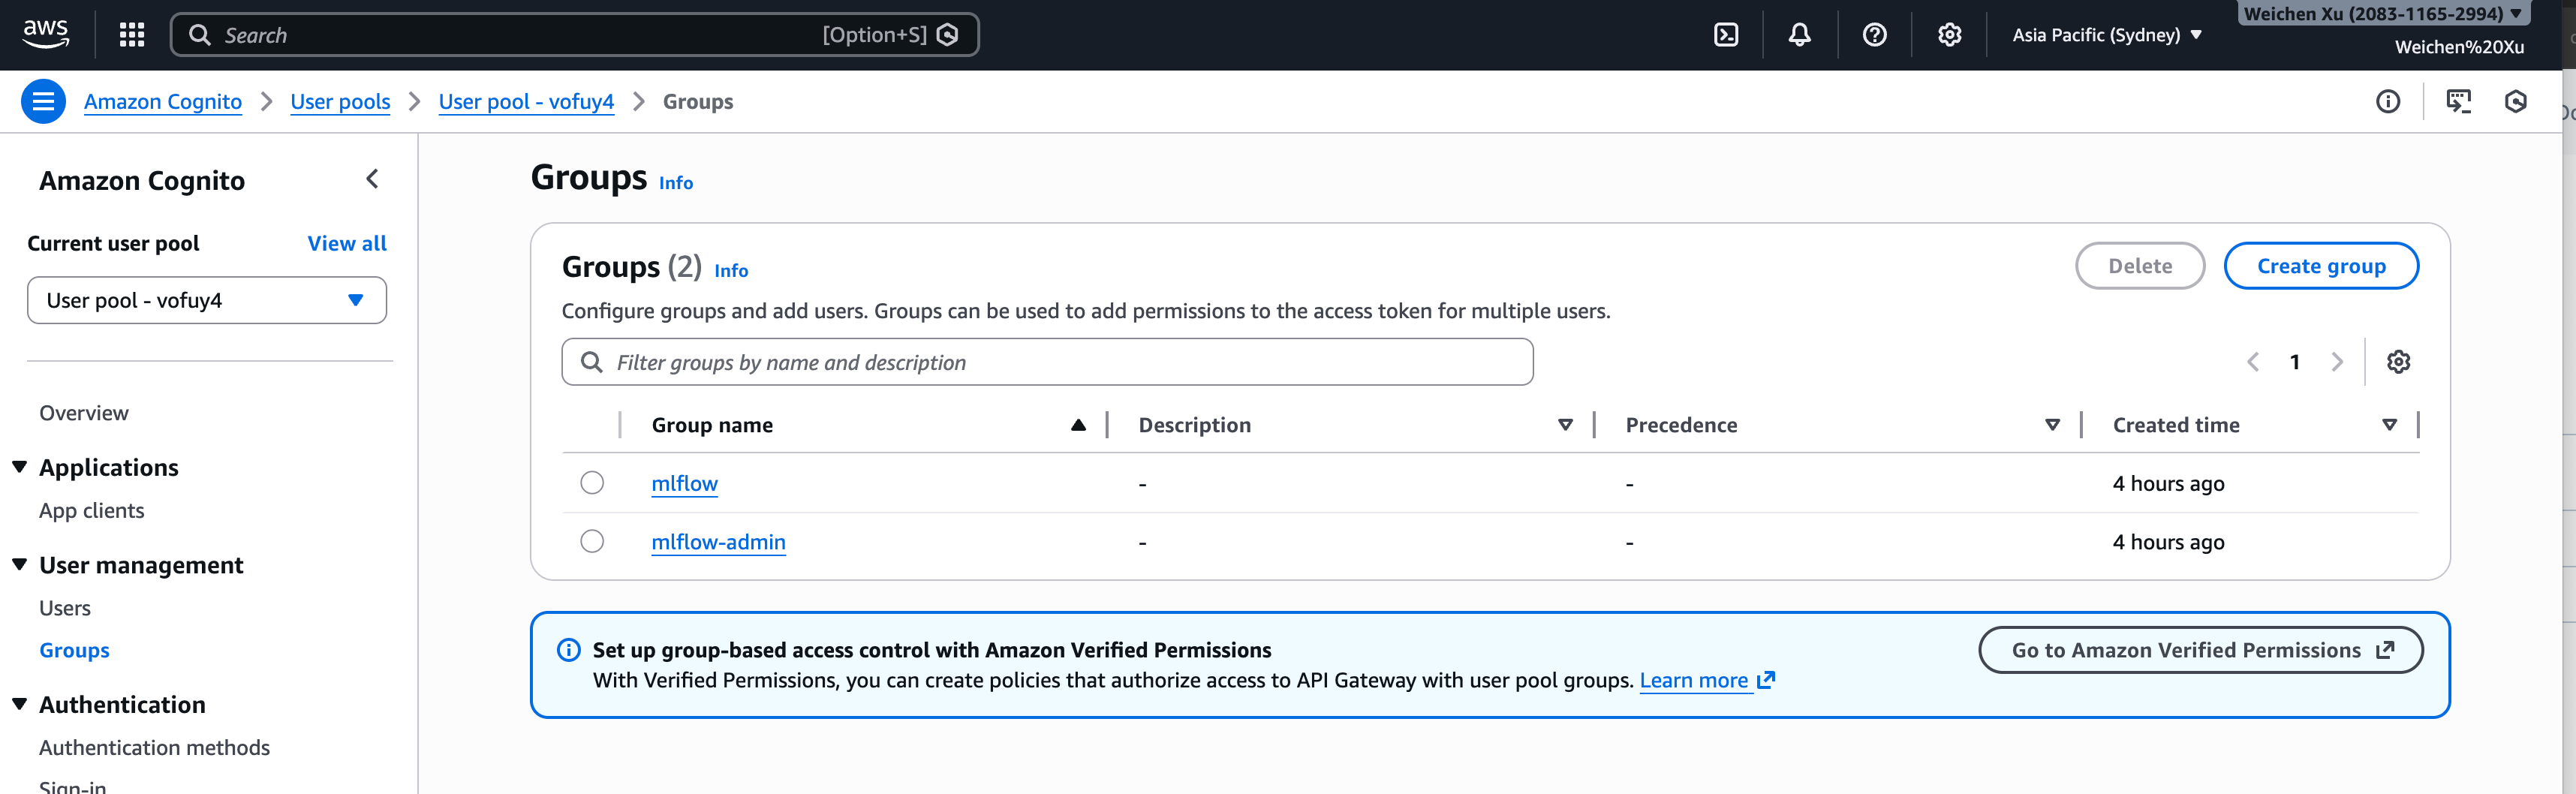
In the created user pool, select menu: User Management -> Groups -> Create Group, create 2 user groups: "mlflow" and "mlflow-admin" as follows:
-
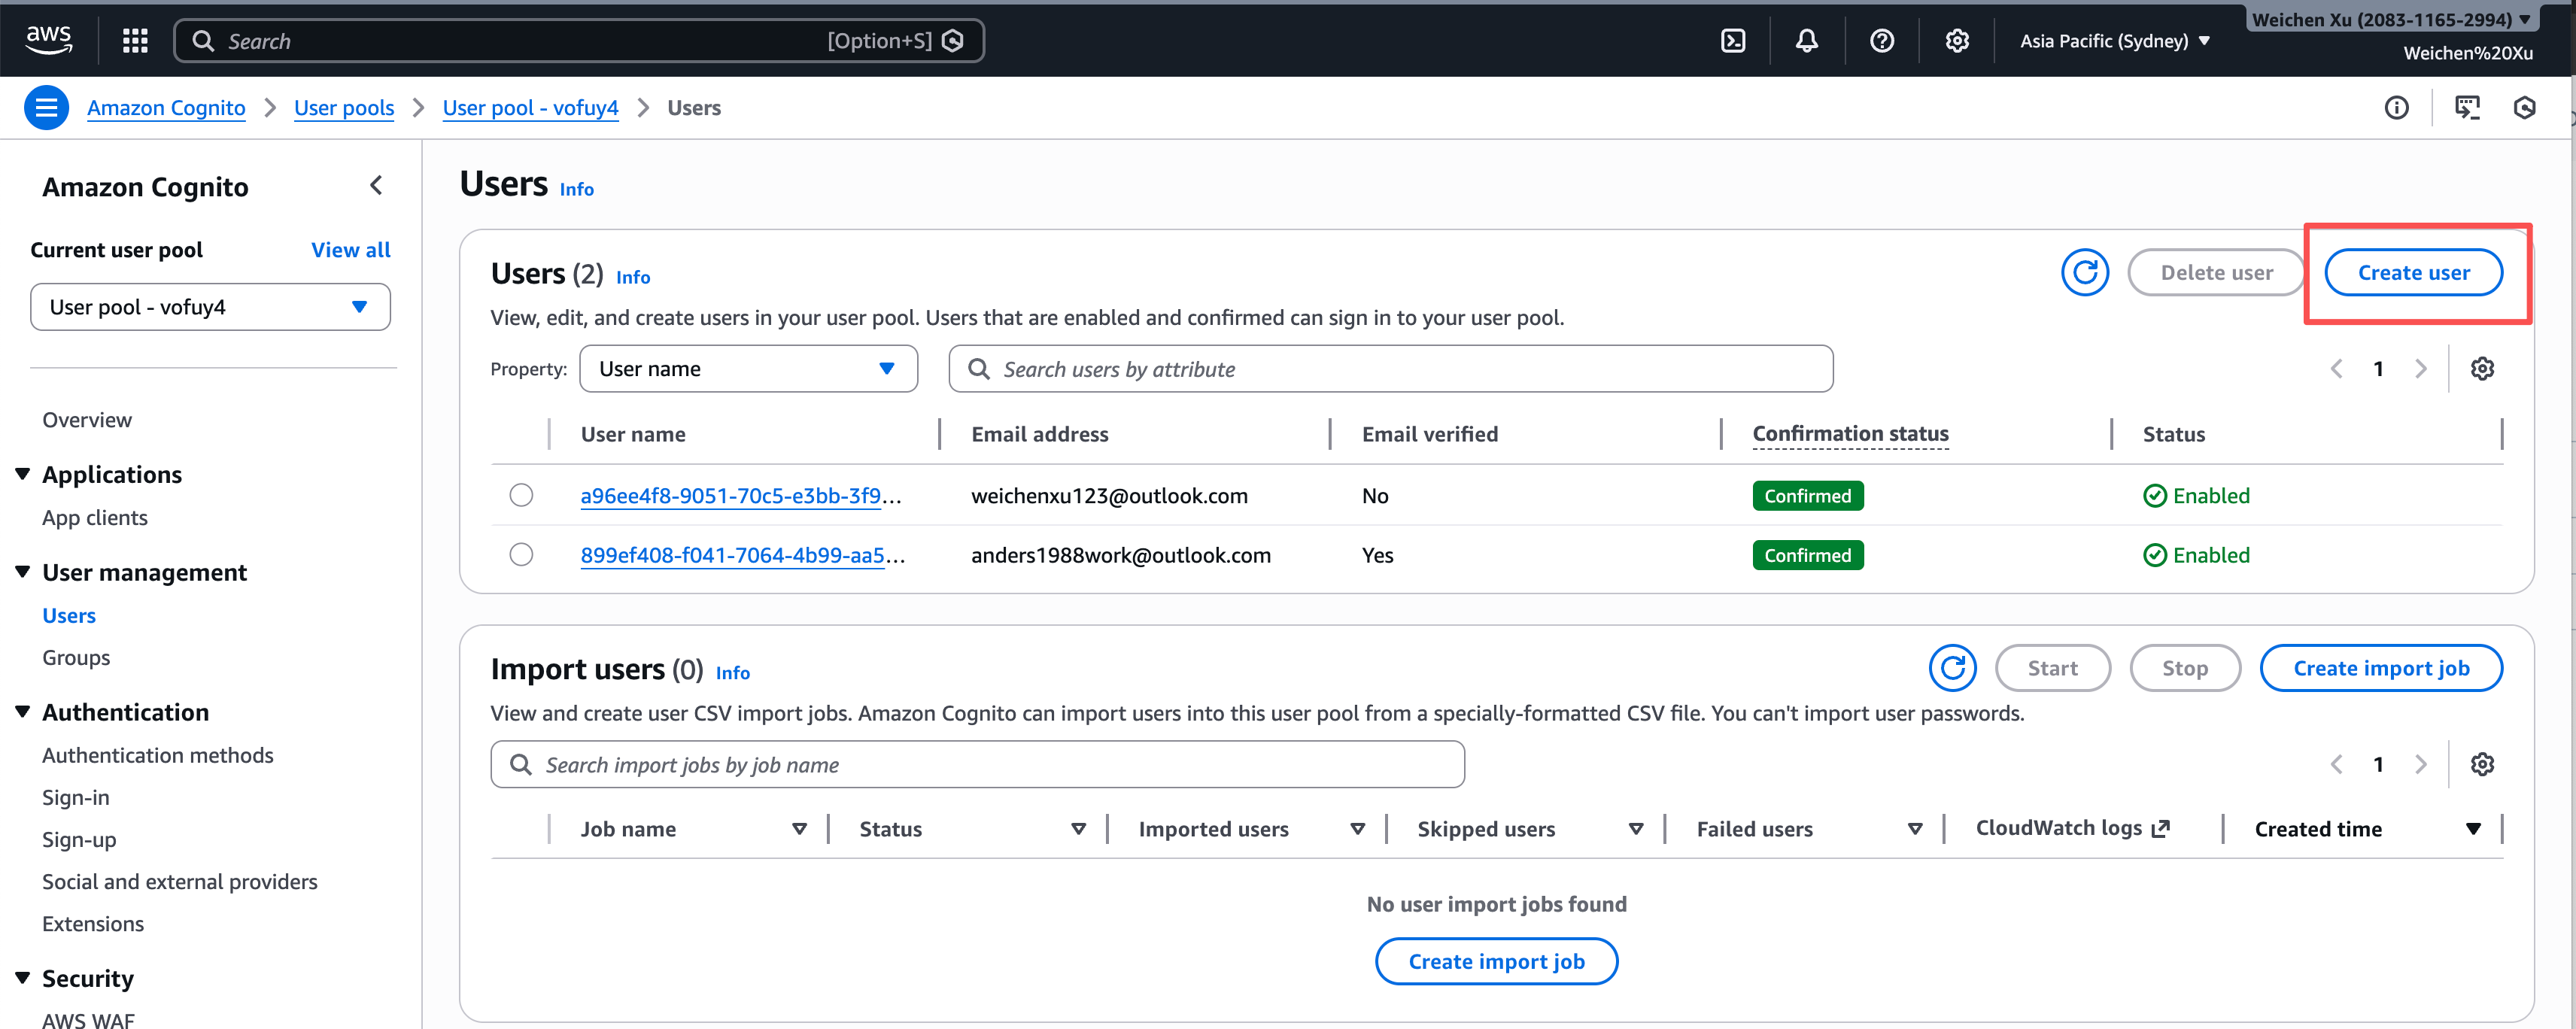
In the created user pool, select menu: User Management -> Users -> Create user, Create users and assign user to either "mlflow" or "mlflow-admin" group as follows:
Azure Entra ID configuration
-
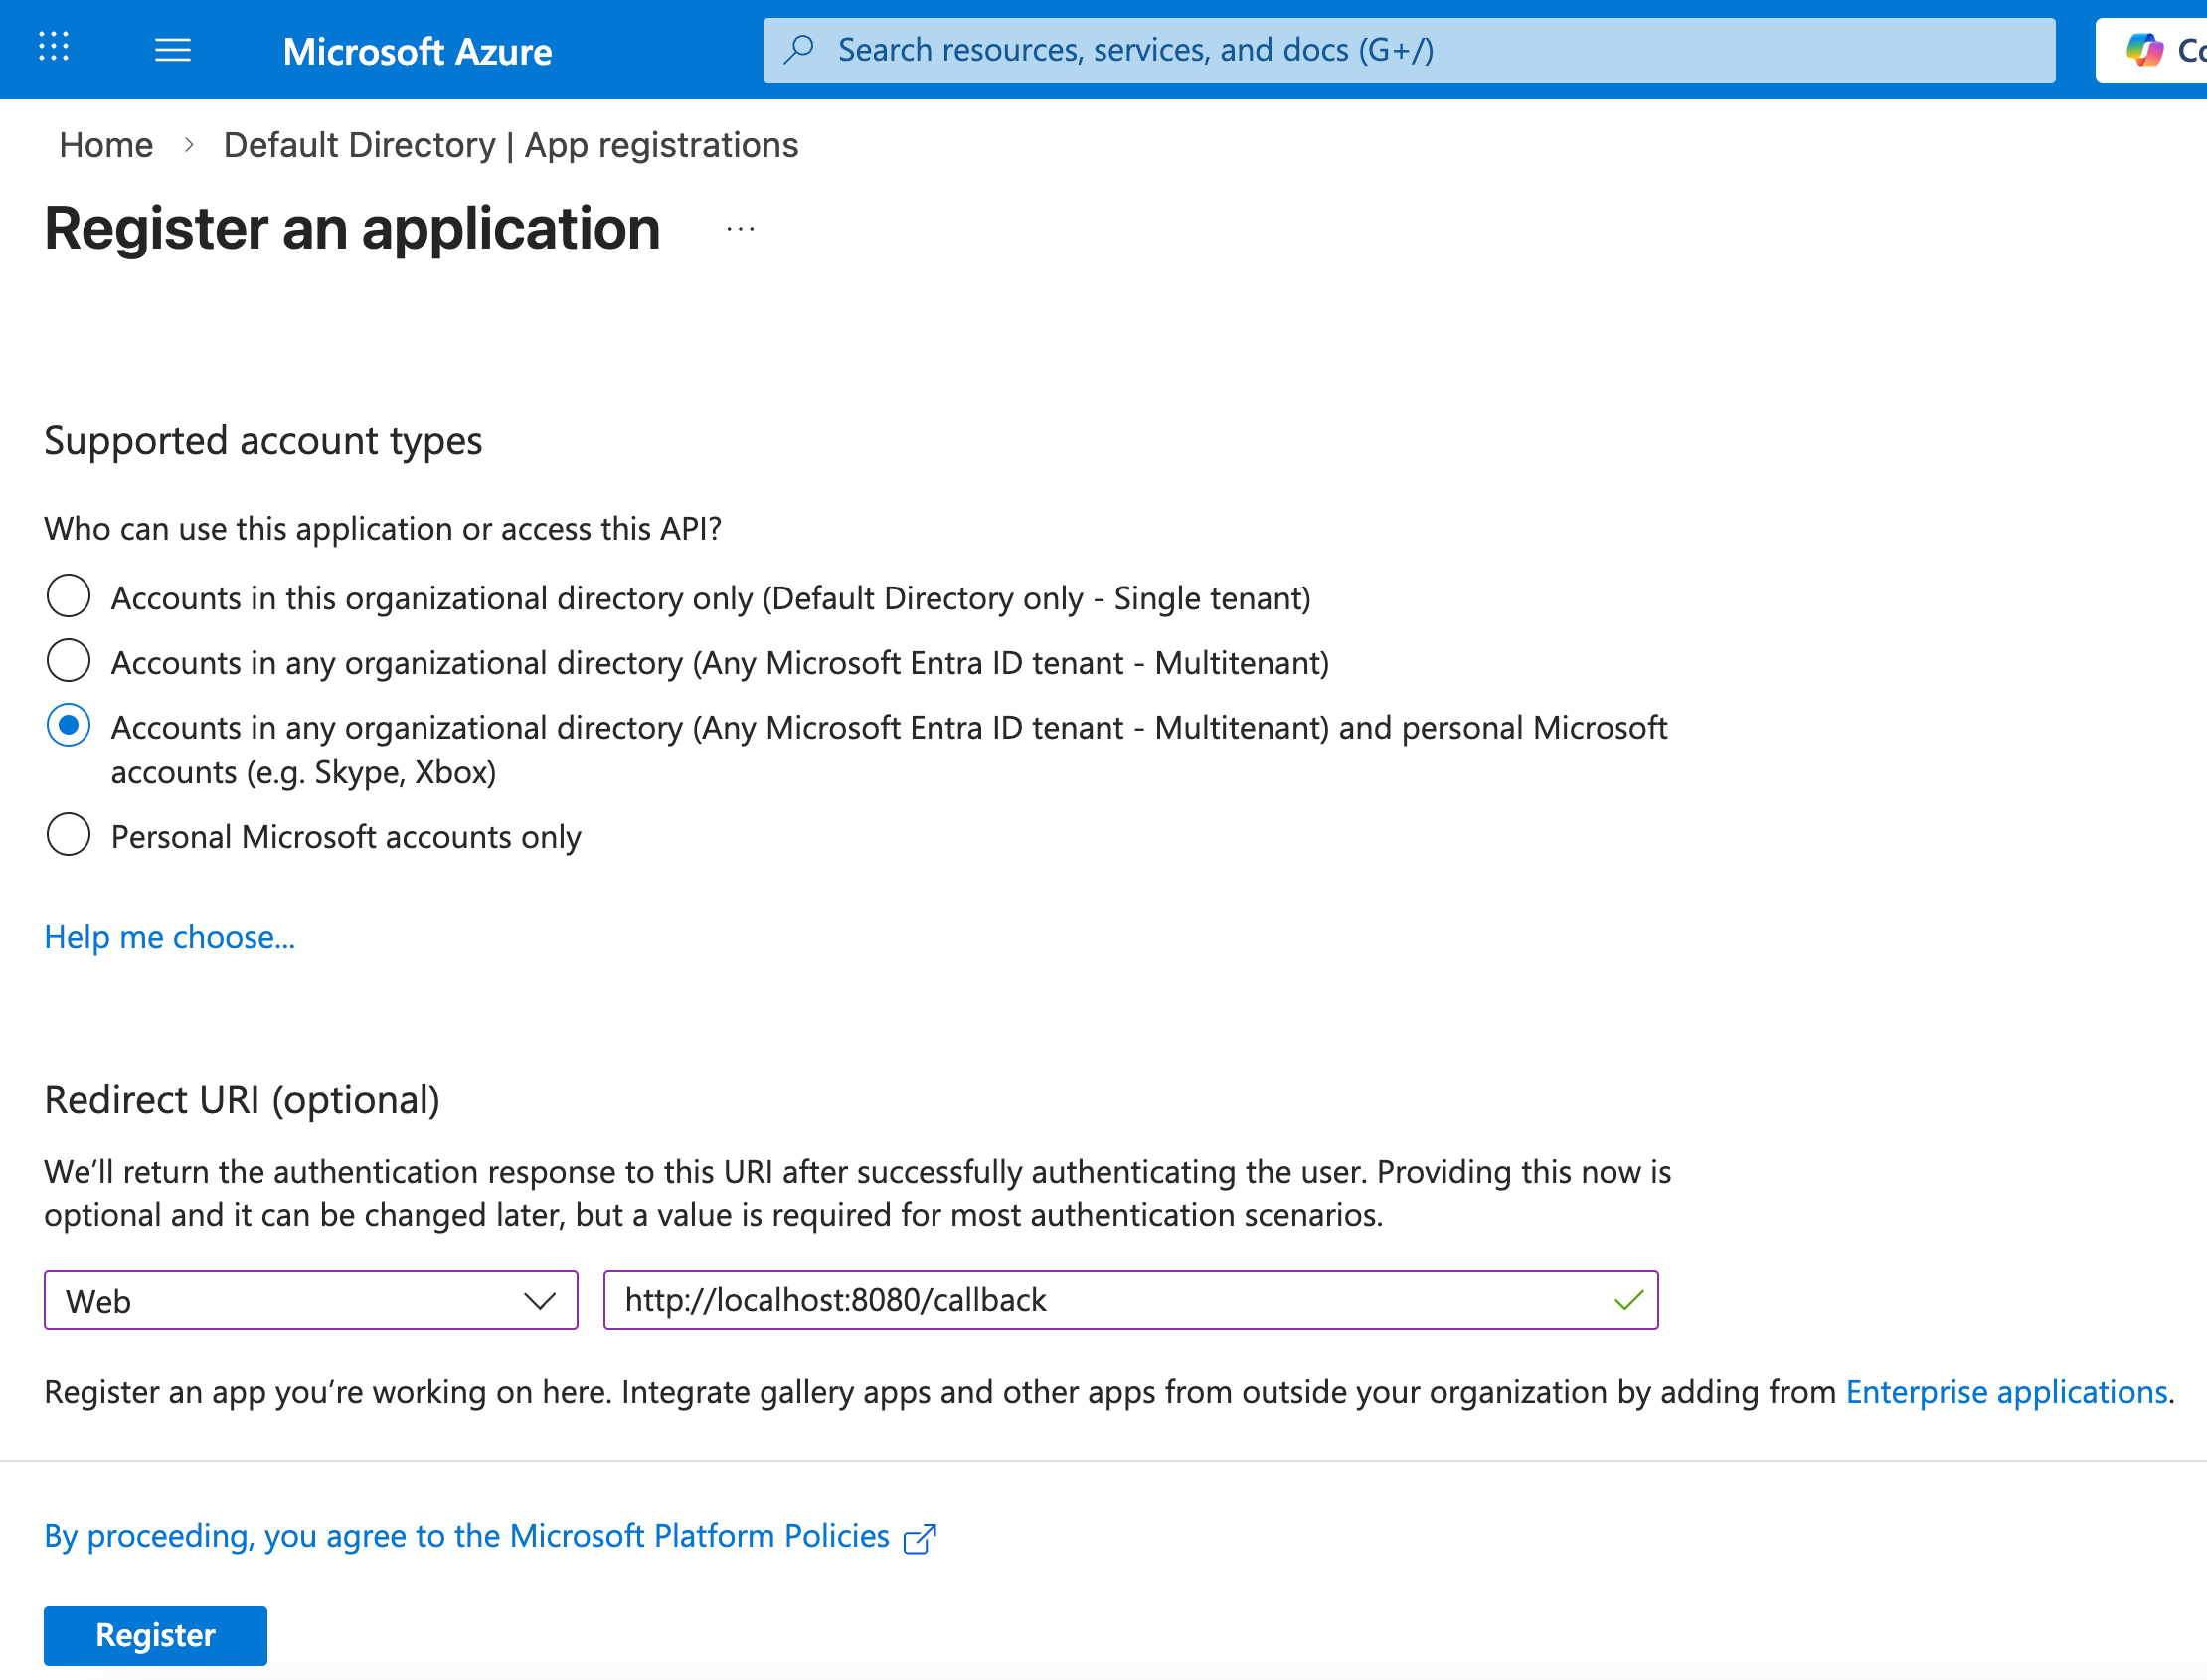
In the Azure portal Microsoft Entra ID portal, select menu: Manage -> App registrations, register an application as follows:
-
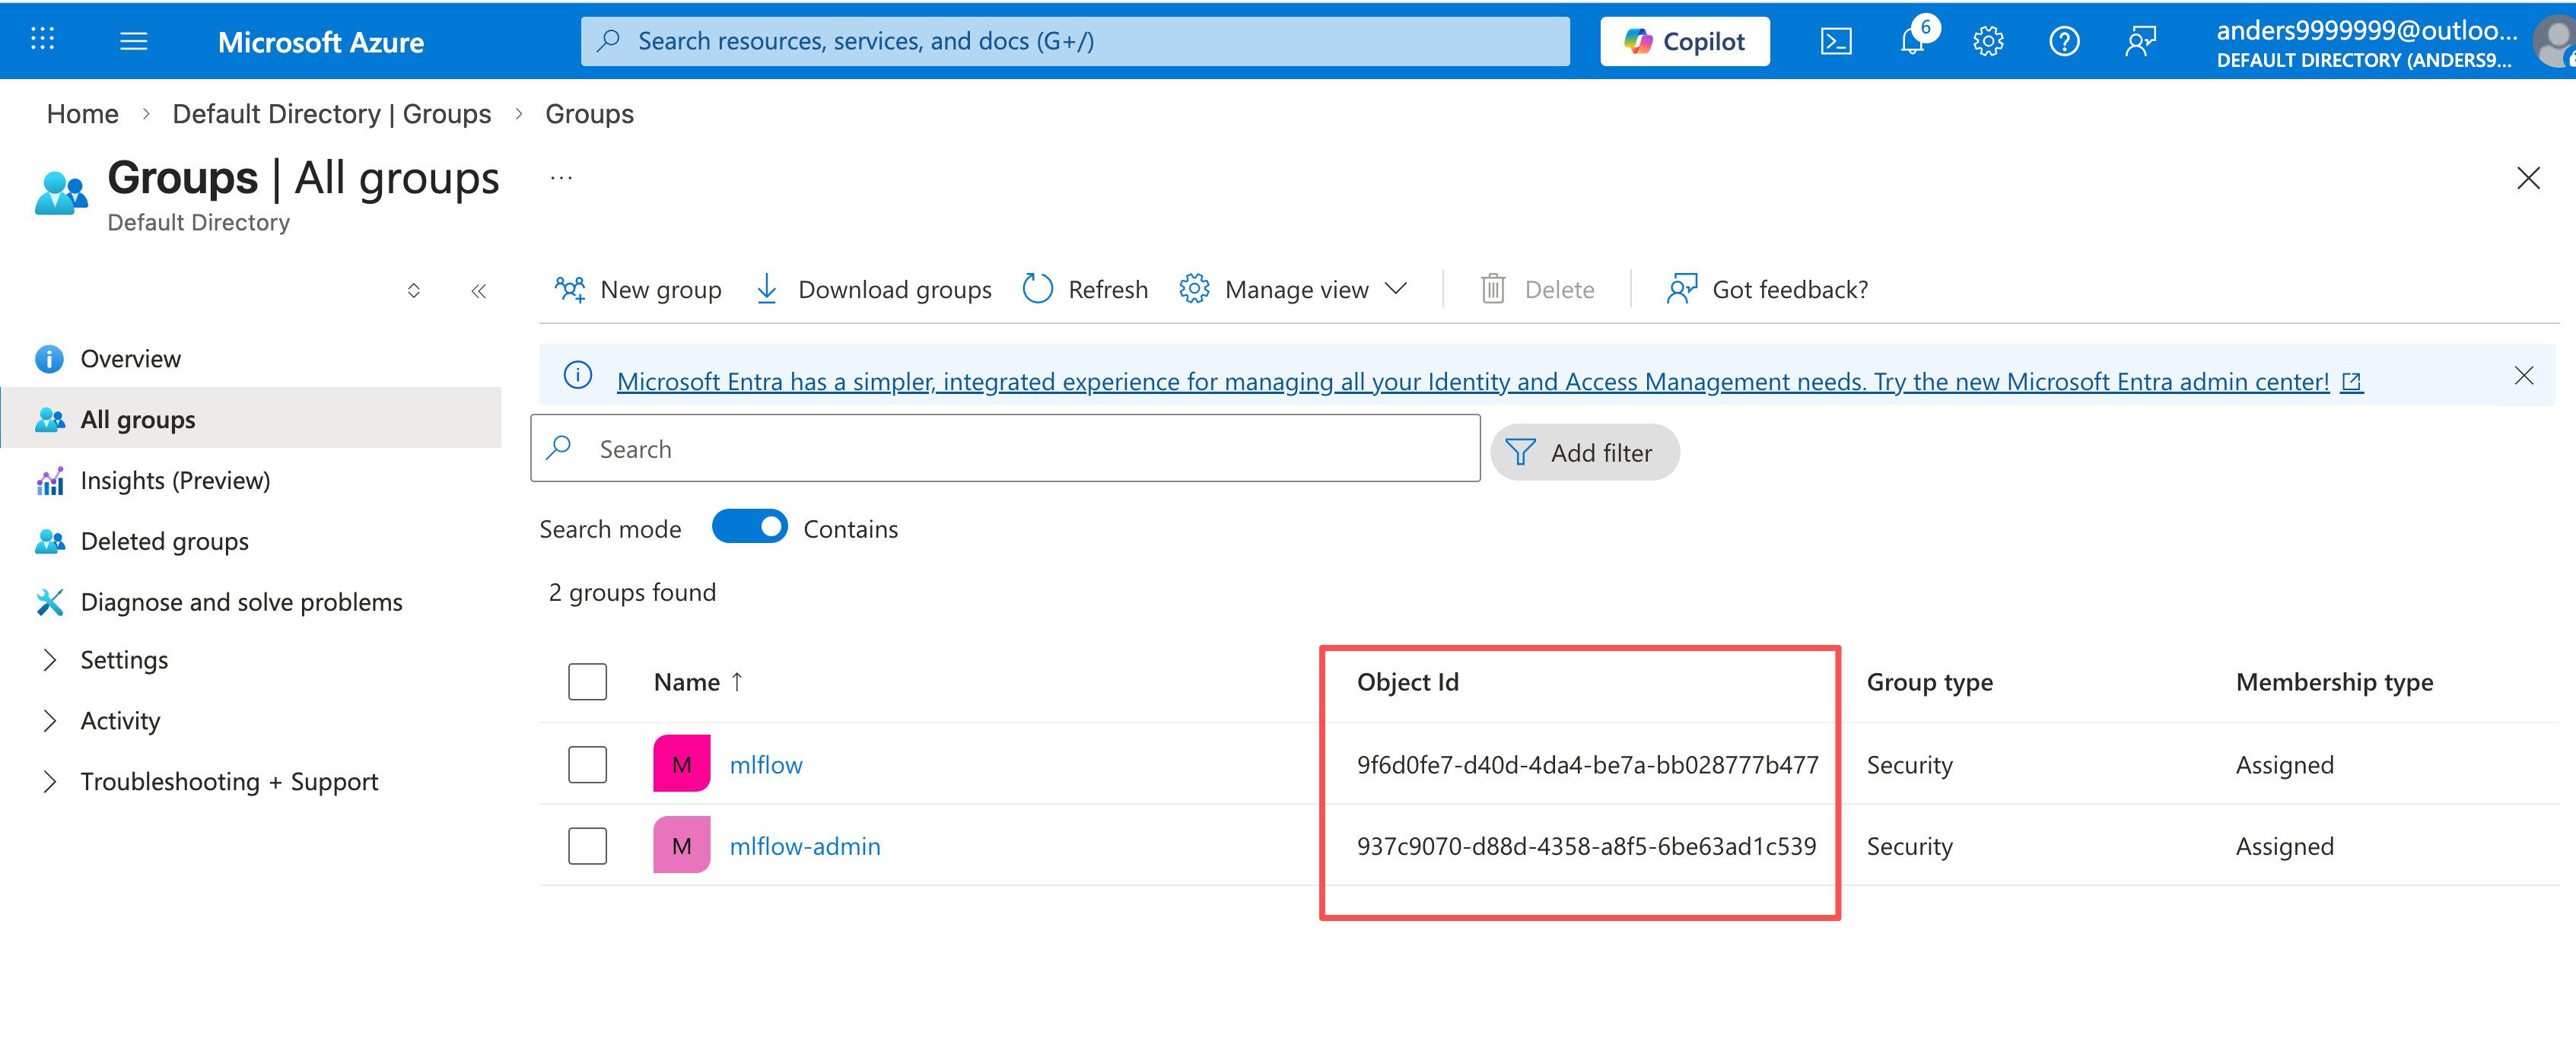
In the Azure portal Microsoft Entra ID portal, select menu: Manage -> Groups -> New group, create 2 groups "mlflow" and "mlflow-admin" as follows:
-
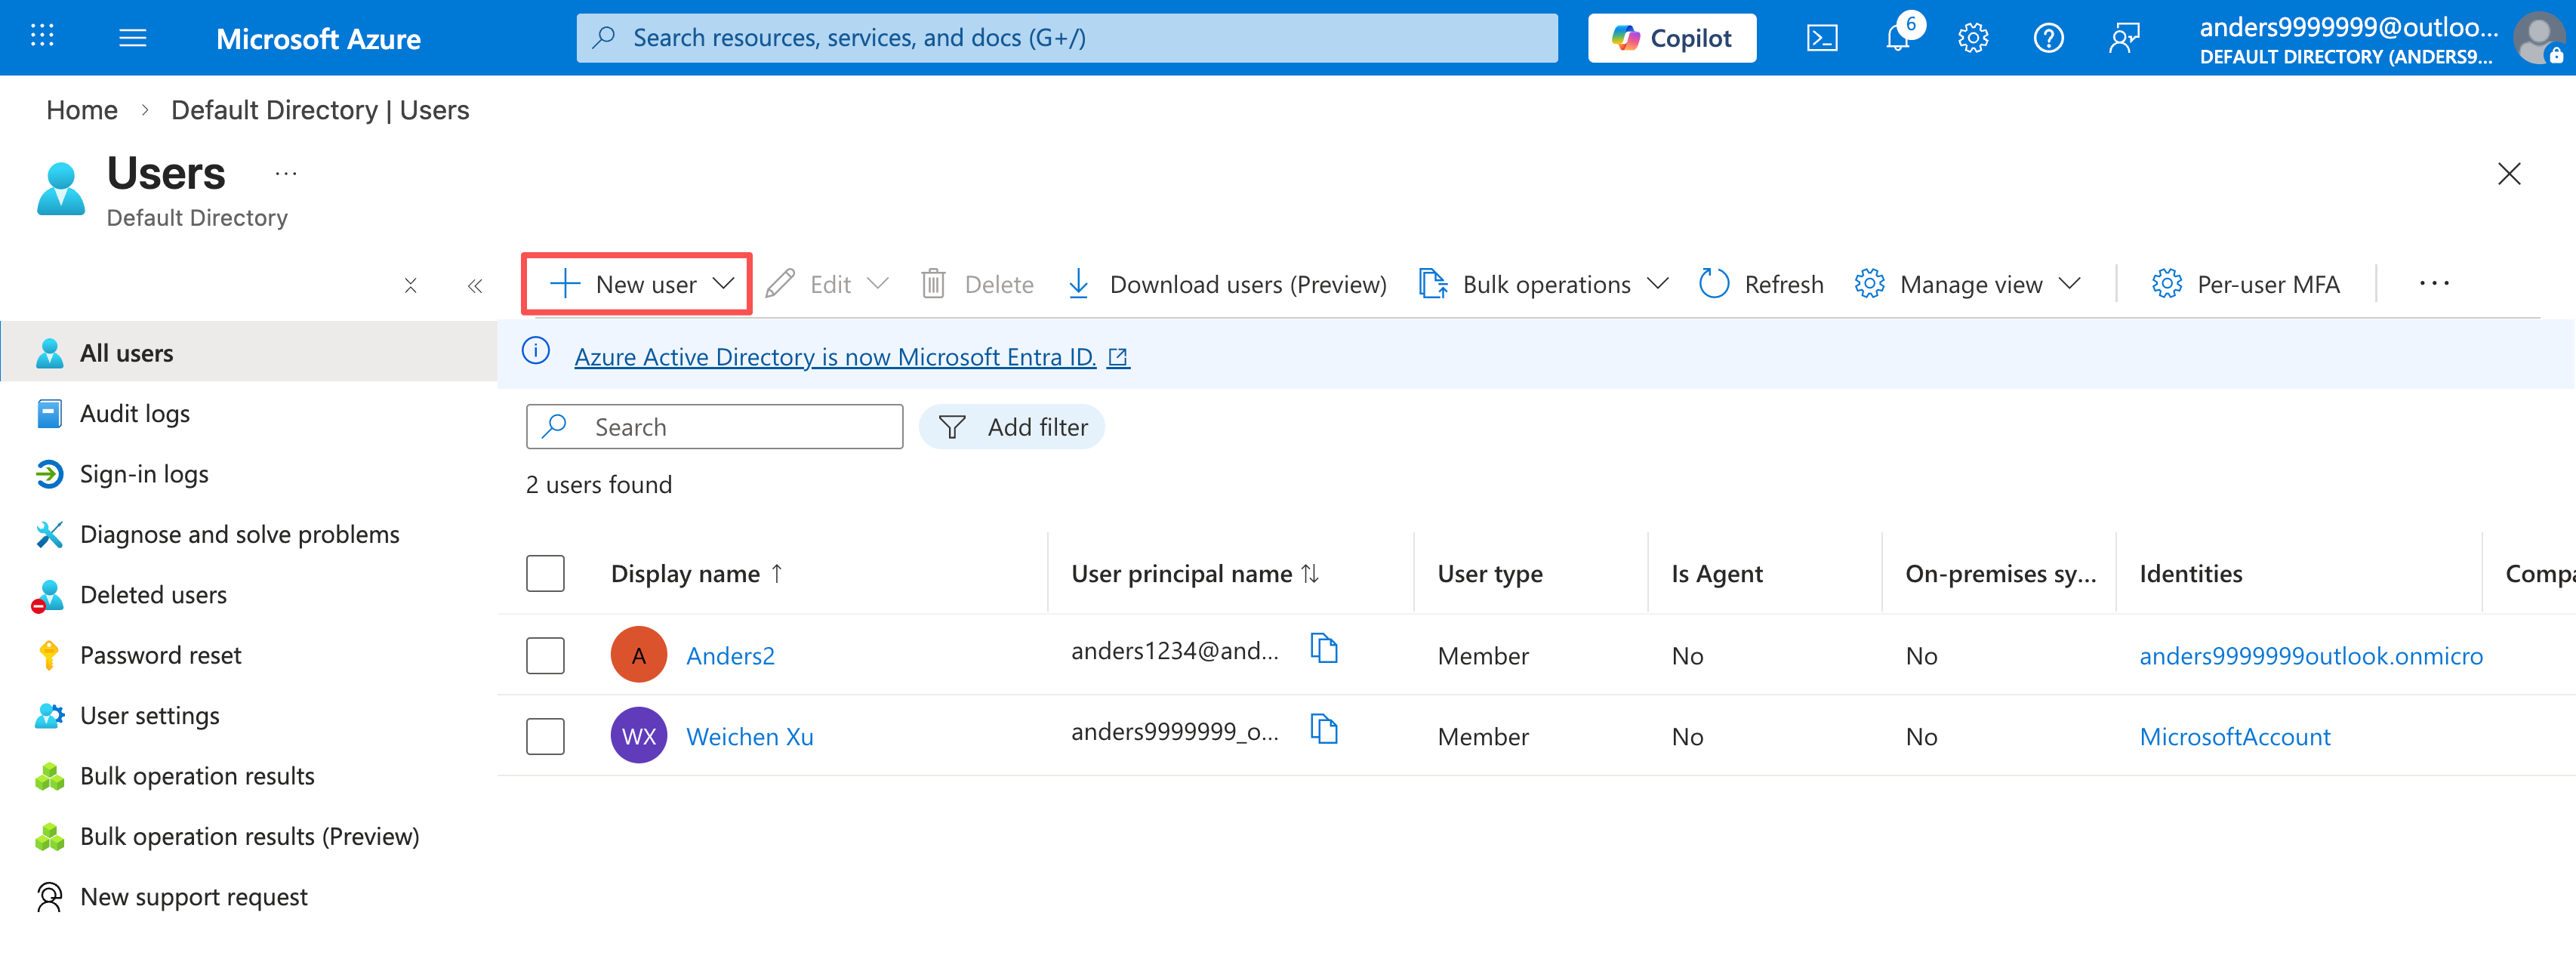
In the Azure portal Microsoft Entra ID portal, select menu: Manage -> Users -> New user, create users and assign users to mlflow or mlflow-admin groups as follows:
-
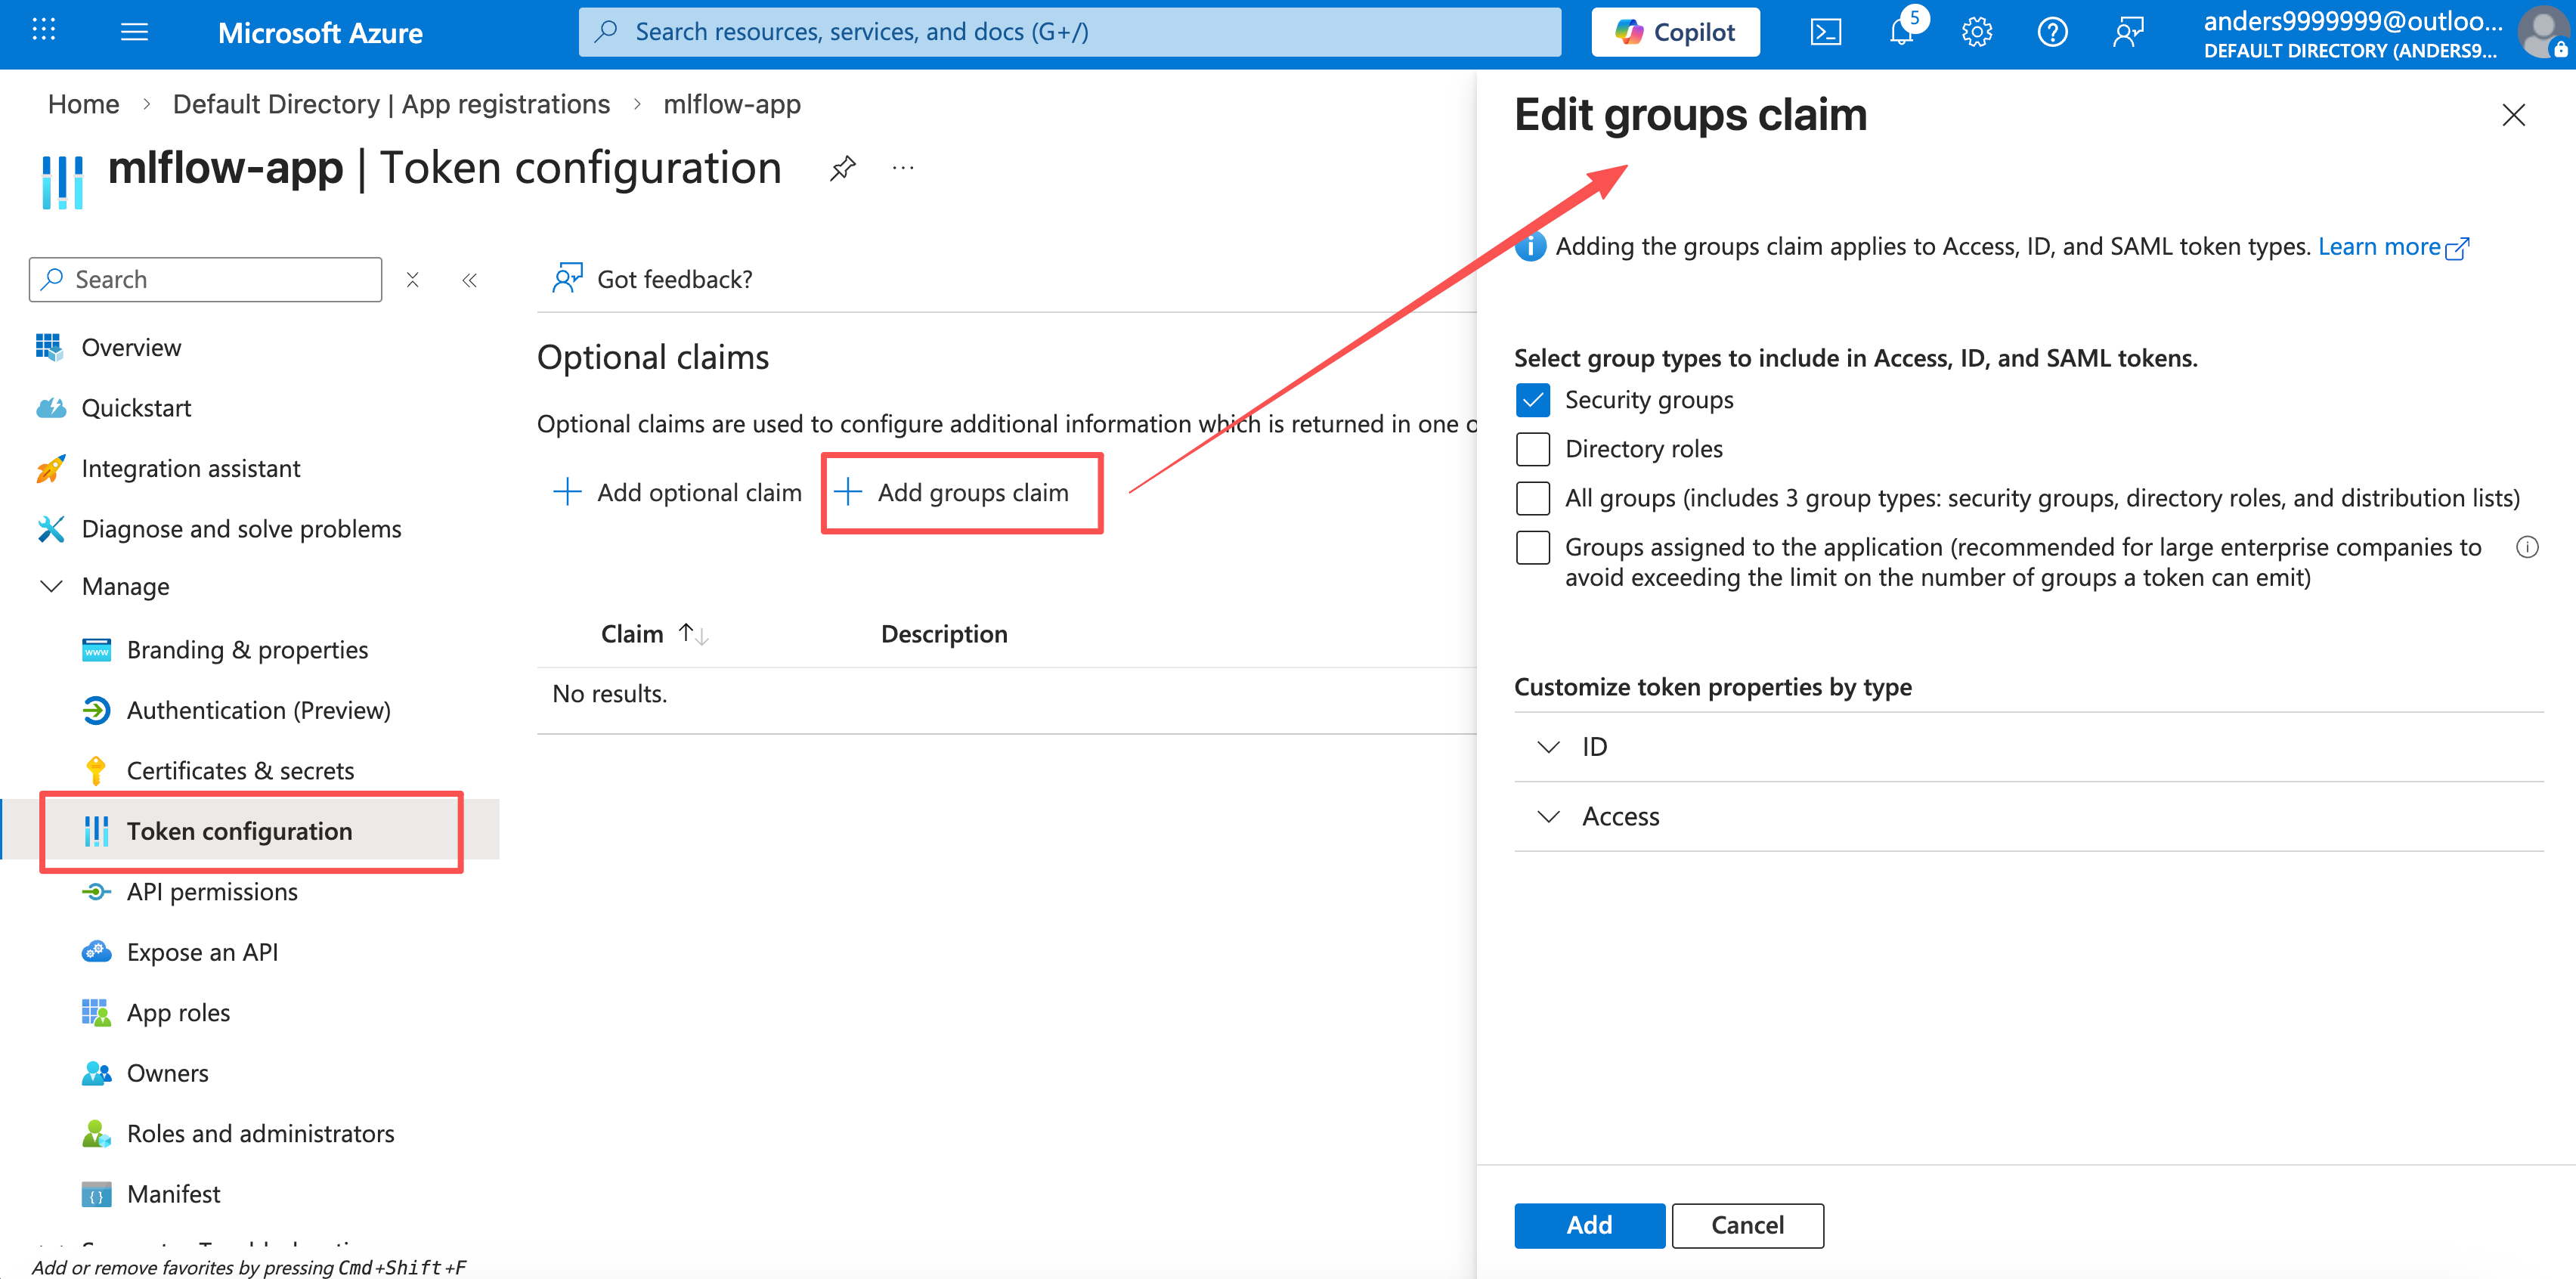
In the registered application, select menu: Manage -> Token configuration -> Add groups claim, add group claims as follows:
Deploy MLflow server with the OIDC plugin
Install mlflow OIDC auth plugin as follows:
pip install 'mlflow-oidc-auth[full]'
Before launching the mlflow server with the OIDC plugin, a couple of environment variables must be set. The following commands set the environment variables that are common for Okta Auth0 / Google Identity platform / AWS Cognito / Azure Entra ID:
# You can view the OIDC client ID and client secret value in the application information page in
# the Okta Auth0 / Google Identity platform / AWS Cognito / Azure Entra ID portal.
export OIDC_CLIENT_ID=...
export OIDC_CLIENT_SECRET=...

# this is the callback URL (redirect URI) that is configured for the OIDC application.
export OIDC_REDIRECT_URI="http://localhost:8080/callback"

# NOTE: OAuth 2.0 and OIDC define the scope parameter as a space-separated list of scope values

export OIDC_SCOPE="openid profile email"

# Set a stable, secret value (e.g. 32+ random characters) and keep it the same across restarts and replicas.

# If you don't set it, the app will use an auto-generated key that changes on server restart / UI page reloading

# and breaks sessions.

export SECRET_KEY="your-stable-secret-at-least-32-chars-long"
then, we need to set specific environment variables for different OIDC cloud providers:
For Okta Auth0, we need to set:
# The ${domain} is the domain value that you can view on the Okta application's basic information page.
export OIDC_DISCOVERY_URL="https://${domain}/.well-known/openid-configuration"

# this value must match the key used in the Okta post-login trigger action "api.idToken.setCustomClaim"
export OIDC_GROUPS_ATTRIBUTE="urn:mlflow:groups"
For Google Identity Platform, we need to set:
export OIDC_DISCOVERY_URL="https://accounts.google.com/.well-known/openid-configuration"

# `OIDC_GROUP_DETECTION_PLUGIN` is only required for Google Identity Platform configuration.
# assuming you put the plugin Python file under current directory and the file name is
# 'google_oidc_auth_plugin.py'. For plugin code, please refer to the section
# "Google Identity Platform configuration".
export OIDC_GROUP_DETECTION_PLUGIN=google_oidc_auth_plugin
For Aws Cognito, we need to set:
# The ${region} is your AWS account region, e.g. "ap-southeast-2"
# The ${user_pool_id} is the user pool ID, e.g. ap-southeast-2_XXXXXXXXX
export OIDC_DISCOVERY_URL="https://cognito-idp.${region}.amazonaws.com/${user_pool_id}/.well-known/openid-configuration"

export OIDC_GROUPS_ATTRIBUTE=cognito:groups
For Azure Entra ID, we need to set:
# You can view the ${tenant-id} in the "overview" page of the Azure Entra ID portal.
export OIDC_DISCOVERY_URL="https://login.microsoftonline.com/${tenant-id}/v2.0/.well-known/openid-configuration"

# The OIDC_GROUP_NAME must be set to the ID of "mlflow" group that is created in Azure Entra.
# You can view the group ID in the Azure Entra "all groups" portal.
export OIDC_GROUP_NAME=<the corresponding Azure Entra group ID>
# The OIDC_GROUP_NAME must be set to the ID of "mlflow-admin" group that is created in Azure Entra.
# You can view the group ID in the Azure Entra "all groups" portal.
export OIDC_ADMIN_GROUP_NAME=<the corresponding Azure Entra group ID>
After all environment variables are set, we can start the MLflow server with the OIDC plugin enabled as follows:
mlflow server --app-name oidc-auth --host 0.0.0.0 --port 8080
Then you can open URL "http://localhost:8080/" and it will jump to the OIDC login page, log in as an Okta / Google / AWS / Azure user, after login, it will jump to the OIDC permission configuration page as follows:
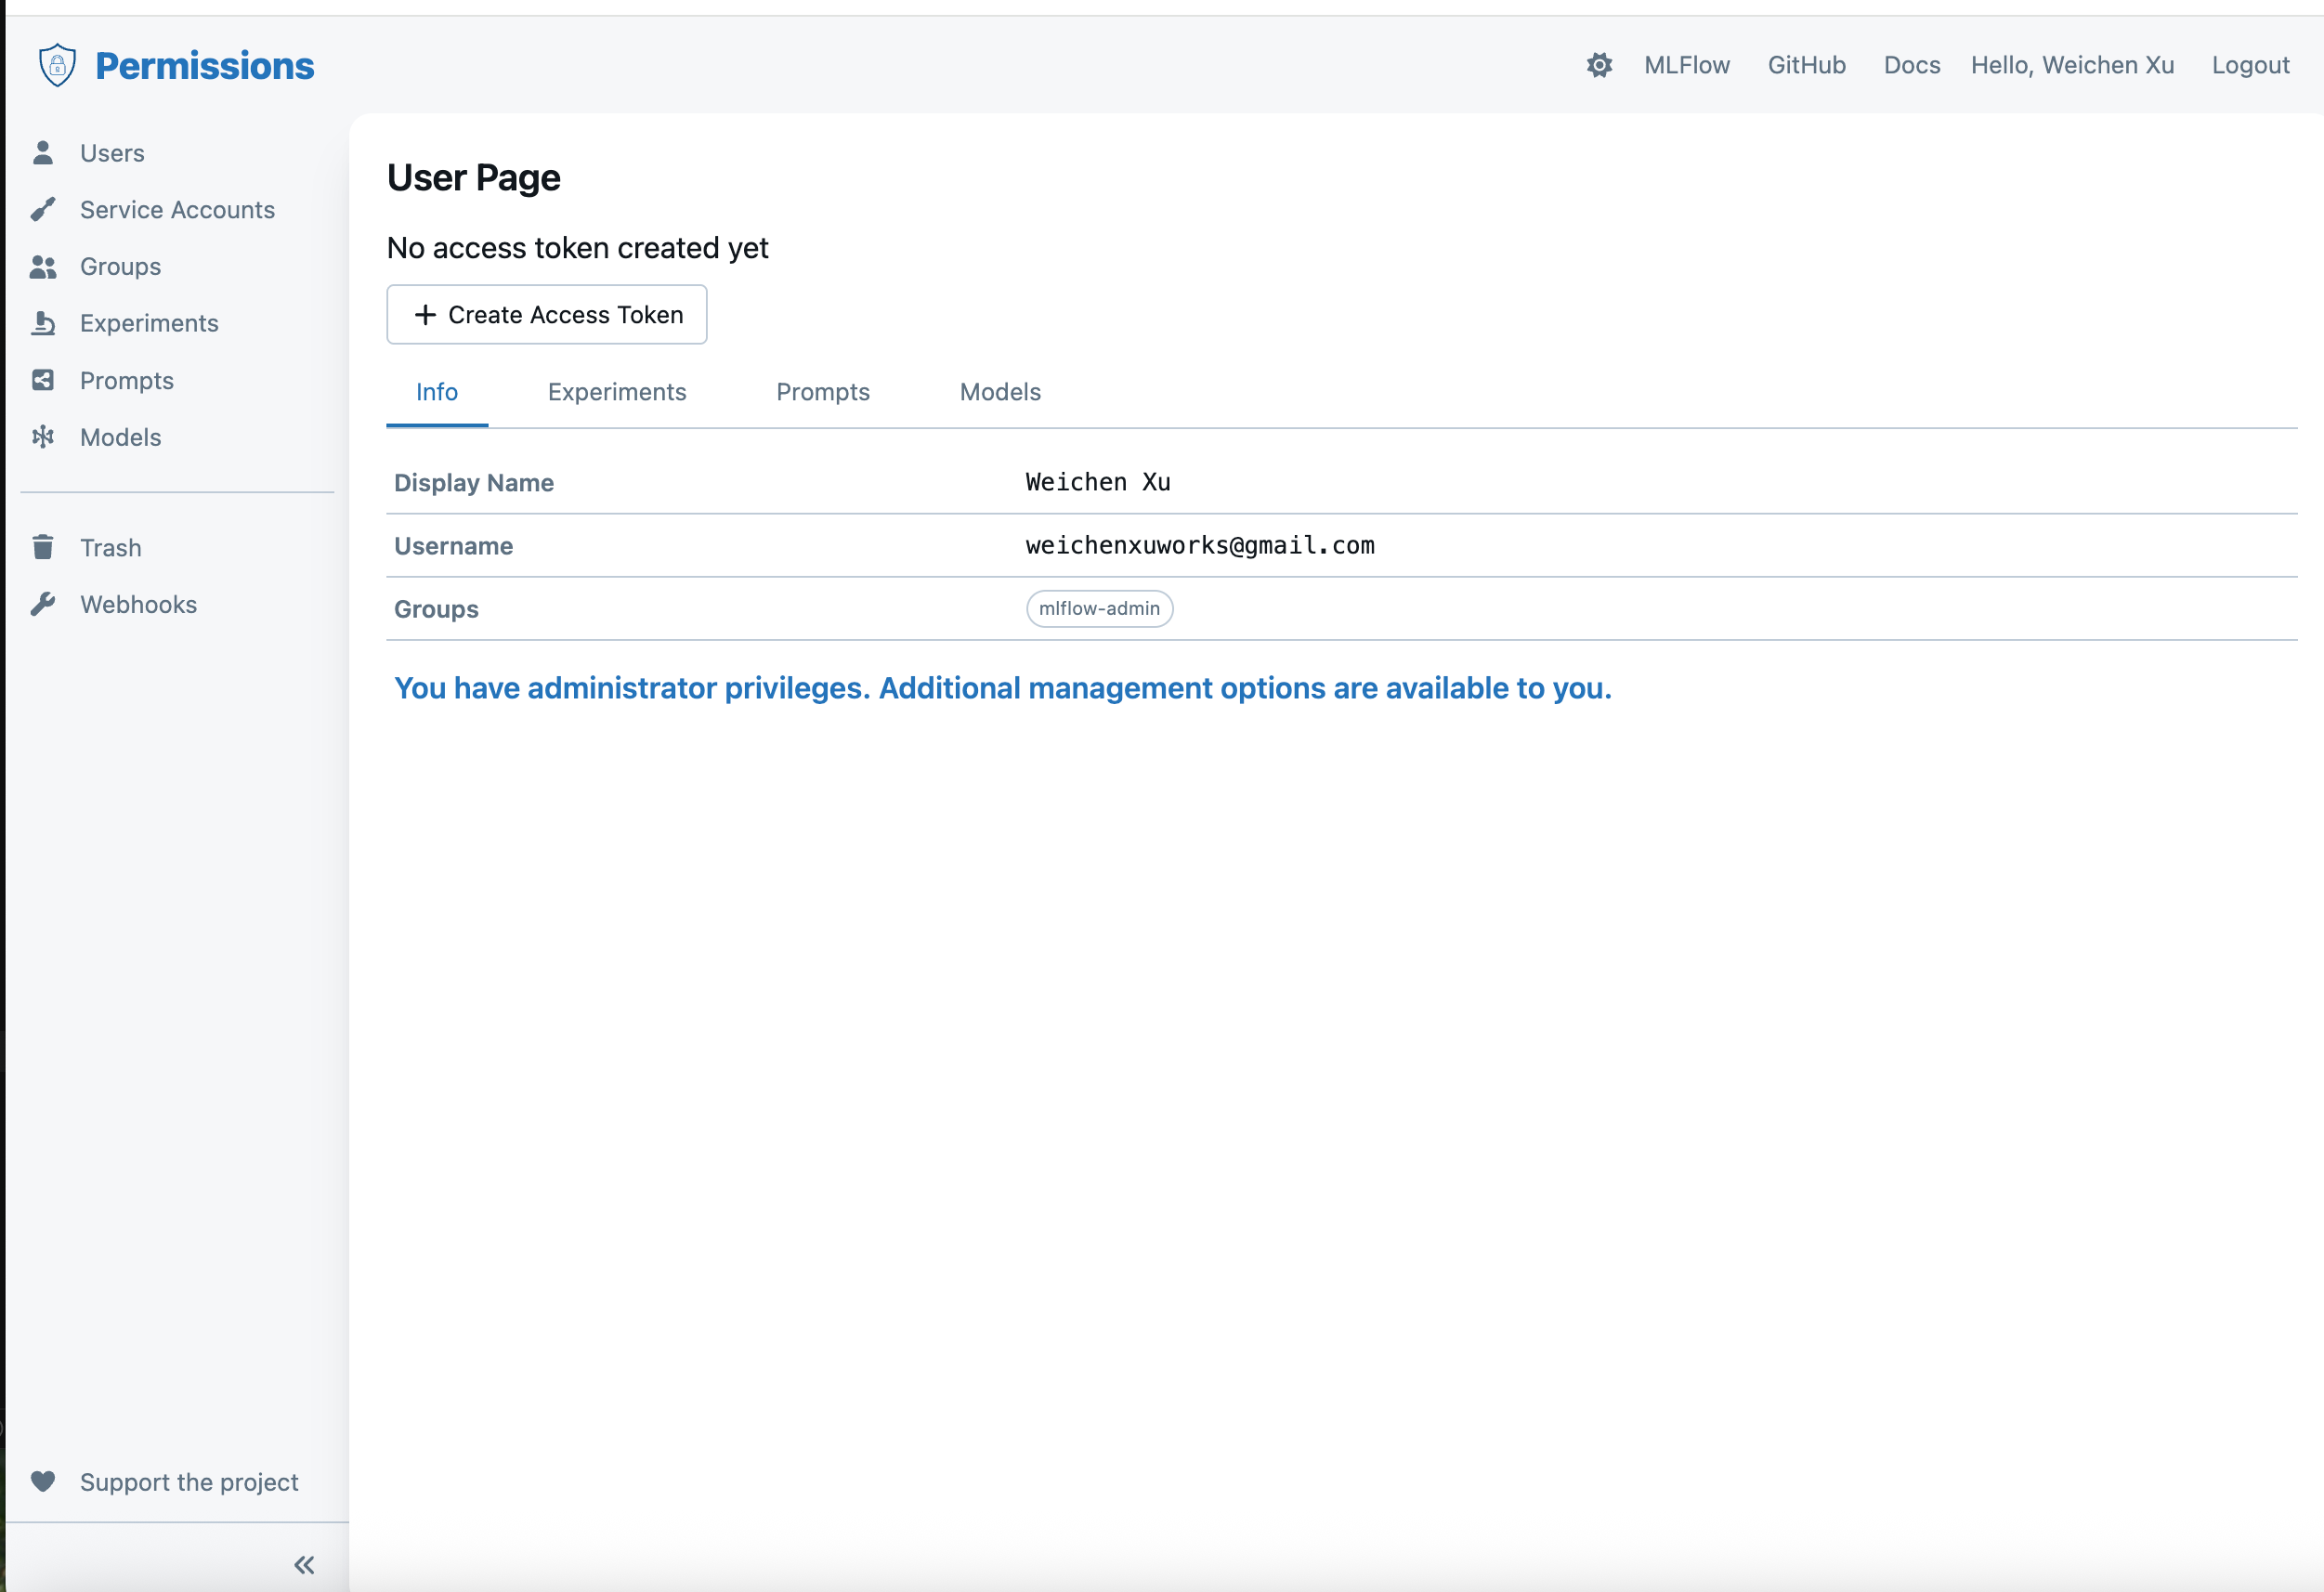
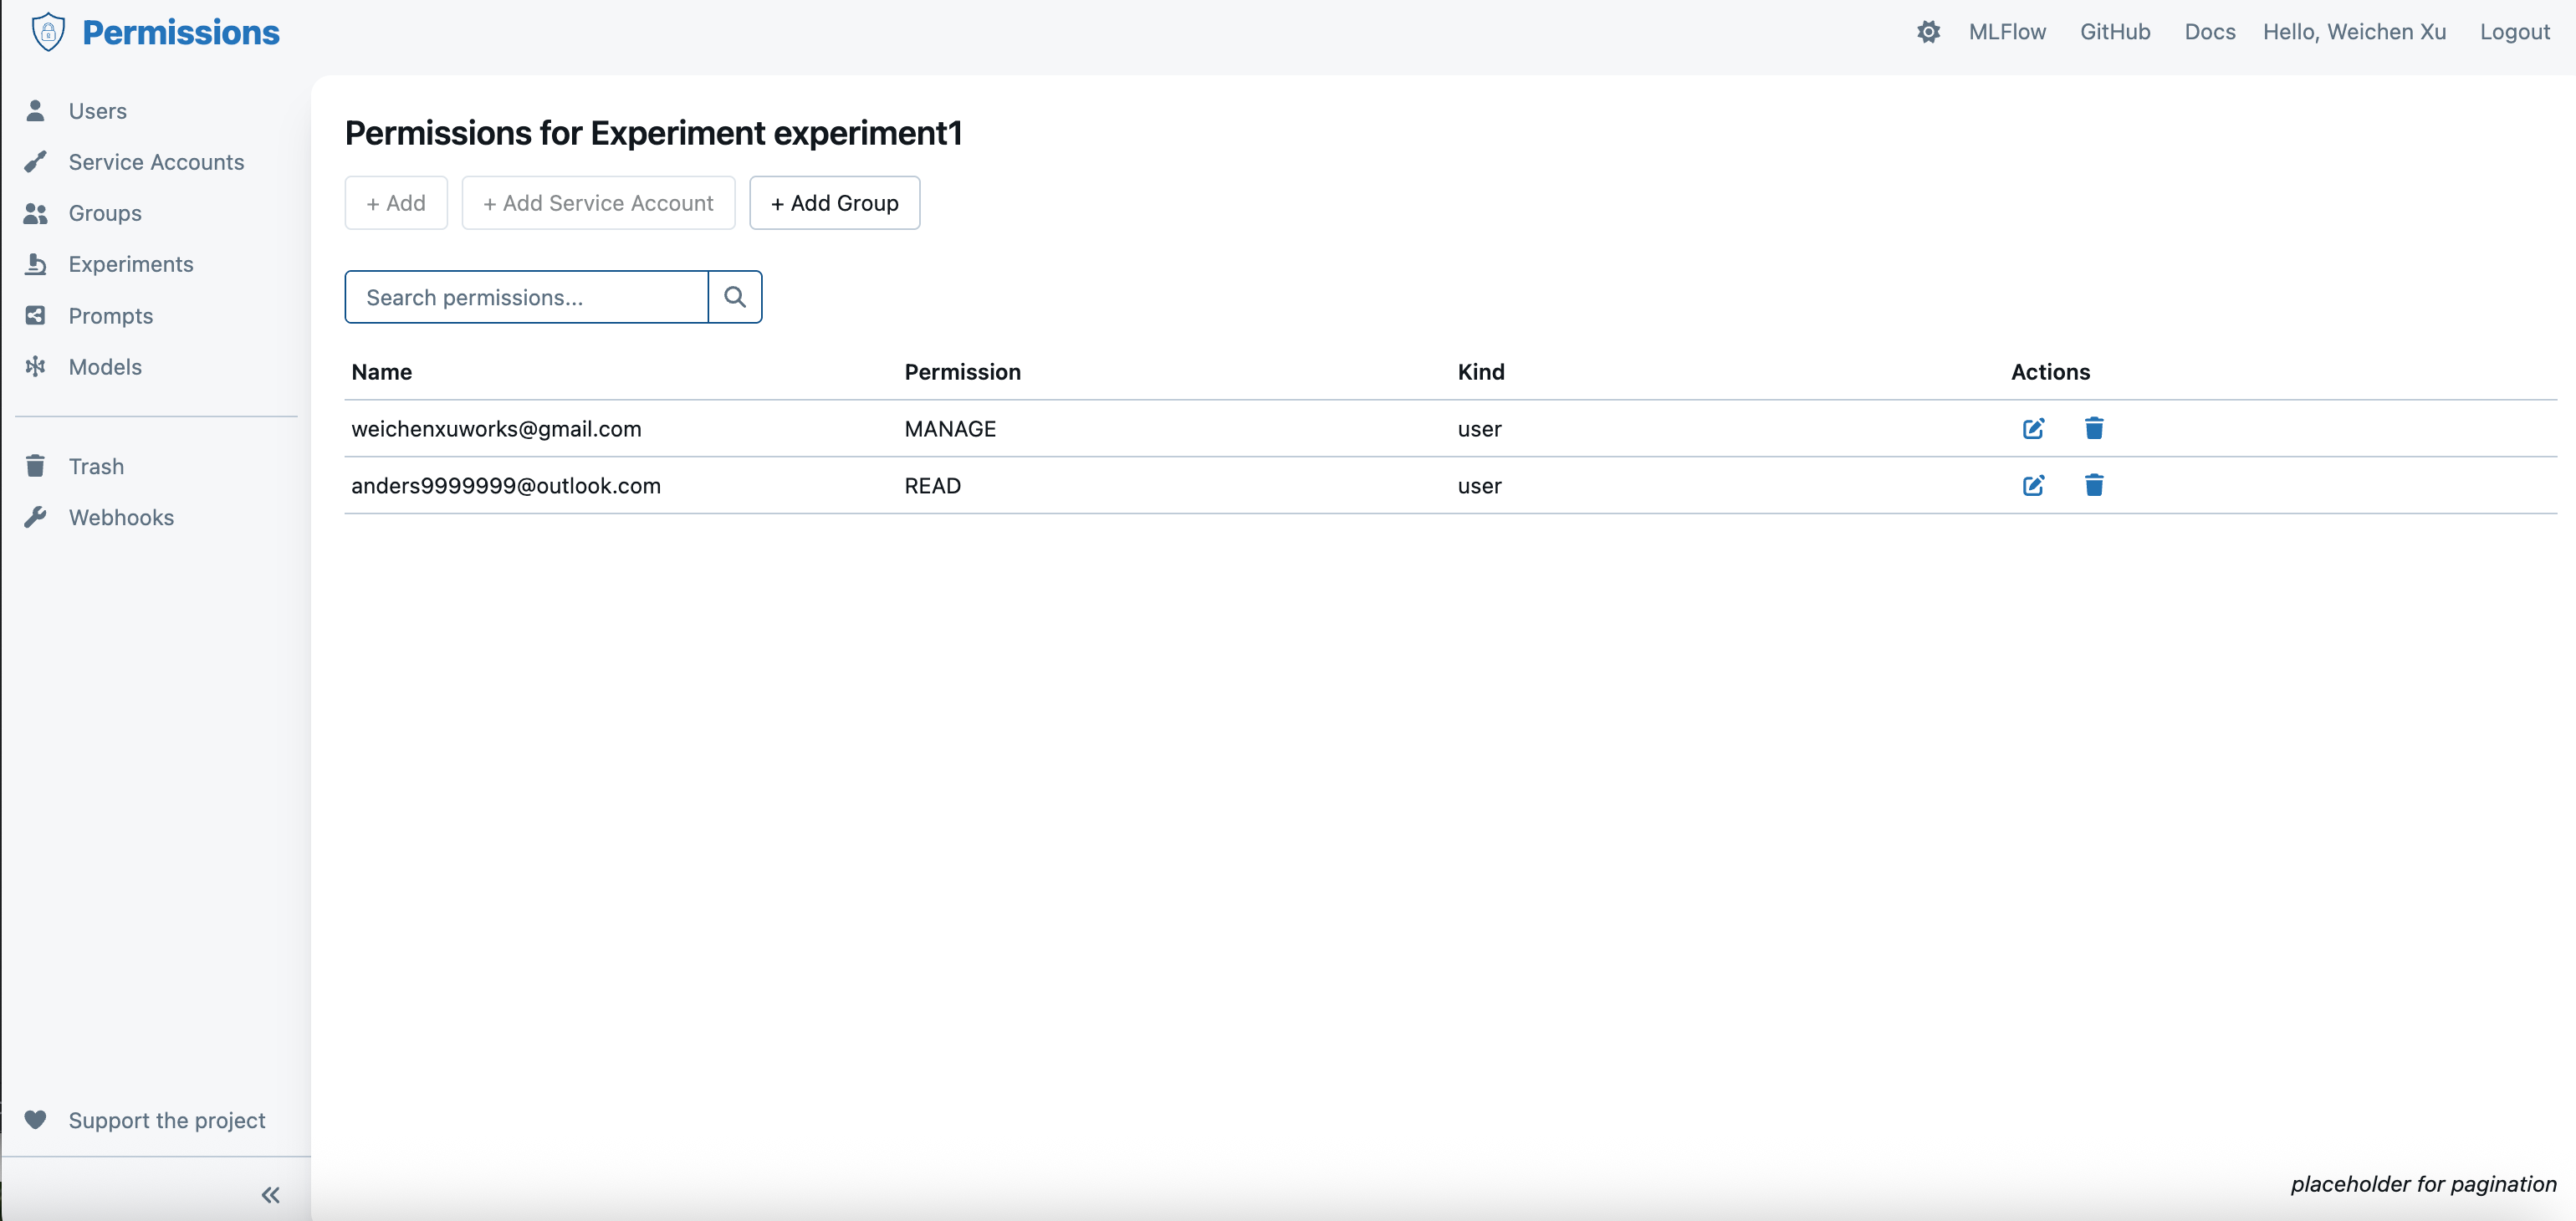
If the current login user is assigned to the administrator group, then you can configure the permissions for other users through the OIDC permission UI portal as follows:
After login via OIDC, open "http://localhost:8080/" again and then it will jump to the MLflow UI main page.
Configure MLflow client
The MLflow OIDC plugin allows MLflow client to connect to the MLflow server via the MLflow basic auth protocol. First, you need to generate an "access token" on the OIDC permission page as follows:
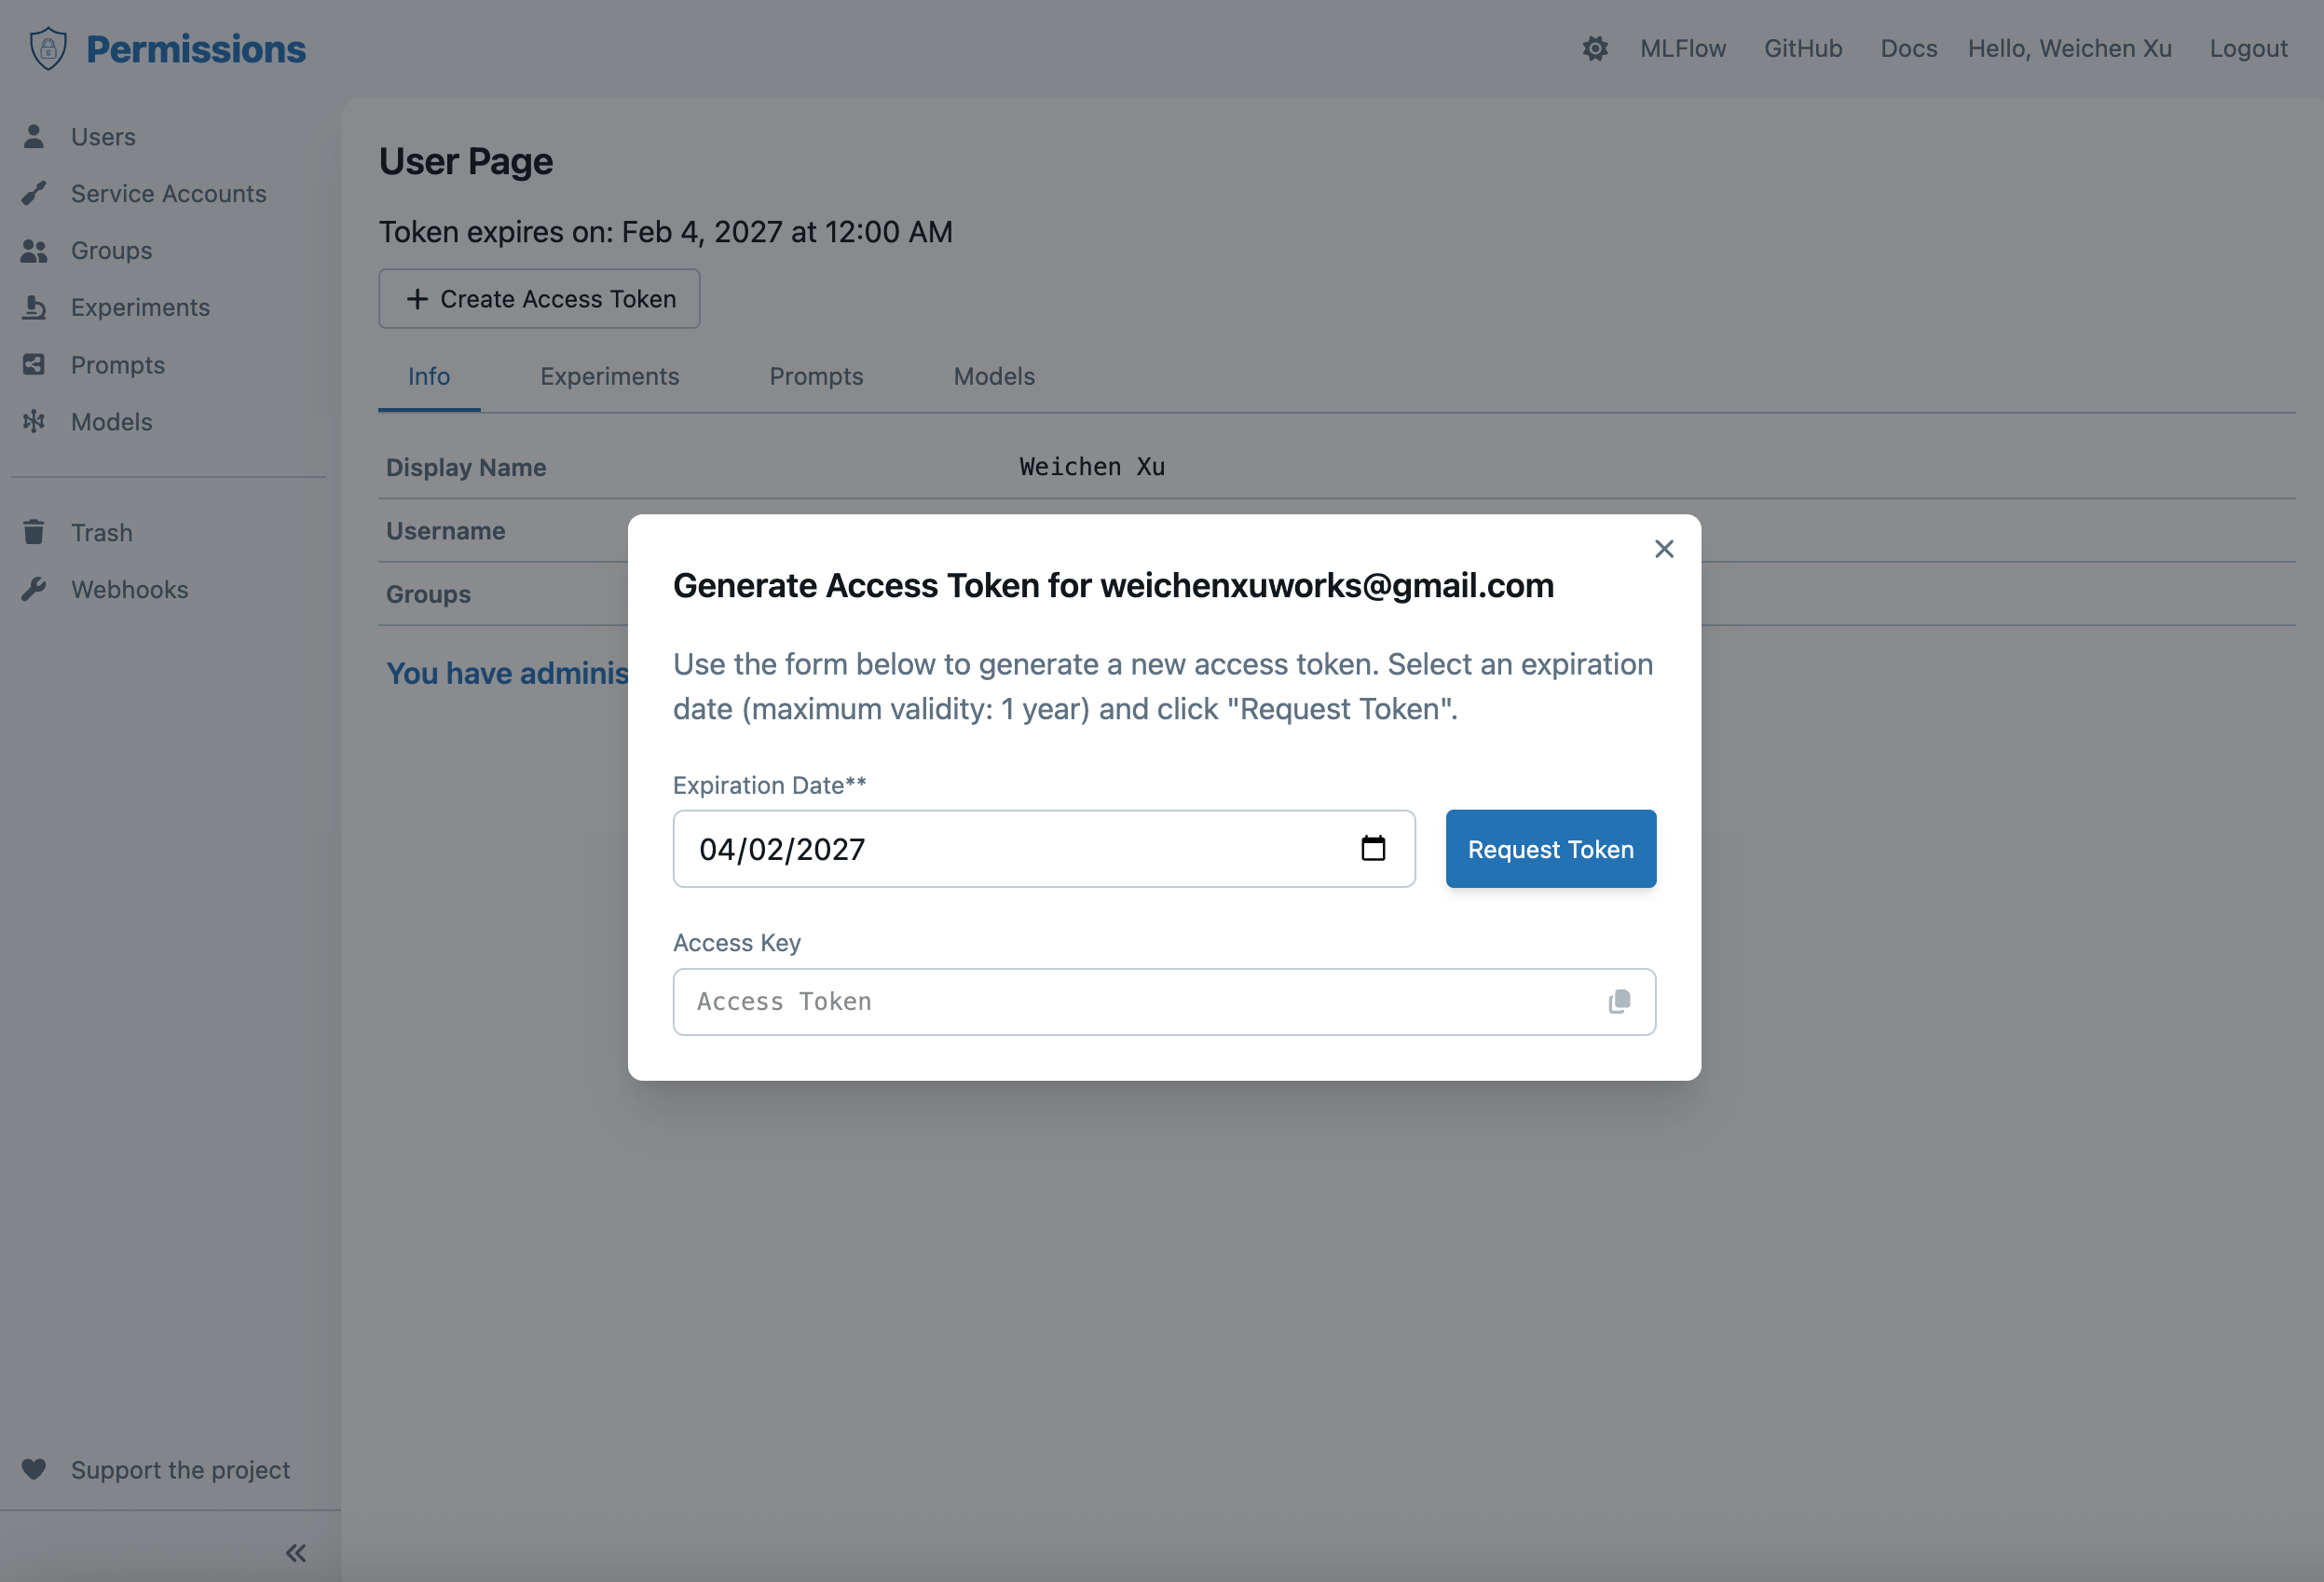
Note: Each time you create a new access token, it invalidates the previous one. Only the latest generated token is valid.
Then set the credentials for basic auth to environment variables:
# set the `MLFLOW_TRACKING_USERNAME` to the username of the Okta account / Google account
export MLFLOW_TRACKING_USERNAME=...
# set the `MLFLOW_TRACKING_PASSWORD` to the access token that is generated on the OIDC user permission page.
export MLFLOW_TRACKING_PASSWORD=...
then, in MLflow client side, you can run code as follows:
import os
import mlflow

mlflow.set_tracking_uri("http://localhost:8080")

# Use MLflow
with mlflow.start_run():
    mlflow.log_param("key", "value")
Reverse proxy pattern
Another common approach is to place MLflow behind a proxy that handles SSO and forwards authenticated requests. The most popular way is to use oauth2-proxy reverse proxy.
- Configure your proxy (NGINX, Traefik, Envoy, or cloud gateways such as AWS ALB with OIDC) to authenticate users against your IdP (Okta, Azure AD, Google Workspace).
- After a successful login, inject user identity headers (for example,
X-EmailorX-Forwarded-User) and restrict access to authenticated sessions only. - Run MLflow without the Basic Auth app and rely on the proxy as the enforcement layer, or map the incoming identity header to a Basic Auth user using a custom middleware.
This pattern keeps MLflow stateless while deferring token validation and MFA enforcement to systems designed for it. You can find the reference implementation in this repository.
